All users added to your KSAT console have a personal profile that displays their performance on Phishing Security Tests, their training completion, and their Risk Score and Phish-prone Percentage. User information, such as email address and job title, is also found here and can be manually modified as needed.
After you add users to the console, they will be displayed in the user list. To view this list, navigate to the Users subtab of the Users tab. Select any user's name or email address to access their profile.

User Dashboard Subtab
After selecting a user in the user list, you’ll be taken to their User Dashboard. This subtab shows the user’s phishing results, training assignments, and Risk Score. You’ll also see the Impersonate User button, which allows you to view the user’s KnowBe4 experience and take action on behalf of a user. For more information, see the Impersonate User section of this article.

- Name and Groups: This area shows the user’s name and the number of groups they are in. To see a list of these groups, select Groups.
-
Phishing Results: This section shows the user’s Phish-prone Percentage, how many simulated phishing emails they received, how many phishing tests they failed, and how many simulated phishing emails they reported.
-
Select the Phish Failures by Type button to view a graph of this user's different types of failures.

-
-
Training Assignments: This section shows the user’s training completion percentage, as well as the number of assignments currently in progress, completed, and not started.
Important:Optional training campaigns are not included in the Training Assignments widget.-
Select the View Training Details button to view a graph of the user's current campaigns. This graph can be filtered by status.

-
- Impersonate User: This button allows you to view the user’s KnowBe4 session. When the button is selected, you will be able to see what that user sees when they log in to their KnowBe4 console or Learner Dashboard. Additionally, you can perform actions as a user while impersonating them. For further information, see the Impersonate User section of this article.
-
Risk: This section shows the user’s Risk Score, risk factors, and a line chart of the user’s risk history. For more information on user risks, see our SmartRisk™ Engine and Risk Score Guide

Phishing Subtab
The Phishing subtab displays the user’s Personal Phish-prone Percentage. Their Phish-prone Percentage is based on the number of phishing test failures divided by the number of phishing emails delivered. See the Failures and Phish-prone Percentages article for more information on the Phish-prone Percentage.
This subtab also lists each simulated phishing email that the user has interacted with. This includes interactions such as selecting a link, opening an attachment, and reporting the email through the Phish Alert Button (PAB). Hover over a checkmark to view the timestamp for that interaction.
Select Download CSV to generate a CSV file with this phishing information, which you can download from the Download Center subtab. For more information, see our Download Center Overview.
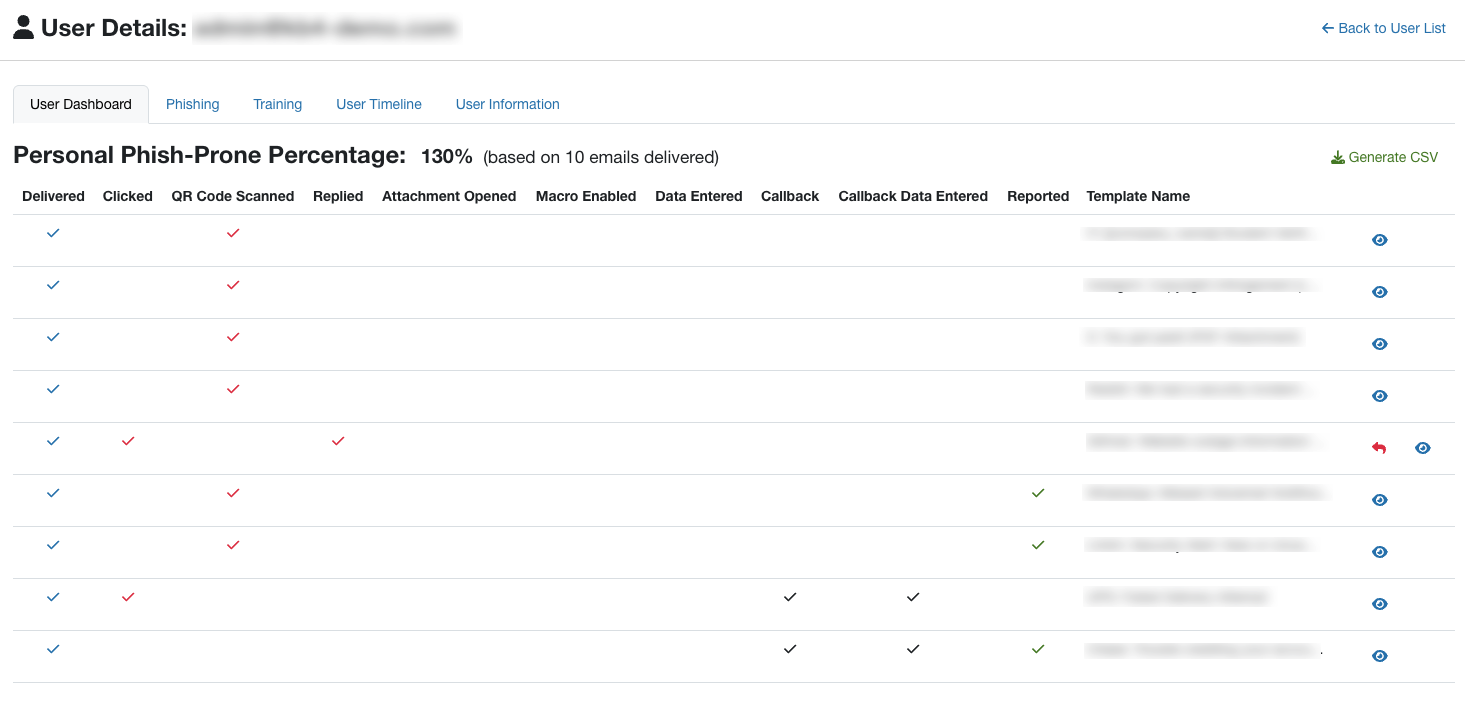
To view the phishing template the user interacted with, select the eye icon to preview the email.
Training Subtab
The Training subtab displays all campaigns that the user has been enrolled in. For each campaign, you’ll see the date the user was enrolled, whether they have started their training, how long they have worked on their training, the amount of time left before the due date, their score, the completion status, and any available AIDA Knowledge Refreshers.
Select Download CSV to create a CSV file with this training information.
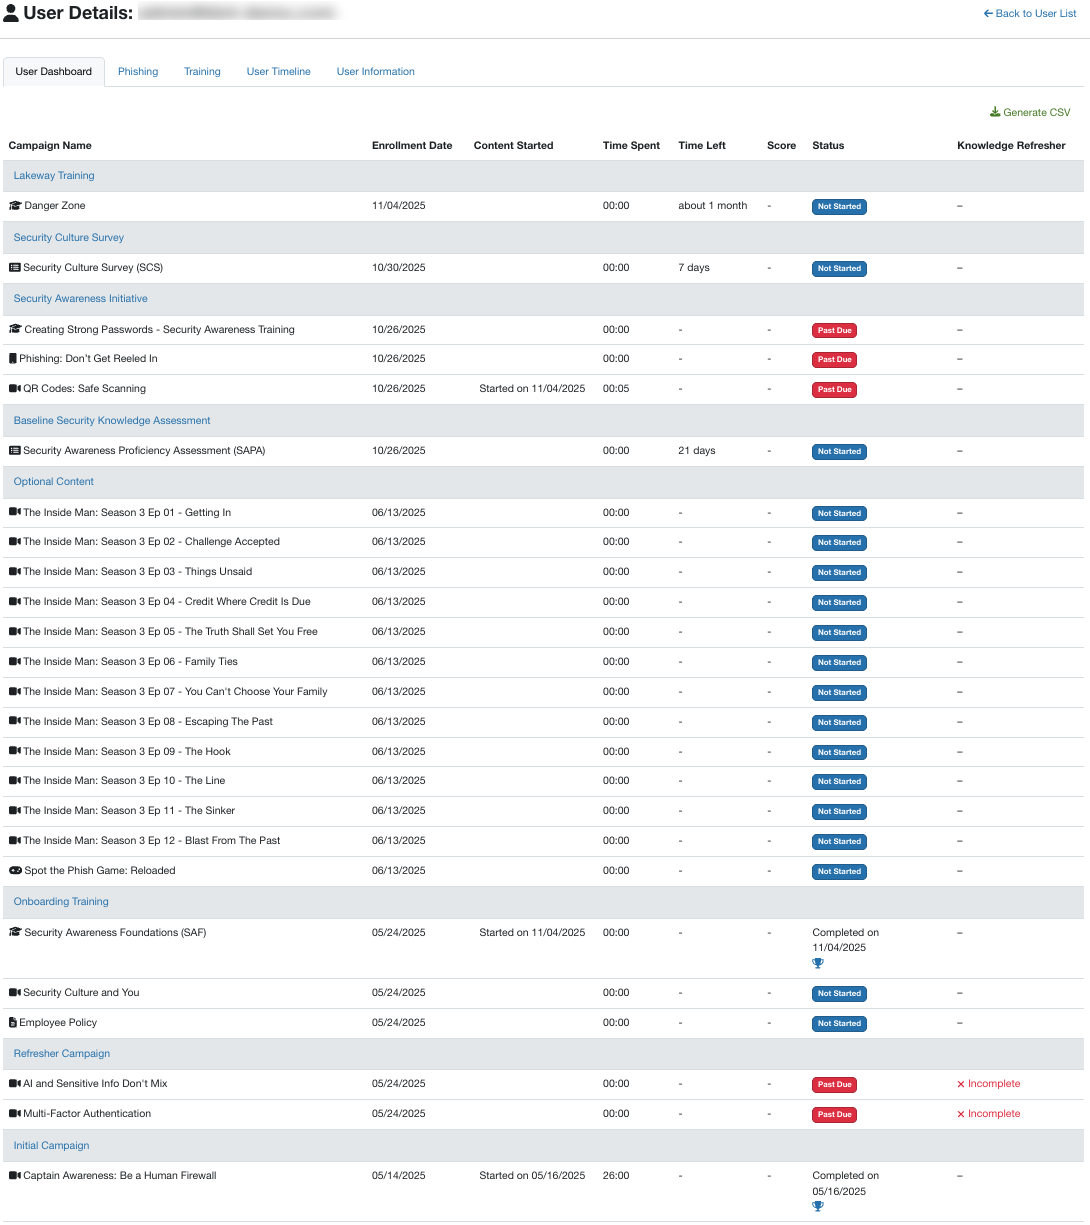
If you would like to download a completion certificate for any of these training assignments, select the trophy icon in the completion status of that assignment.
User Timeline Subtab
The User Timeline subtab shows a complete history of the user's phishing tests, related emails, and the training console itself.

Use the drop-down menus at the top of the page to filter your results by event type, source, or date range.

In the Event Type drop-down menu, you can select one or more event types, such as Passed Phishing or Started Course. To remove a selected event type from the filter, select the X icon next to the name of the event type.

In the Source drop-down menu, you can select one or more source types, such as SecurityCoach.
In the Date Range drop-down menu, you can select from common time frames such as Last Quarter or Year to Date. You can also select Custom Date Range to choose a specific start and end date.
The user timeline records all of the events below.
| KSAT Event Types | Event |
|---|---|
| General user events |
|
| Phishing test-related events |
|
| Training-related events |
|
| Other |
Note:Data breach involvement events may display with dates that occurred before your user was added to the console. This is because the User Timeline uses the date that a data breach was reported. For example, a user who was added to the console in 2018 may have been found to be part of a data breach that was reported in 2012. |
| Custom Event Types | Event |
|---|---|
| User-created events |
A list of all custom event types created through the User Event API will populate under the User Events section of the Event Type drop-down menu. See our User Event API Overview article for more information. |
| Platinum and Diamond-Level Subscription Event Types | Event |
|---|---|
| Admin events |
|
| PasswordIQ events |
|
| SecurityCoach events |
|
| SecurityCoach Event Types | Event |
|---|---|
| Admin events |
Note:SecurityTip previews will display the target user’s language that was used during delivery. |
User Information Subtab
The User Information subtab lists user attributes, such as user languages, job title, user account details, and number of sign-ins. From this page, you can also enable features such as multi-factor authentication (MFA).
Modifying User Information
There are three ways you can modify a user's information. These methods are listed below, with the most recommended method listed first:
- Automatically sync your user list through user provisioning.
- As a best practice, we recommend modifying your user details with your identity provider when you are using user provisioning and allowing the next sync to update your user's information.
- When using user provisioning to sync user information, most settings will be uneditable through the other methods.
- See our Active Directory Integration (ADI) Configuration Guide or our SCIM Configuration Guide for more information.
- Import a prepared CSV file.
- Navigate to Users > Import Users. Then, select the CSV Import button. Once you select this button, you can import a CSV file containing your users' email addresses along with any additional information you'd like to include about your users.
- Be sure to follow the formatting steps in our Import Users with a CSV File article when adding user fields and details to your CSV file.
- Manually edit a user’s profile from the User Information subtab.
User Account Details
For more information about the different areas and fields in the User Information subtab, see the annotated screenshot and list below:

- User Account Details: This section shows basic account history and login data, such as how many times the user has signed in, when their confirmation email was sent, and the last IP address they used to sign in.
- User Type: You can use this option to select the type of user this profile represents. For more information about importing users, see the Import Users with a CSV File article.
- Phishing Language: You can use this option to send Phishing Security Tests in a specific language.
- Training Language: You can use this option to change the Learner Experience’s user language.
- Out of Office End: You can use this option to pause training notifications for a user while they are out of the office until the selected date. Notifications sent to managers and admins about this user will also be paused. This field has been renamed from Out of Office Until.
-
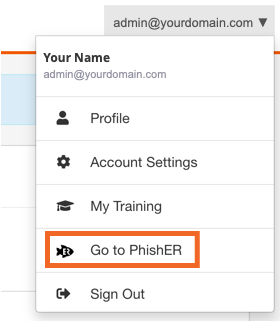
PhishER: You have the option to enable or disable a user’s access to PhishER. By default, PhishER will be disabled for users and enabled for admins. As an admin, you have the option to disable and re-enable your own PhishER access. If PhishER is enabled, a Go to PhishER drop-down menu option will be available by selecting your email address in the top-right corner of the KSAT console.
- Multi-factor Authentication: You have the option to enable multi-factor authentication (MFA) for your users as an added layer of security. We strongly recommend that you enable MFA for any users with elevated security roles or admin access. For more information about MFA, see our Enable Two-Factor or Multi-Factor Authentication on Your Account article.
Impersonate User
The Impersonate User button allows you to view a user’s KnowBe4 experience. This feature is useful if you would like to see what that user sees when they log in to KnowBe4. This feature can be useful when configuring Security Role permissions for a user or in other scenarios where you may need visibility into your users’ experience.
You can also perform actions as a user while impersonating them. Any action taken while impersonating a user will be applied to their account. For example, if you impersonate a user and start their training, the training will show as In Progress for that user the next time they log in. If you complete their training, it will show as Completed for them the next time they log in to KnowBe4.
This feature can only be used to impersonate users who have previously logged in to KnowBe4. Users who have admin privileges in your KSAT console cannot be impersonated. Additionally, any time a user is impersonated will show as an event in the audit log.
-
After navigating to a user’s User Dashboard subtab, you’ll see the Impersonate User button in the top-right corner.

-
Once the button is selected, you'll receive a confirmation prompt.

-
Selecting Confirm will allow you to impersonate the user. While impersonating the user, you’ll have the ability to view what the user sees when they are logged in to KnowBe4, and you can also perform actions as that user. For example, when impersonating one of your users, you can view their Learner Dashboard and see the training they have been assigned.

Additionally, if you are configuring a Security Role for a user, you can impersonate them to see what levels of access they have been given for their KnowBe4 Dashboard.

-
When you have finished impersonating the user, select Click here in the top-right corner to return to your KSAT console.
