The User Messaging feature allows you to send messages to some or all of your users within the KSAT console. Once a message has been created, the Messages tab of the Learner Experience (LX) will be enabled. On this tab, users can review and mark their messages as read. If no messages have been created, the Messages tab will remain hidden. For more information about the Messages tab, see our Learner Experience Guide.
User messaging can be used to send custom messages, such as informative memos or announcements. You can also use this feature to share our KnowBe4 messages: the Scam of the Week and Security Hints and Tips.
Custom Messages
Custom Messages are one-time messages that you can customize with our What You See Is What You Get (WYSIWYG) editor. You can use custom messages for internal memos, frequently asked questions (FAQs), announcements, and more.
Scam of the Week Messages
The Scam of the Week is a weekly message written by KnowBe4. The message summarizes a recent real-world scam and provides tips on how to stay safe from similar scams. You can create a recurring Scam of the Week message.
For more information on how to set up a Scam of the Week message, see our Scam of the Week Overview article.
Security Hints and Tips Messages
The Security Hints and Tips message is written by KnowBe4 and provides hints and tips for a wide variety of cybersecurity topics. A new message is added to the collection each month. You can create a recurring Security Hints and Tips message.
For more information on how to set up a Security Hints and Tips message, see our Security Hints and Tips Overview article.
Create New Messages
To create a custom message, follow the steps below:
- From your KnowBe4 console, navigate to Users > Messages.
- Click the +Create New Message button at the top-right corner of the page.
-
Fill out all of the fields on the Create New Custom Message page. For more information about each field, see the screenshot and list below:
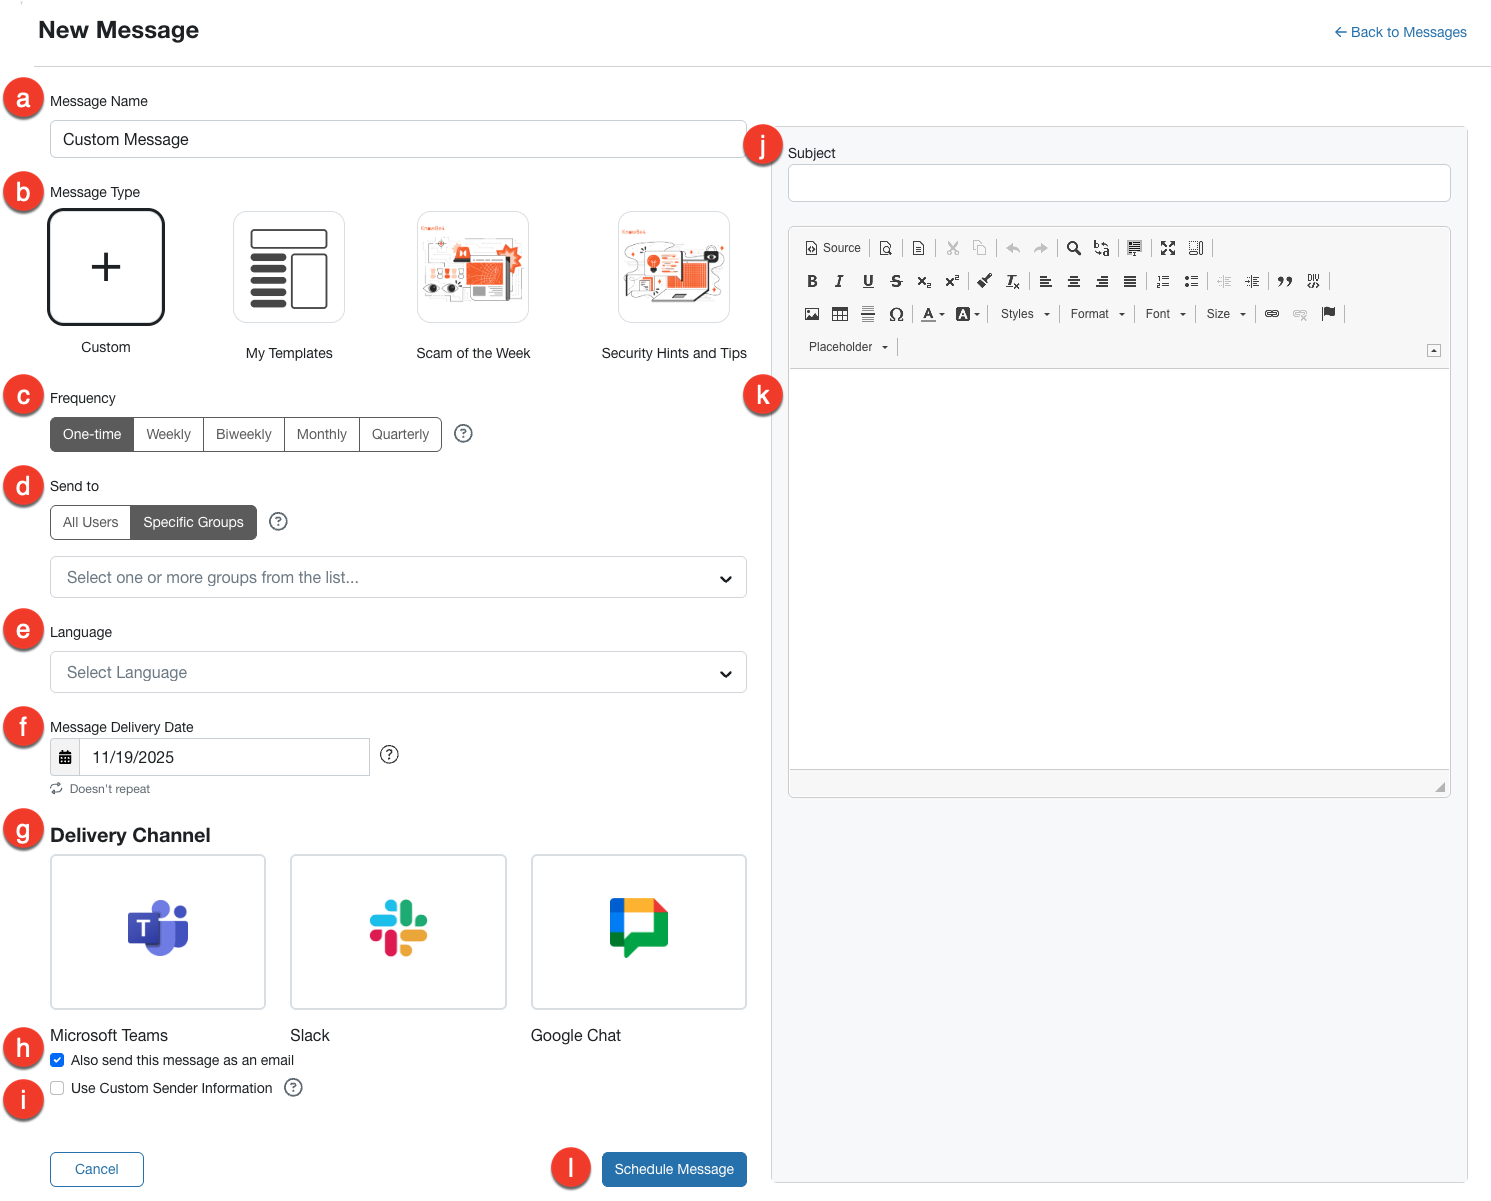
- Message Name: Enter a descriptive and unique name for your message campaign.
- Message Type: The message type can be a new custom template, a custom template you already created, a Scam of the Week template, or a Security Hints and Tips template.
- Frequency: Select how frequently the message template will be sent.
- Send to: Select All Users if you would like to send the message to your entire organization. Otherwise, select Specific Groups and choose one or more groups from the drop-down menu.
- Language: Select the written language for this message. You will need to provide the translated text for the message, unless it is a Scam of the Week or Security Hints and Tips message. The KnowBe4 console does not translate custom messages for you.
-
Message Delivery Date: In this field, select when you would like to send your message.
Note:When choosing Monthly as your Frequency, every message will automatically send on the first business week of the month. For example, if you select Thursday, July 24th, 2025, each message will be sent on the first Thursday of each month, not the 24th. Similarly, when choosing Quarterly as your Frequency, every message will automatically send on the first business week of each quarter. -
Delivery Channel: Choose Microsoft Teams, Slack, or Google Chat as your delivery method for the Custom, Scam of the Week, or Security Hints and Tips message types. You can preview your message before sending it. If an error occurs through the selected delivery method, messages will be sent through email.
Note: To send a message through one of these delivery channels, you must have a SecurityCoach subscription with these delivery methods enabled. -
Also send this message as an email: Select this check box to send a copy of this message to each user via email. This message will still be listed on the Messages tab of the LX.
Note:The sender's email address for User Messaging emails is do-not-reply@knowbe4.com. - Use Custom Sender Information: Enable this option to customize the sender's name and email address. The email address must match one of the allowed domains on your account.
- Subject: The message subject will be seen by both users and admins.
- Message: Enter your message into the text field. Our WYSIWYG editor includes standard text formatting options such as font size, text alignment, and bullets. You can also use more advanced options such as images, hyperlinks, and div containers. To identify each option, hover your mouse over the WYSIWYG buttons. If you would rather edit this message using HTML, click the Source button to switch from the WYSIWYG editor to a source code view.
- Schedule Message: Select this button after you review your selections. You can preview your message before sending it.
Managing User Messages
To view and manage your user messages, navigate to the Users > Messages. On the Messages subtab, you'll see the Message History table, which lists all messages sent within the last 90 days.
For more information about the Message History table, see the screenshot and list below:
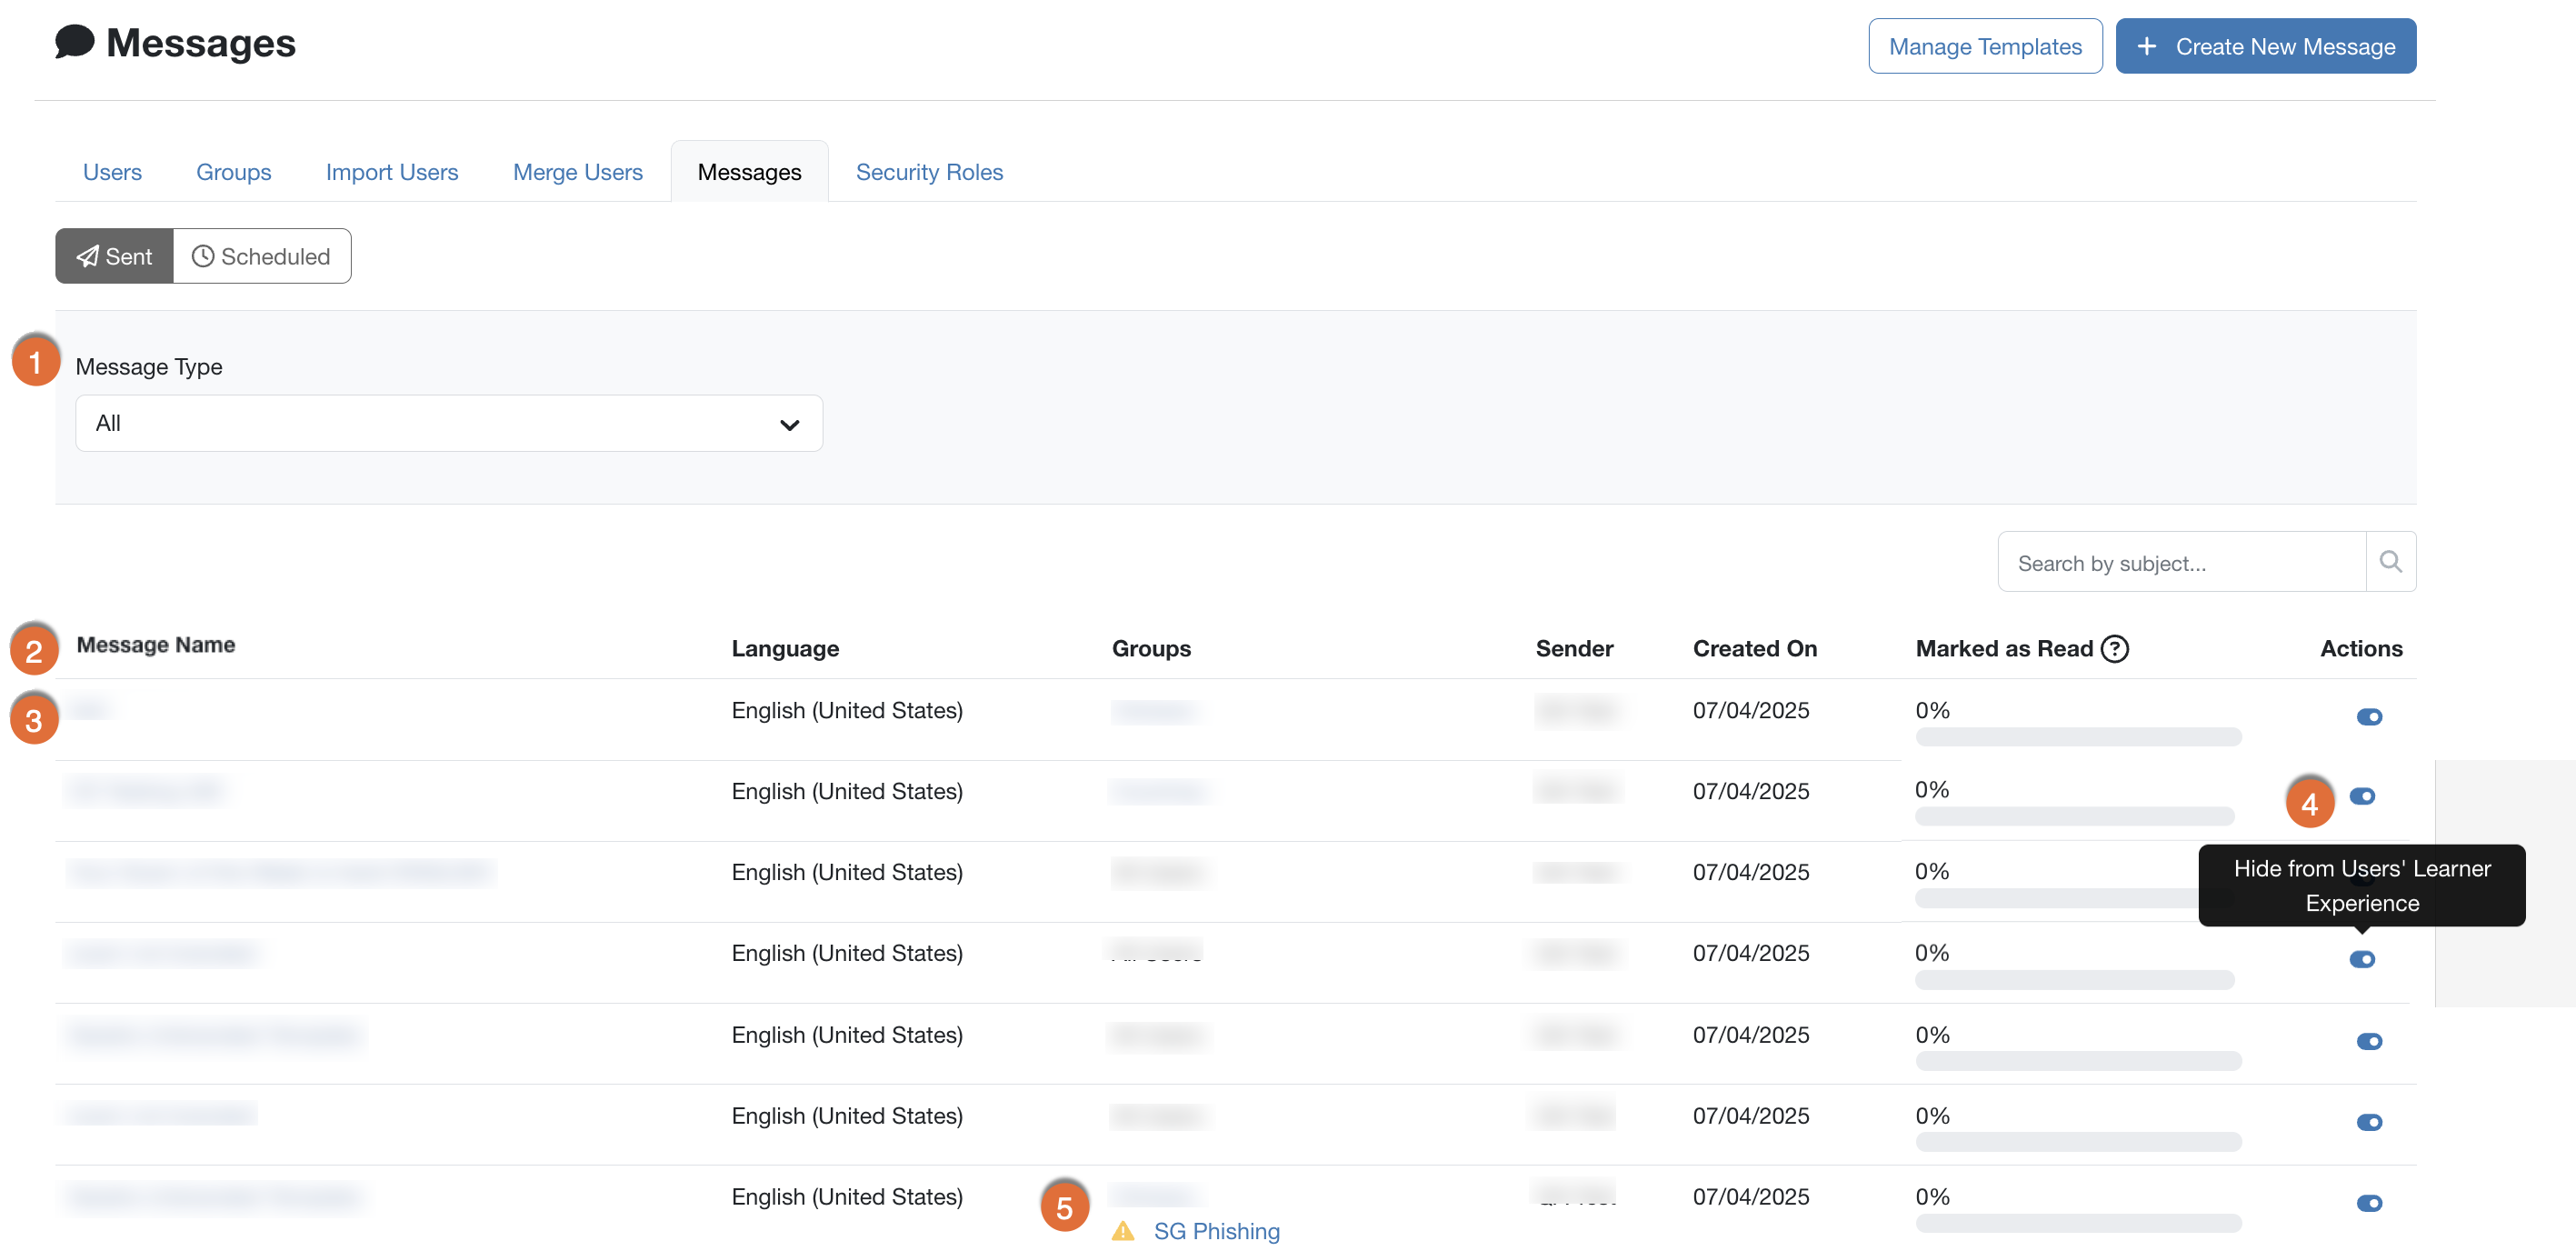
- Filter: You can select the Message Type drop-down menu to filter this table by the message types: Custom Message, Scam of the Week, and Security Hints and Tips. You can also use the Search field to search for keywords in the message subjects.
- Message History Table: This table is organized from newest to oldest message and provides detailed information for each message. These details include the groups the message was sent to, the admin who sent the message, and the percentage of users who have marked the message as read in the Learner Experience (LX).
- Message Name: Select the message name to view the Overview and Users tabs for that message. See the Individual Messages section of this article for more information.
- Message Subject: Click the message subject to view the Overview and Users tabs for that message. See the Individual Messages section of this article for more information.
-
Hide from Users: You can't delete user messages, but you can hide individual messages by clicking the Hide from Users toggle. The message will still appear in your admin console, but it will be hidden in the LX.
- For messages that have been hidden, you can select the Show to Users toggle to unhide the message in the LX.
- Error Messages: Users and groups are subject to change. Any relevant changes to the Groups or Sender of a message will result in an error message in the corresponding column.
Individual Messages
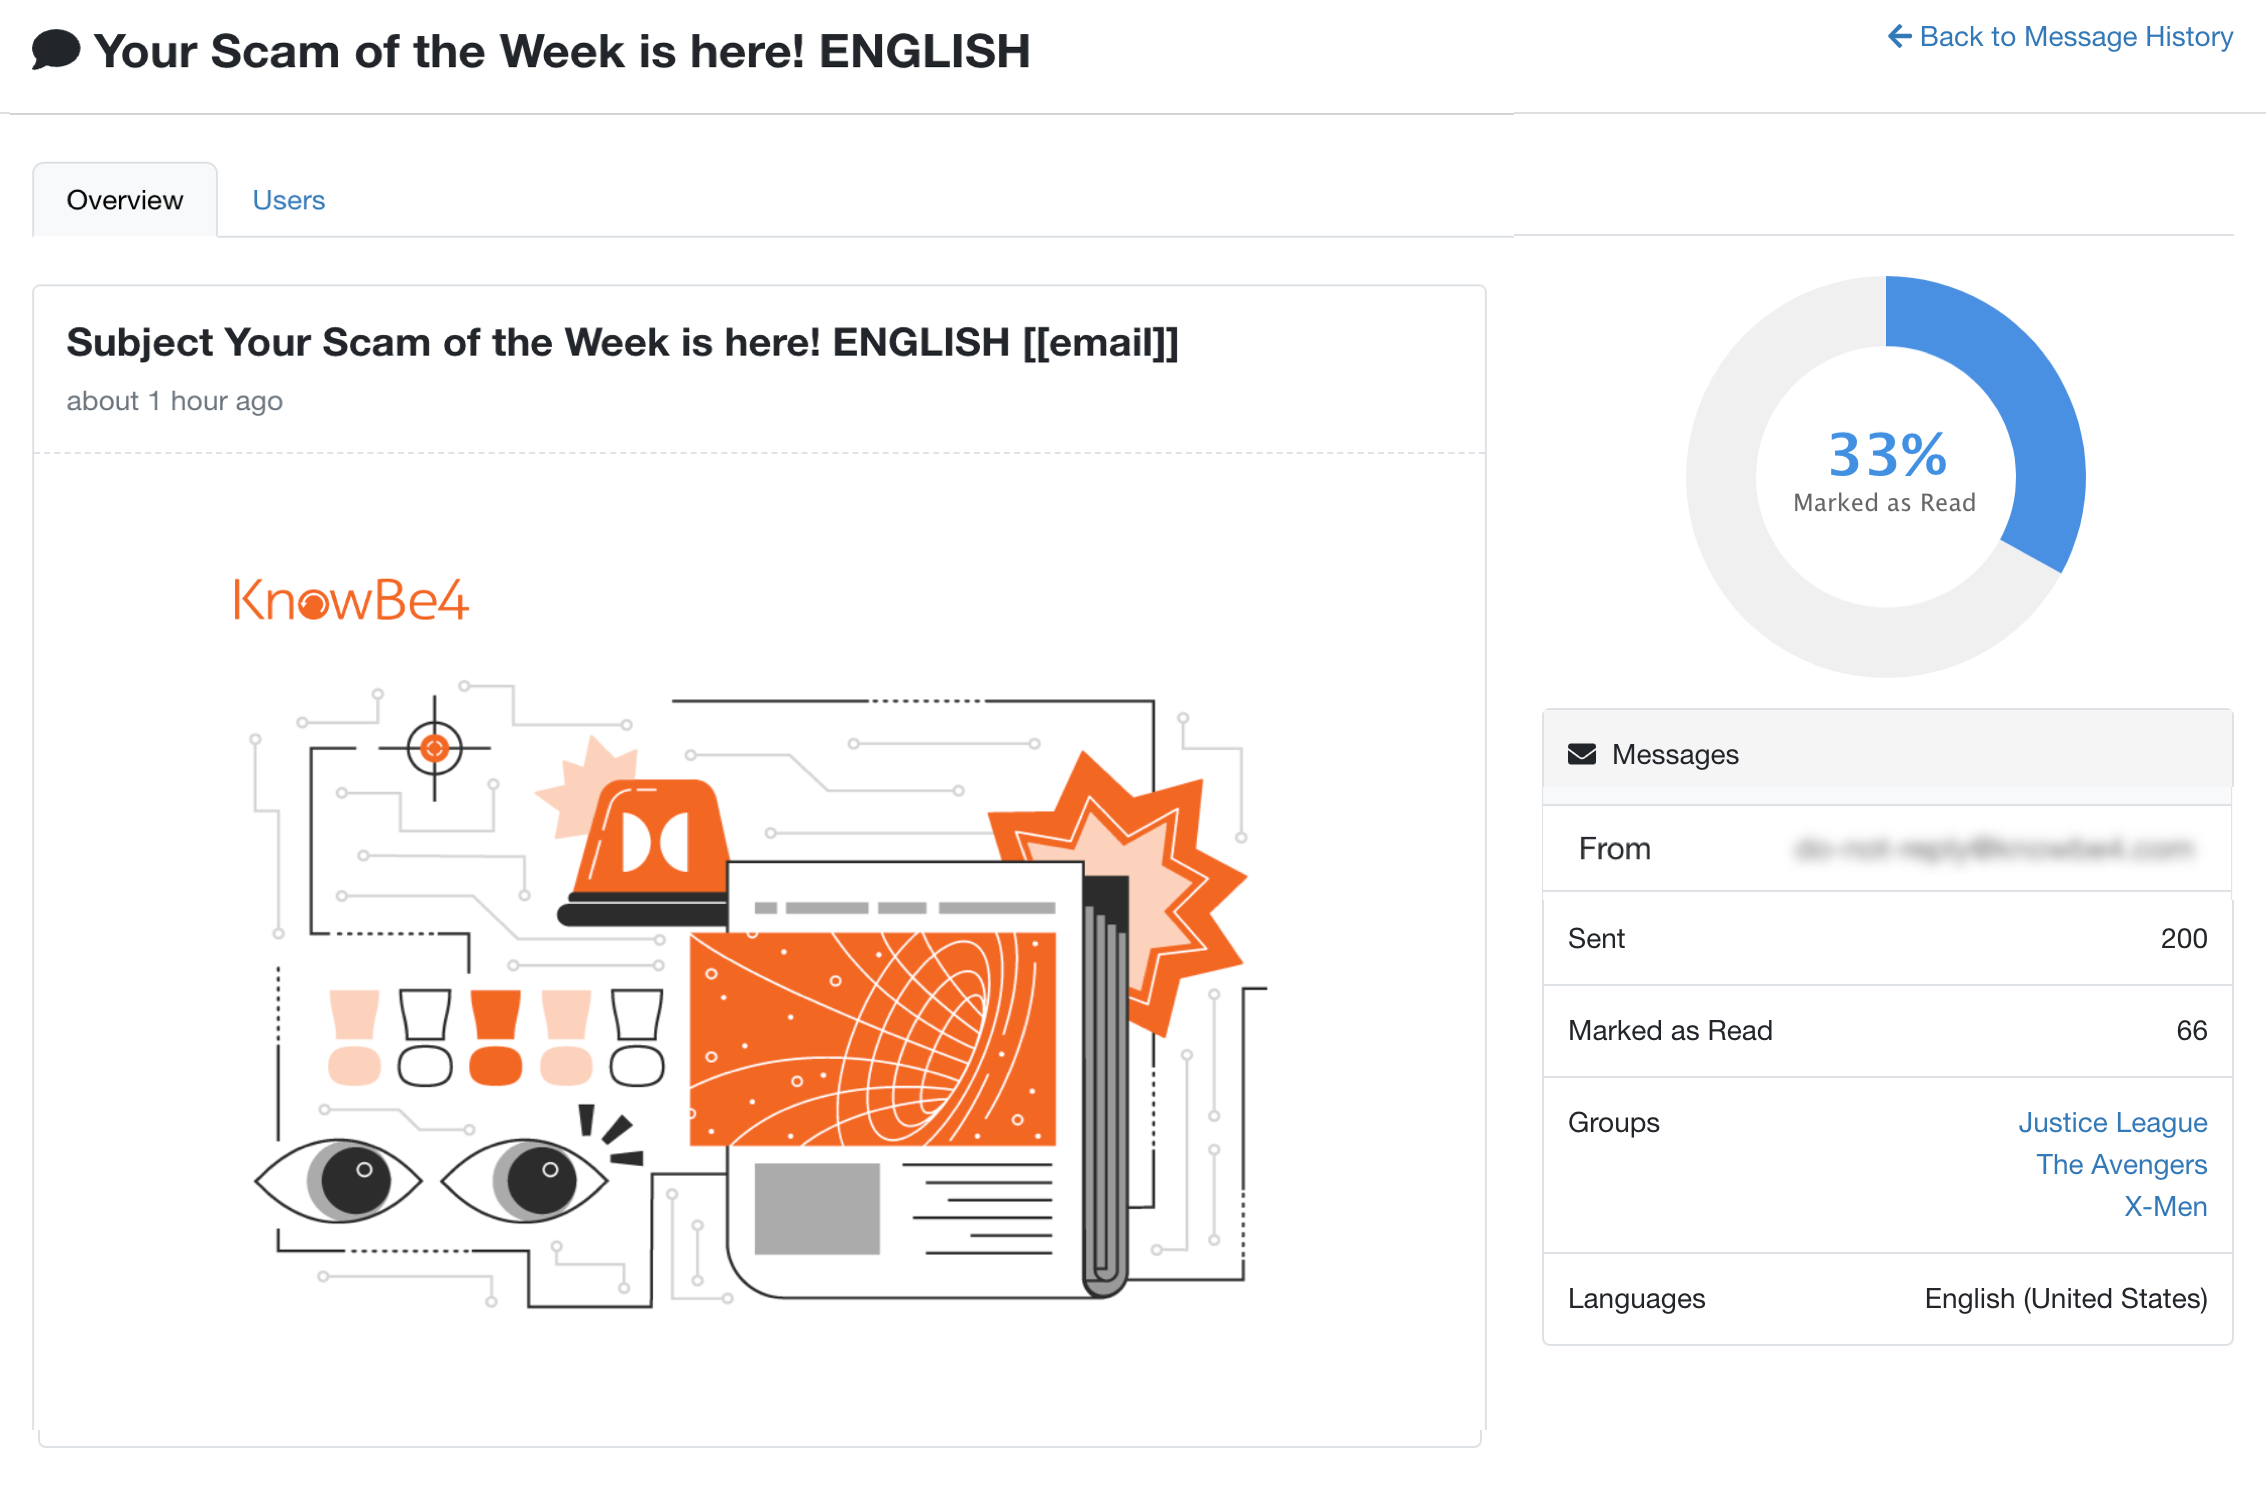
When viewing your Message History, you can select the subject of an individual message to view the Overview and Users tabs for that message.
The Overview tab includes a preview of the message and lists details such as the percentage of users who have marked the message as read in the Learner Experience (LX).
The Users tab includes a list of all the users who received the message and one of the following message statuses:
- Created: The message has been created but is in the process of being sent to the user.
- Delivered: The message has been sent to the user, and the user has logged in to the LX but has not marked the message as read.
- Read: The message has been marked as read in the LX. Users with this status will also have a date in the Marked as Read column of the Users tab.
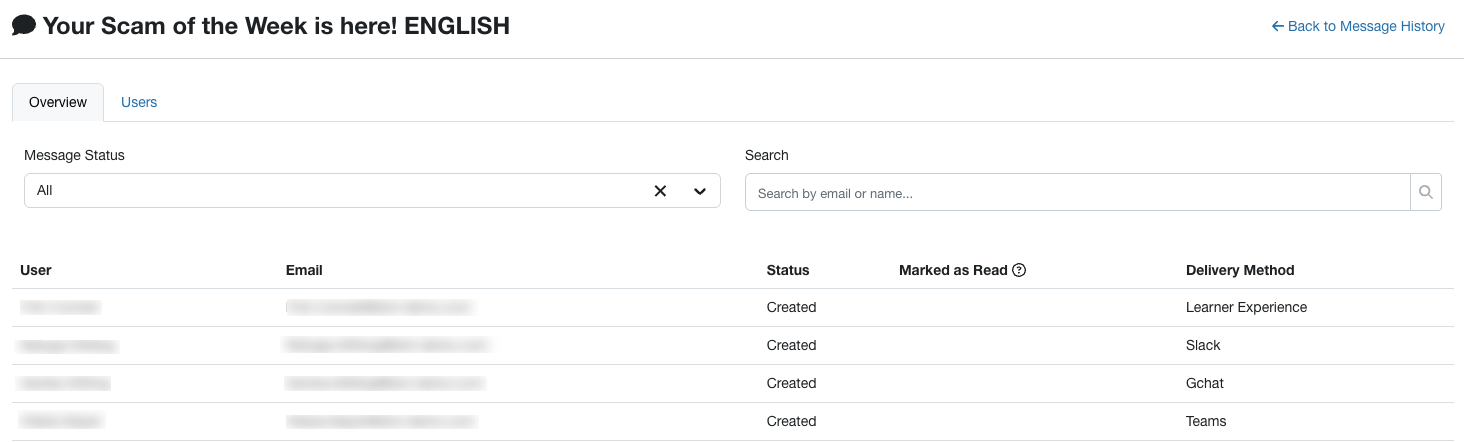
At the top of the page, you can filter the user list by message status or search for a specific user by their name or email address.
In the Delivery Method column, you can see if your message was delivered through Slack, Microsoft Teams (listed as Teams), Google Chat (listed as Gchat), or the Learner Experience.
Scheduled Messages
The Scheduled Messages page lists all of your messages that you scheduled to send at a later date. Once your custom message is sent, you can view it in the Message History table.
For more information about the Scheduled Messages page, see the screenshot and list below:

- Subject: Click on the subject of a message to be taken to the Edit Message page, where you can make changes to your message.
- Groups: Click on the groups of a message to edit which groups the message is sent to.
- Status: This column shows the status of each message. Messages will have the Scheduled status until they’re sent.
- Frequency: This column will show how often and when messages are sent.
- Send On: This column shows the specific dates messages will be sent on.
- Actions: Click the three dots icon underneath Actions to activate or deactivate the message being scheduled to send.