In Real-Time Coaching, you can create and manage Detection Rules for your connected security vendors. Detection rules identify which user behaviors you want to track using data from your integrated vendors. For example, you may want to detect when your users visit prohibited websites, download malicious attachments, or click phishing links. If a user triggers a detection rule, that event will display on the user's timeline.
We offer system detection rules based on the default policies of integrated vendors. These rules are enabled by default and require no further configuration. You can also create custom detection rules for your custom vendor policies.
For general information about Real-Time Coaching, see our Real-Time Coaching Overview.
Create a Custom Detection Rule
To use custom detection rules in Real-Time Coaching, you'll need to first set up a corresponding custom policy in an integrated security vendor's platform. For more information about configuring a custom security vendor policy, refer to your vendor's product documentation or contact their support team.
Once you've configured a custom security vendor policy, you can create a matching custom detection rule by following these steps:
- Log in to your KnowBe4 console's Security Awareness Training (SAT).
- Navigate to Coaching > Detection Rules.
- Select + Create Detection Rule at the top-right corner of the page. This will open the Create New Detection Rule page.
-
Fill out the fields in the Detection Rule Details section. For more information, see the screenshot and list below:
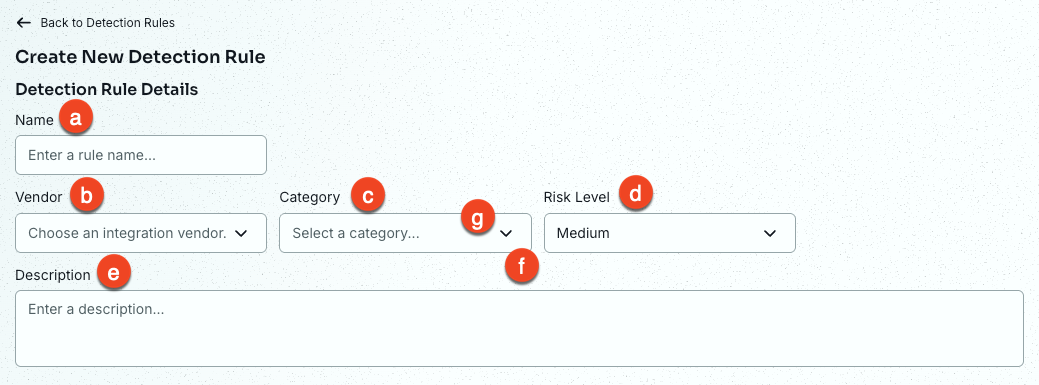
- Name: Enter a name for your detection rule.
-
Vendor: Select a vendor for your detection rule.
Note:The KnowBe4 SAT vendor is integrated by default for all customers. Customers with an SAT Advanced subscription can also integrate additional third-party vendors into detection rules. - Category: Select a category for your detection rule.
- Risk Level: Select a risk level for your detection rule.
- Description: Enter a description of your detection rule. For example, you could describe the rule's purpose or include information other admins may need to know.
-
Add Detection Rule Criteria for your detection rule. For more information, see the screenshot and list below:

- Metadata Type: Select the metadata type from your security vendor to check in this detection rule.
- Operator: Select the operator to use when checking the Metadata Type against the Metadata Content. For more information about available operators, see the Detection Rule Operators section below.
- Metadata Content: Select the value to check in this detection rule. The Metadata Content values are determined by the Metadata Type.
- Save Criterion: Add the criterion to your detection rule. After creating your first criterion, you can add additional criteria by selecting the Add Another Criterion button.
- Select your Detection Rule Threshold.
- Select your SecurityTip Text.
-
Select your SecurityTip Media.
Note:If a SecurityTip is not available as a GIF in the user's default training language, the SecurityTip will be sent as an image. If a localized SecurityTip is unavailable, it will display in English. -
Enabling User Feedback is optional but recommended.
Tip:We recommend enabling Confirmation of Receipt to verify that your users have received and read their SecurityTips. -
SecurityTip Preview: Preview your SecurityTip text, media, and user feedback selections.
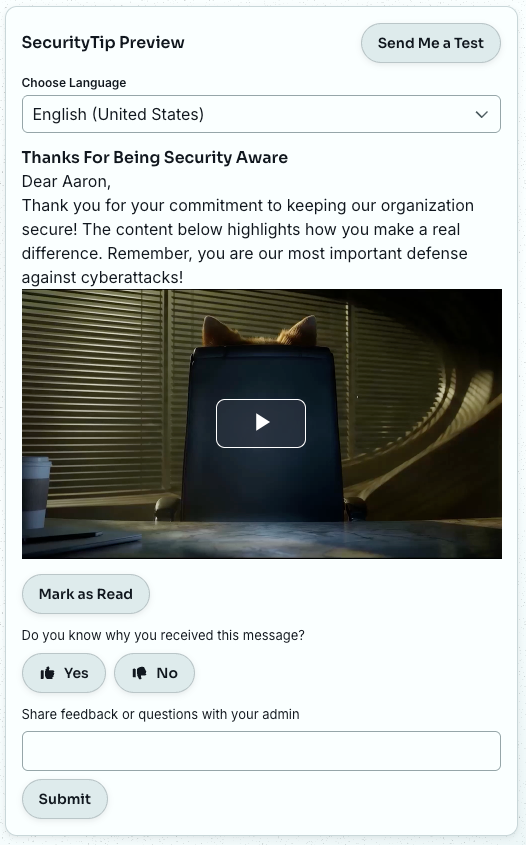
From here, you can also use the Send Me a Test feature to test your SecurityTip in a real delivery.
Note:If your selected Delivery Method or backup delivery method is email, the email address you provide for Send Me a Test must be an active user in your KnowBe4 console. - Select Save to save your changes and create the rule.
Detection Rule Operators
The following operators are available when creating a detection rule criterion.
| Operator | Description |
|---|---|
| Is | This operator checks if the field and value match. You can enter only one value when using this operator. |
| Is Not | This operator checks if the field and value do not match. You can enter only one value when using this operator. |
| Contains | This operator checks if the field contains the value. You can enter only one value when using this operator. |
| Does Not Contain | This operator checks if the field does not contain the value. You can enter only one value when using this operator. |
| Starts With | This operator checks if the field starts with the value. You can enter only one value when using this operator. |
| Ends With | This operator checks if the field ends with the value. You can enter only one value when using this operator. |
| Starts with Any Of | This operator checks if the field starts with any of the values. |
| Ends with Any Of | This operator checks if the field ends with any of the values. |
| Contains Any Of | This operator checks if the field contains any of the values. |
| Contains None Of | This operator checks if the field contains none of the values. |
| Is Any Of | This operator checks if the field matches any of the values. |
| Is None Of | This operator checks if the field does not match any of the values. |
Manage and Edit Detection Rules
To manage and edit your detection rules, navigate to Coaching > Detection Rules.
To learn more about the options on the Detection Rules subtab, see the screenshot and list below:
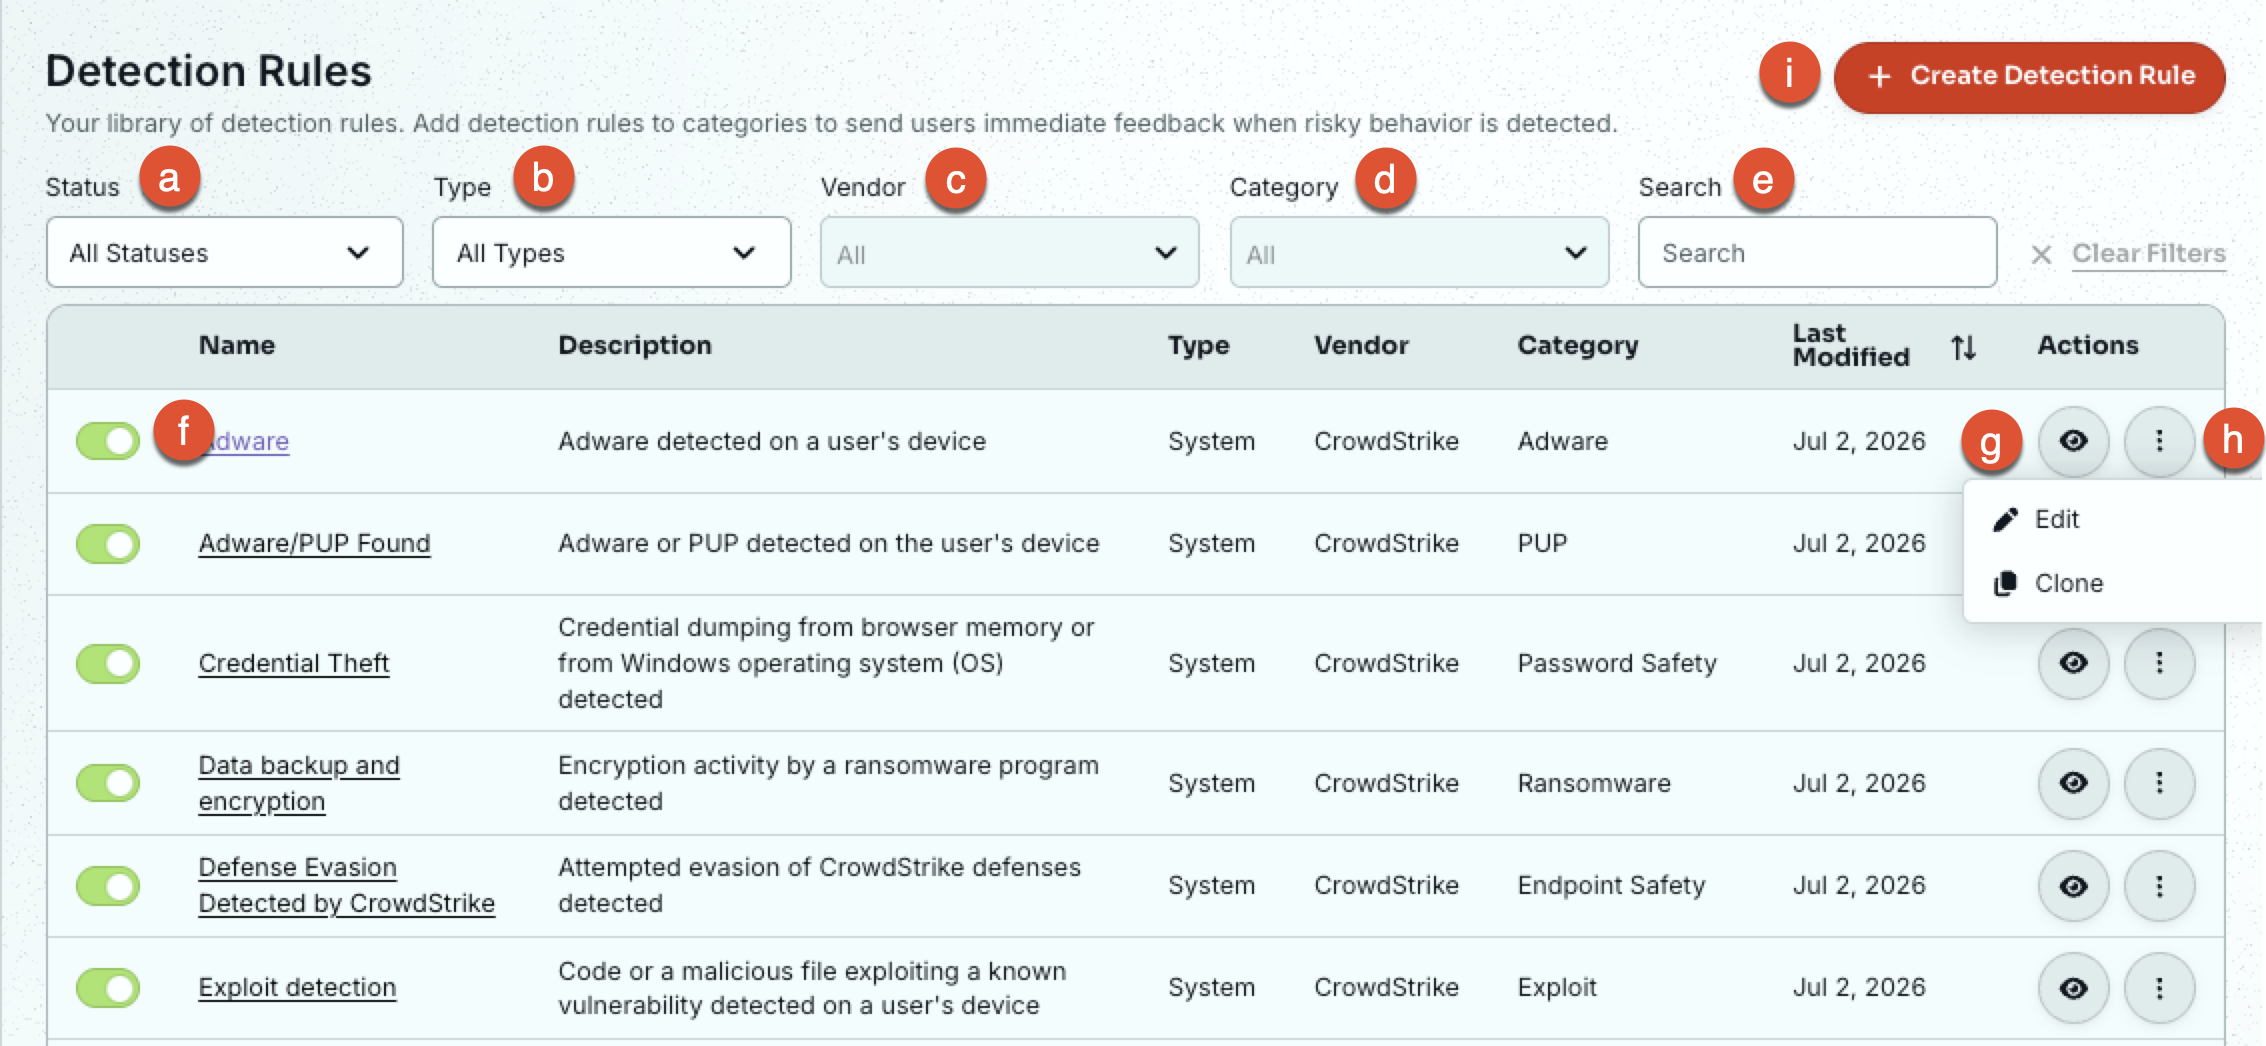
- Filters: Filter your detection rules by Status, Type, integrated Vendor, and Category. You can also Search for a specific detection rule.
- Toggle: Enable or disable a detection rule.
- Eye icon: When you select this icon, you'll be taken to the View Detection Rule page, where you can view the details for the system detection rule.
-
Three dots icon: Open a drop-down menu with the following options:
-
Edit: Opens the Edit Detection Rule page, where you can edit a custom detection rule as needed. Grayed-out options can't be changed. Select the Save button at the bottom-left corner of the page to save your changes.
Note:If the detection rule was cloned from a system detection rule, you can also select the Restore Default Settings button to return the rule to its default settings. - Clone: Opens the Clone Detection Rule page, where you can modify the rule and save it as a custom detection rule.
- Delete: Delete a custom detection rule. System detection rules can't be deleted, only disabled.
-
- + Create Detection Rule: Select this button to create a new detection rule.
Example Detection Rule
See the screenshots below for an example of a detection rule:
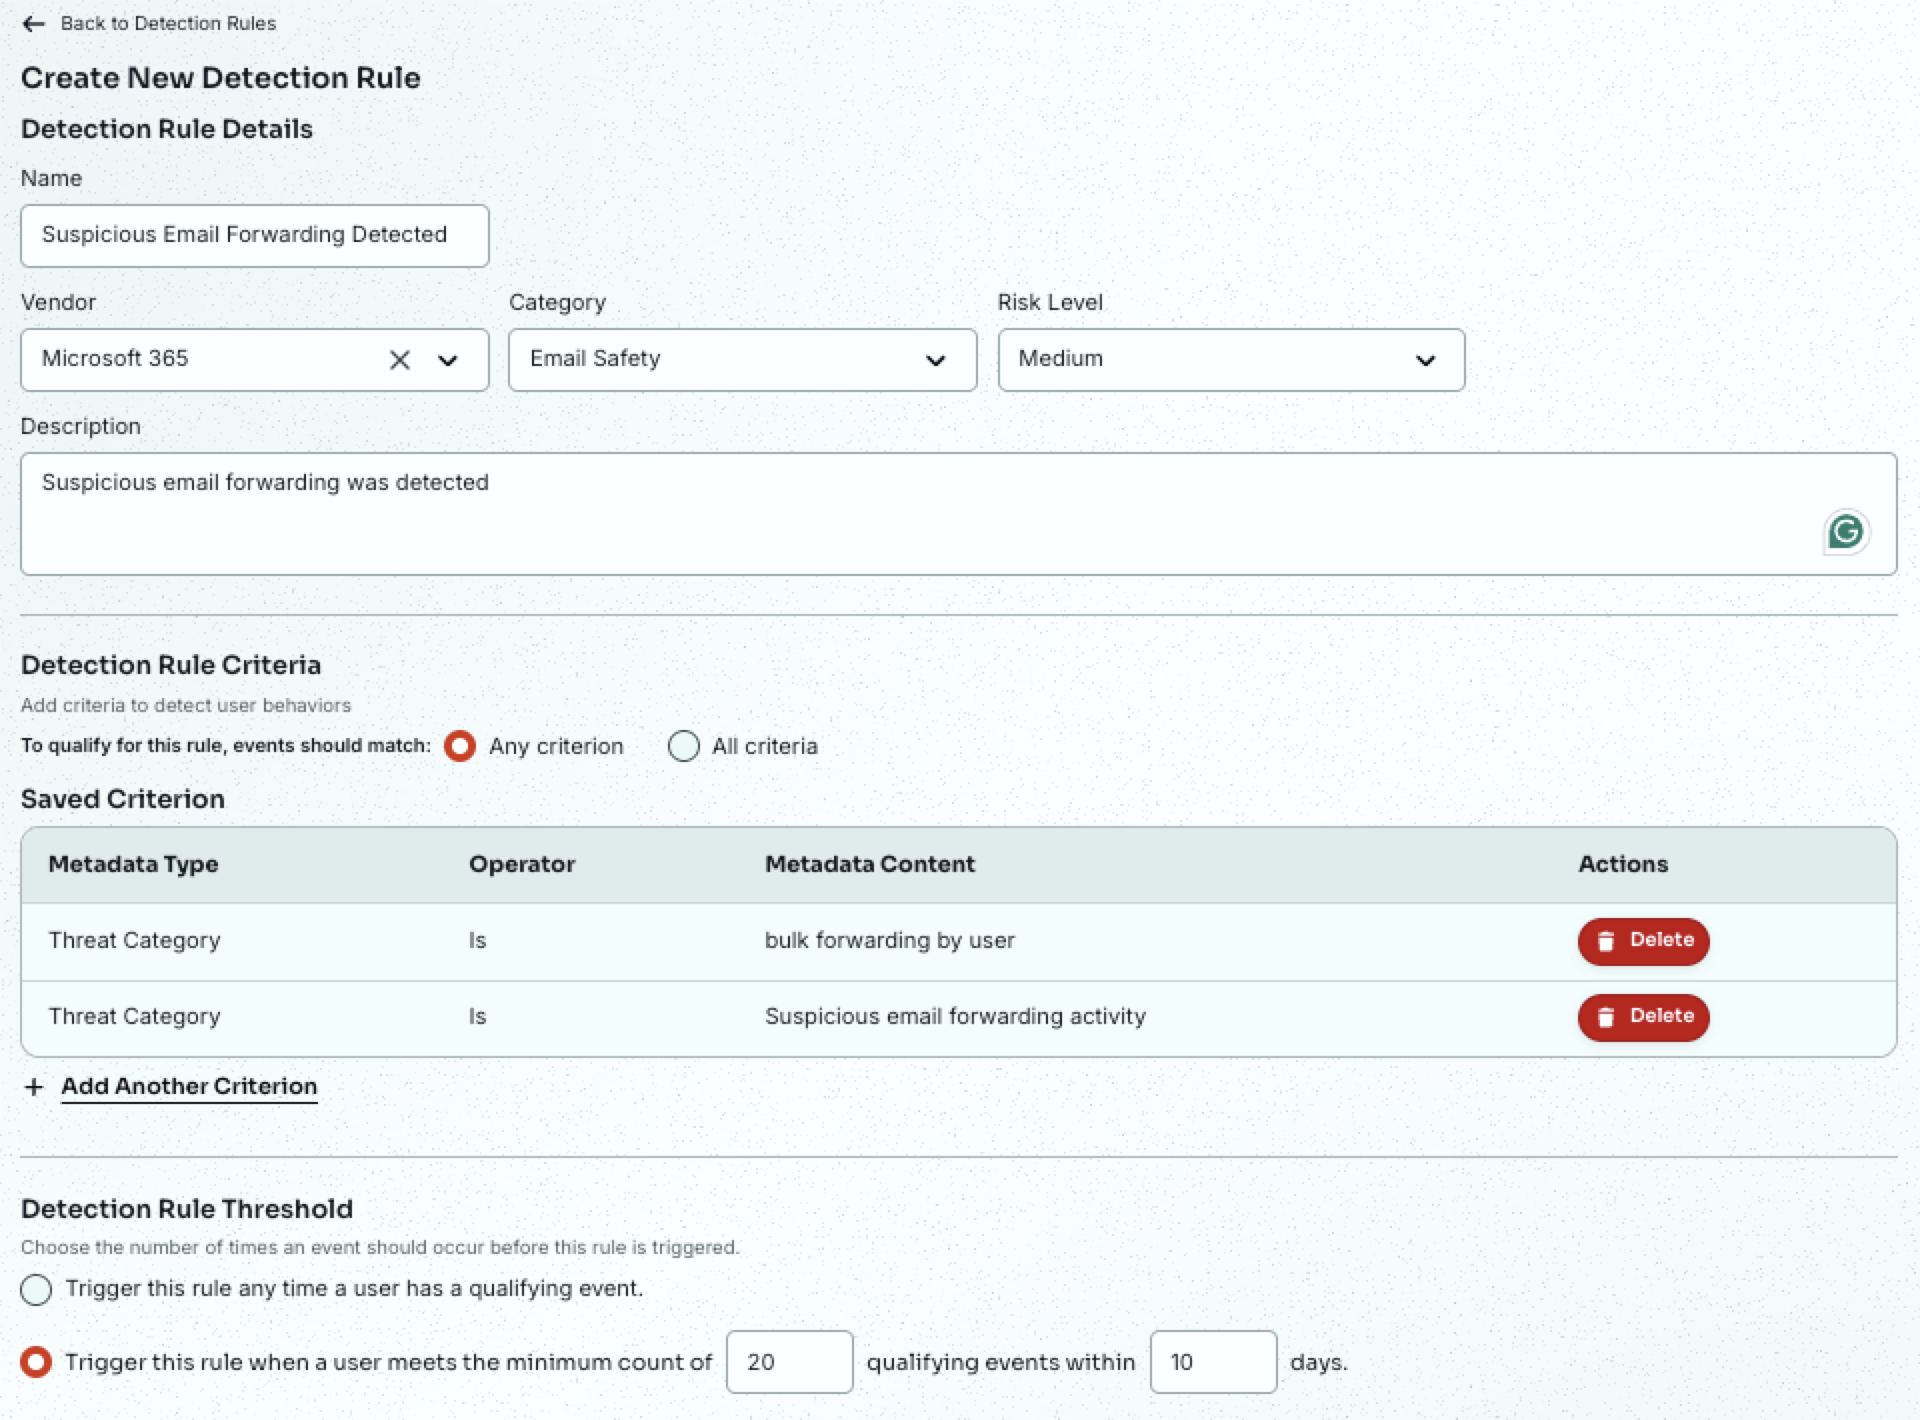
This detection rule will be triggered when either of the saved criteria are met. Using this configuration, a user would need to either have suspicious email forwarding activity or be forwarding emails in bulk to trigger this rule.
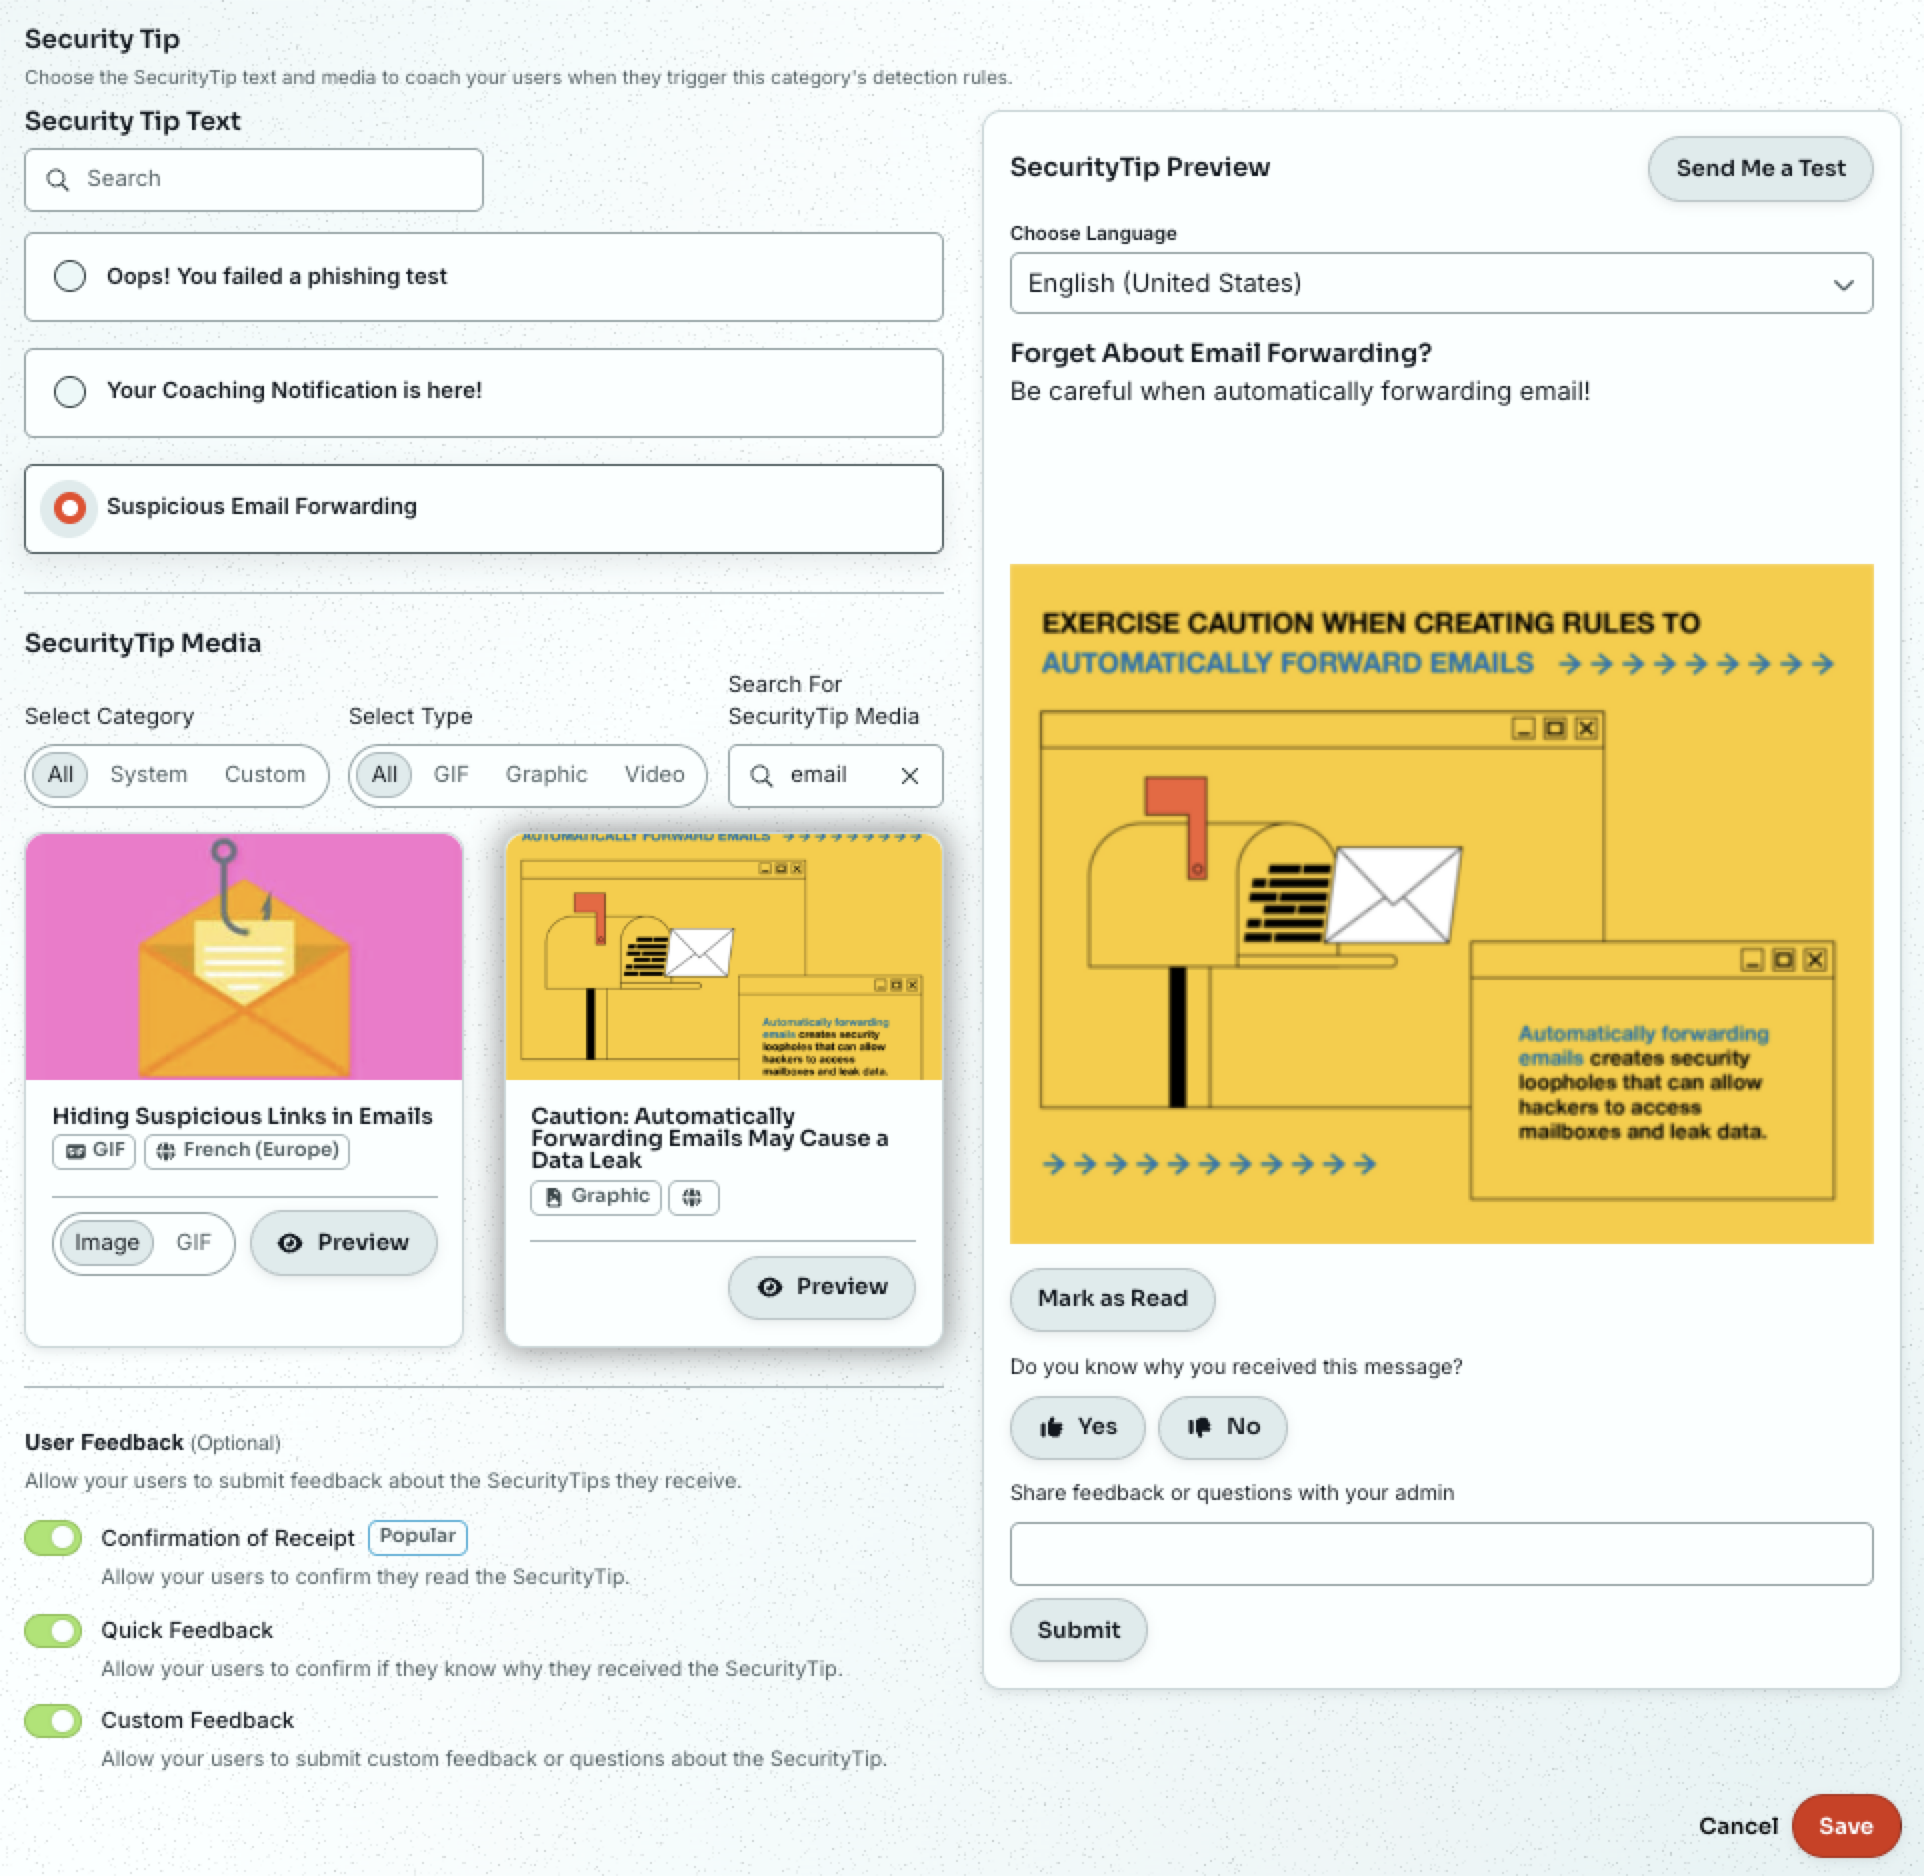
We can use the SecurityTip Preview section to see the selected SecurityTip and the enabled User Feedback options.