In this guide, you'll learn how to set up and start using Agent Risk Manager. You can use Agent Risk Manager to gain real-time visibility into every AI agent operating across your organization. You can also automatically discover and monitor agent behavior, detect security risks, and maintain an audit trail of all agent activity. By the end of this guide, you’ll have connected your first integration, reviewed your AI agent data, and started triaging your first flagged detections.
Agent Risk Manager currently supports integration with the following:
- Anthropic Claude Compliance
- Google Chrome
- Google Gemini Enterprise
- Microsoft Copilot Studio
- Microsoft Edge
- OpenAI ChatGPT Compliance
Access Agent Risk Manager
To access the Agent Risk Manager console, follow these steps:
- Log in to your KnowBe4 console.
-
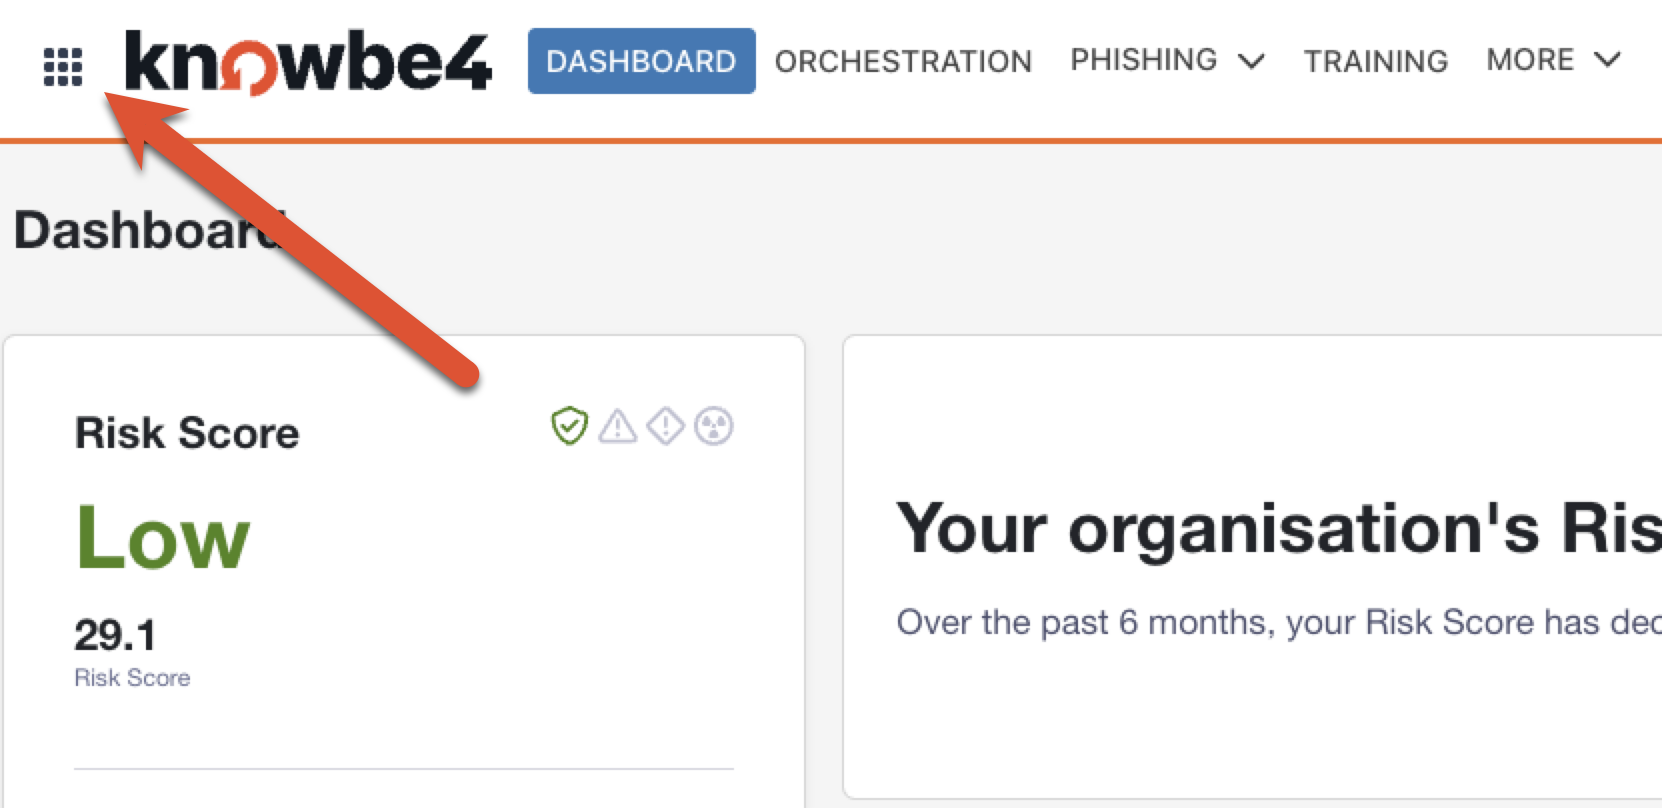
Select the grid icon in the top-left corner of the page. This action will open a drop-down menu.
-
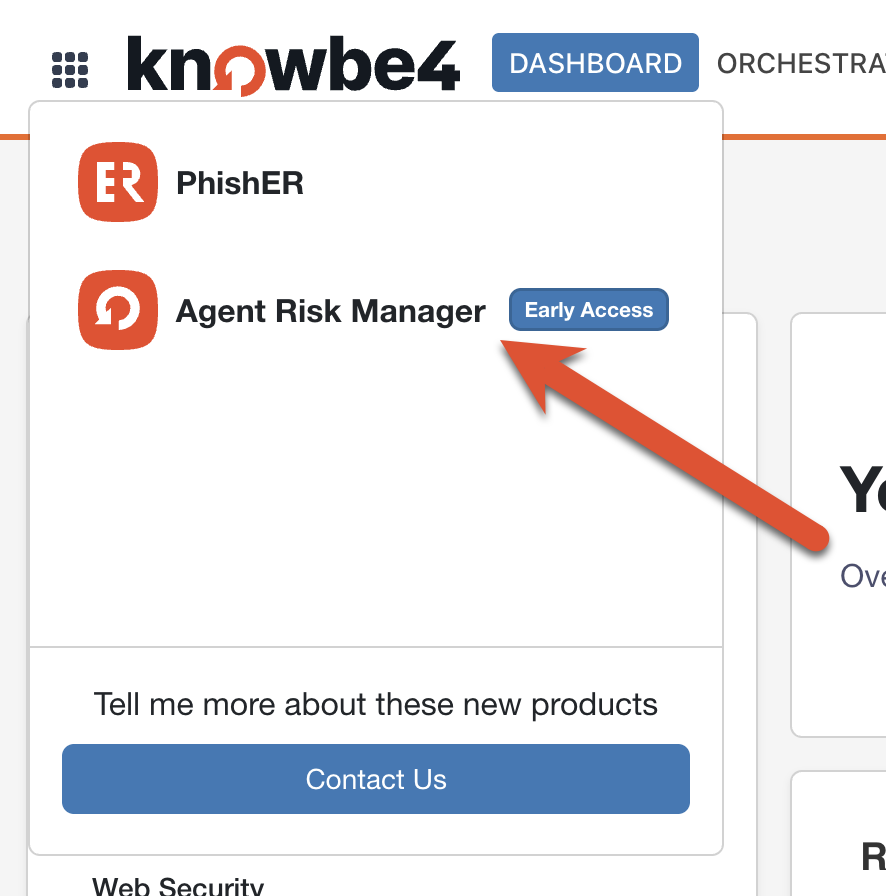
Select Agent Risk Manager.
Connect Your Integration
Before Agent Risk Manager can discover agents or surface detections, you'll need to connect at least one integration. Integrations connect Agent Risk Manager to your AI vendors so that it can receive and analyze agent activity.
To add your first integration, follow the steps below:
- Log in to Agent Risk Manager.
- Navigate to the sidebar and select Setup > Integrations.
- On the Integrations page, select Add New Integration.
- Select your AI vendor and follow the guided setup.
Once your connection is live, the connection status will update to Healthy to confirm that Agent Risk Manager is receiving events. When your connection is Healthy, you can review your vendor data in the Dashboard.
If the connection has a status other than Healthy, follow these steps to resolve the status:
- Pending: Select the connection and finish the remaining setup steps.
- Setting Up: Wait a few minutes for the connection to finish setting up, then refresh the page.
- Error: Select the connection to review its configuration and re-run the connection test
Agent Risk Manager can also monitor and block the use of unapproved AI tools via our browser extension. To use the browser extension, navigate to Policies > AI Tool Permissions and follow the setup instructions.
Review Your Data
To review your AI vendor data, navigate to the sidebar and select Dashboard.
The Security Posture widget shows four key panels with data metrics: Total Agents, Total Tools, Total Detections, and Est. Agent Invocations. Each panel can be selected to view more details.
The Recently Discovered Agents panel displays new agents and their details. Agents flagged as Stale have not been used recently and may need further review. Select any agent card to view more details.
Once you have reviewed your vendor data, you are ready to investigate flagged detection events.
Investigate Flagged Detections
To review and triage events that Agent Risk Manager has flagged as potentially risky, navigate to the sidebar and select Policies > Data Detection Policies.
Agent Risk Manager classifies detections into four main categories:
- Excessive Agency: When an agent escalates its own permissions, adds extra parameters, drifts from the user's goal, or attempts to exfiltrate data.
- Prompt Injection: An attempt to manipulate agent behavior by embedding malicious instructions in user-controlled input.
- Sensitive Information: When an agent processes or transmits data classified as sensitive, such as PII, credentials, or financial records.
- Unbounded Consumption: When an agent exceeds configured token budgets, tool call limits, conversation lengths, or maximum invocation time thresholds.
Configure Your Policies
Integration Policies
Currently, Agent Rick Manager takes in and monitors AI activity to provide you with visibility into how your organization uses AI. Integration policies, including blocking unwanted activity, are coming soon.
Browser Extension Policies
Agent Risk Manager not only detects AI activity but can also block your users from accessing certain AI vendors entirely.
To configure your AI vendor access permission policies, install the browser extension, then navigate to Policies > AI Policies > AI Tool Registry.
To add new AI tools to your list, use the Add Custom AI Tool section. For more information, see the screenshot and list below:
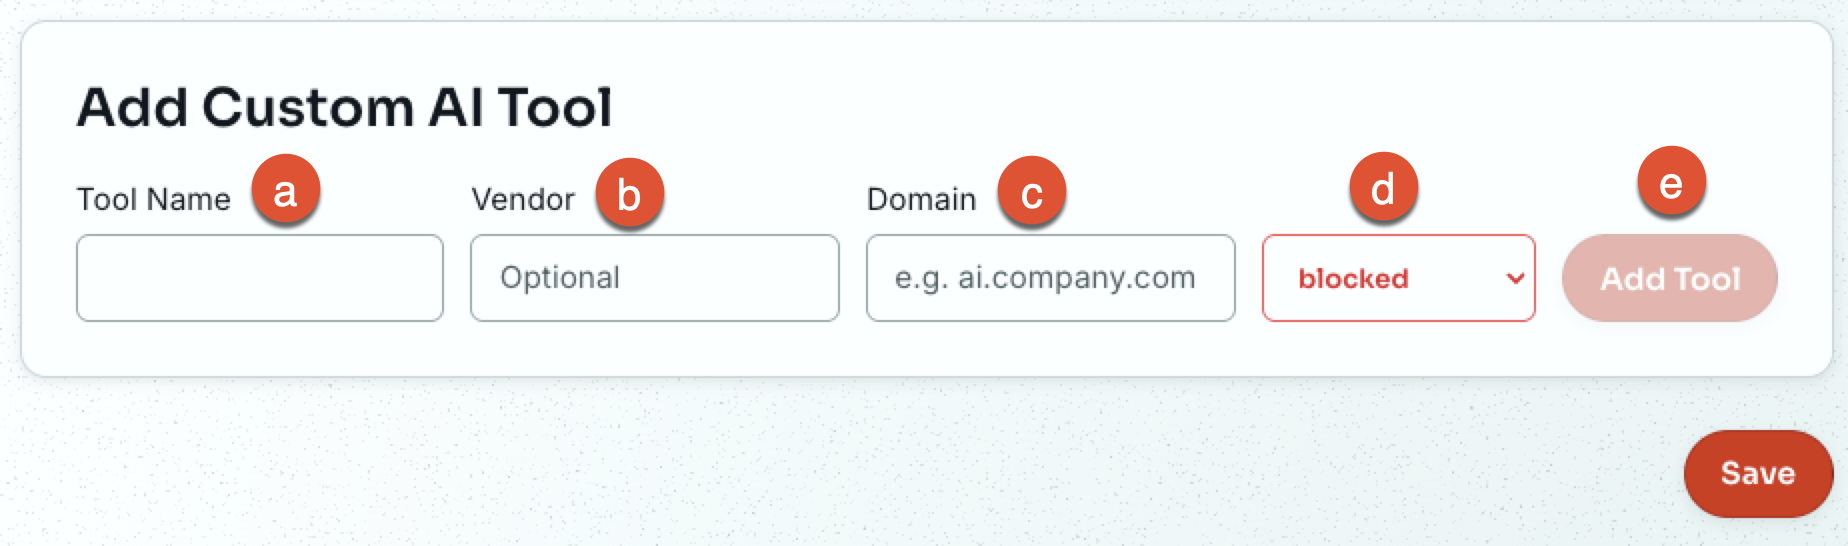
- Tool Name: Enter your preferred name for the AI tool.
- Vendor: Enter the name of the AI tool vendor.
- Domain: Enter the specific AI tool domain for which you want to create a policy.
- Permissions: Choose whether this AI tool should be Approved for use, Warn users when they open it, or be Blocked from use.
- Add Tool: Add the custom AI tool to your policies list.
Once you have finished configuring your new tools, select Save to apply the changes.