This article will show you how to use the Custom Pattern Builder to create your own custom information types that Prevent will monitor in outbound emails that are triggered by policies.
Note: For use cases and examples of how to build custom patterns, see our Prevent - Custom Pattern Builder Use Cases article.
Overview
This section provides descriptions of each of the Custom Pattern Builder's components.
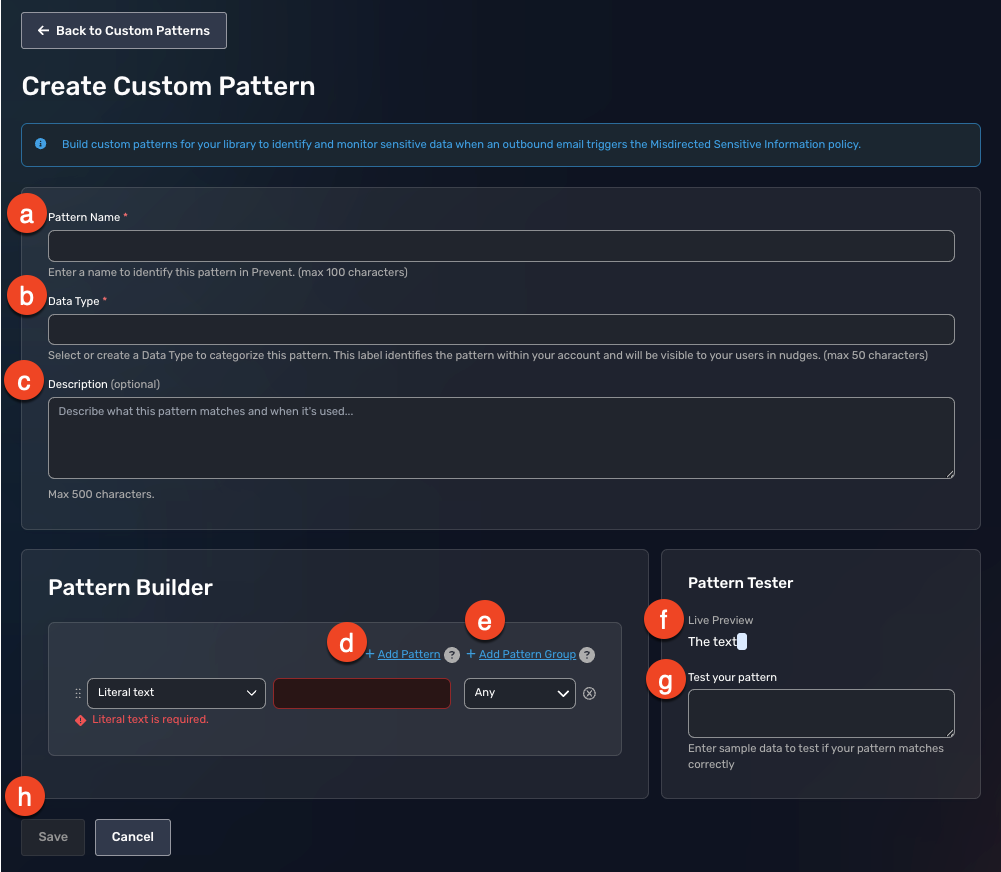
- Pattern Name: In this field, you will add the name of your custom pattern. We recommend naming it something specific to the information type you want to monitor. For example, if you are monitoring commercial invoices, name it Commercial Invoices.
- Data Type: In this field, you can select or create a data type to categorize your pattern. For example, if you are monitoring commercial invoices, name it Invoices.
- Description (optional): Here, you can add a description of what information types you are creating a pattern for. For example, this pattern is used to monitor for any commercial invoices in our users' outbound emails that are triggered by Prevent policies.
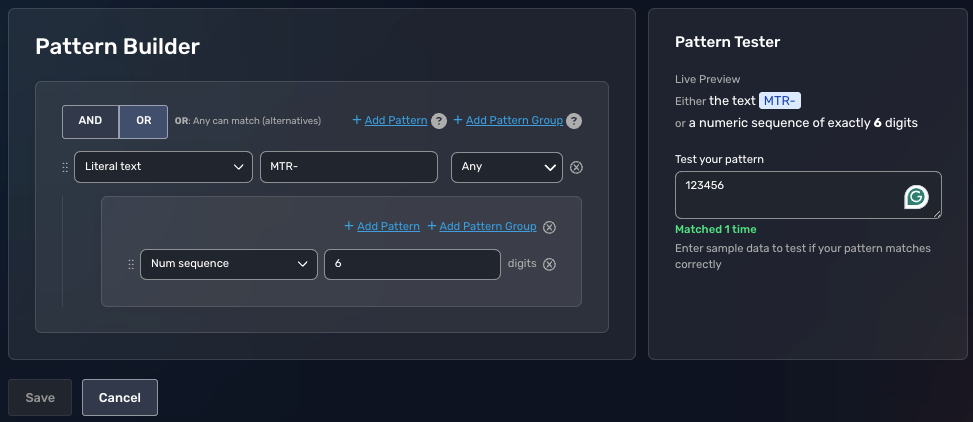
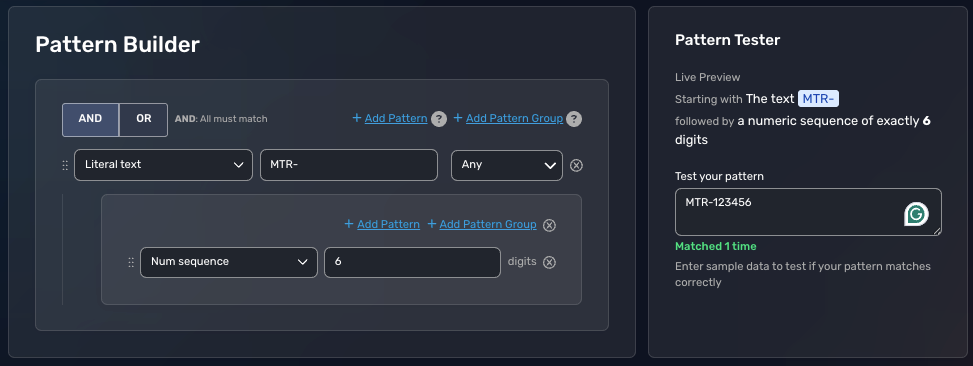
- + Add Pattern: Click this button to add an additional pattern. If you add multiple patterns or pattern groups, you can select AND or OR to enforce whether any or all patterns must match.
- + Add Pattern Group: Click this button to add a nested pattern that will be added to the end of your existing pattern. For example, if you selected Literal text "INV-" for your initial pattern, you can group the Num sequence with 6 digits. This pattern and pattern group would give you "INV-123456", where each of those digits can be any number from zero to nine.
- Live Pattern Preview: This field will show you a live preview of the custom pattern you've built.
-
Pattern Tester: In this field, you can type an example pattern to see if it matches the custom pattern you created. We recommend testing a few examples before saving your pattern.
- Save: Select this button to save your custom pattern.
Creating a Custom Pattern
To create a custom pattern in Prevent, follow the steps below:
- Log in to your Prevent console.
- Select Policies & Library from the menu on the left side of the page.
- Click the Library tab.
- Under the Custom Information card, click View.
- Click + Create Custom Pattern.
- In the Data Type field, create a title for your custom pattern.
-
Under Pattern Builder, select the Literal text drop-down menu for various criteria to build your custom pattern.

- In the box on the right side of the drop-down menu, input the characters to create your pattern.
-
Use the Test Your Pattern field to test that the pattern you build matches a real example of what you want Prevent to monitor.
- Click Save.
- Click Back to Custom Patterns to return to the Custom Patterns section of your Library.
Your new custom pattern will be detected whenever the Misdirected Content Prevent policy is triggered in an outbound email.