You can now configure DKIM signatures at the partner level. This feature allows child accounts to automatically inherit configurations, ensuring consistent email compliance and a streamlined setup across multi-tenant environments.
A KnowBe4 training email includes a DomainKeys Identified Mail (DKIM) signature that verifies it is an authentic KnowBe4 email. You can also enable this feature for phishing emails. This guide will show you how to enable and use an allowed domain as a partner-level DKIM signature for both your managed phishing and training emails.
Adding Managed DKIM Signatures
You can add managed DKIM signatures in the managed partner console. To add managed DKIM signatures to phishing and training emails, follow the steps below.
- Log in to your managed partner console.
- Navigate to Account Settings at the top-right corner of the page.
- Navigate to Phishing > Phishing Settings > Phishing Email Headers.
- Select the Enable DKIM Signature toggle.
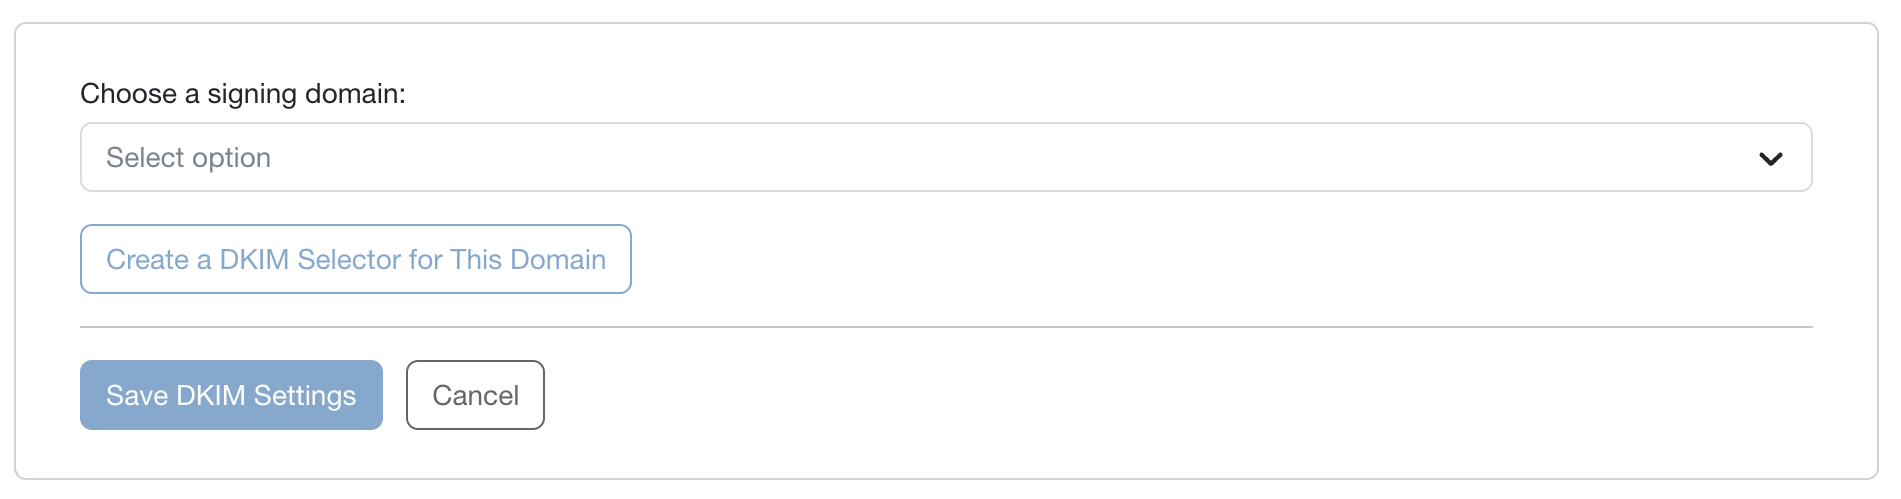
- Select + Add Domain.
- From the drop-down menu, select a signing domain.
-
Select Create a DKIM Selector for This Domain.
-
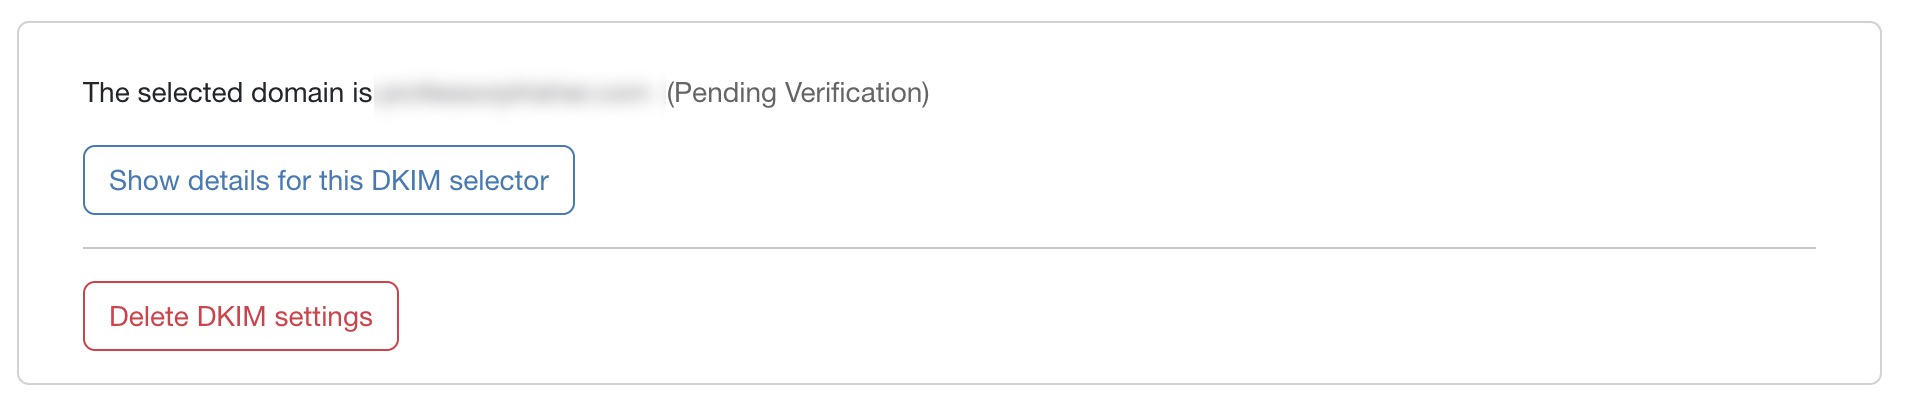
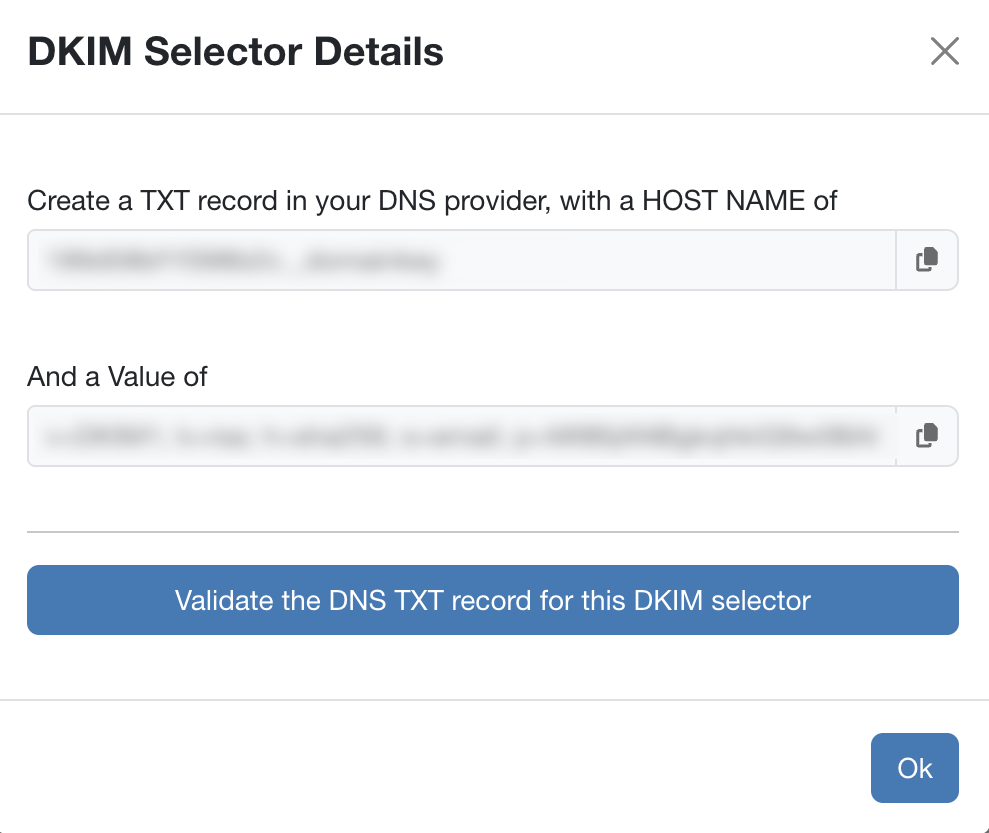
After creating a DKIM selector for the domain, you can view its details by selecting the Show details for this DKIM selector button.
-
In this pop-up, you can select Validate the DNS TXT record for this DKIM Selector.
- When completed, select Save DKIM Settings. If you would like to delete your DKIM selector, select the Delete DKIM settings button.
-
To add managed DKIM signatures to training emails, repeat the same steps in the Training Email Headers.
Enabling and Using a Managed DKIM Signature for Phishing Emails
You can use partner-level DKIM signatures for your managed phishing emails. See below for steps on how to enable and use partner-level DKIM signatures for managed phishing emails.
- Log in to your managed KSAT console.
- Navigate to Account Settings at the top-right corner of the page.
- Navigate to Phishing > Phishing Settings.
-
In the Phishing Settings section, select the Enable DKIM Signature toggle.
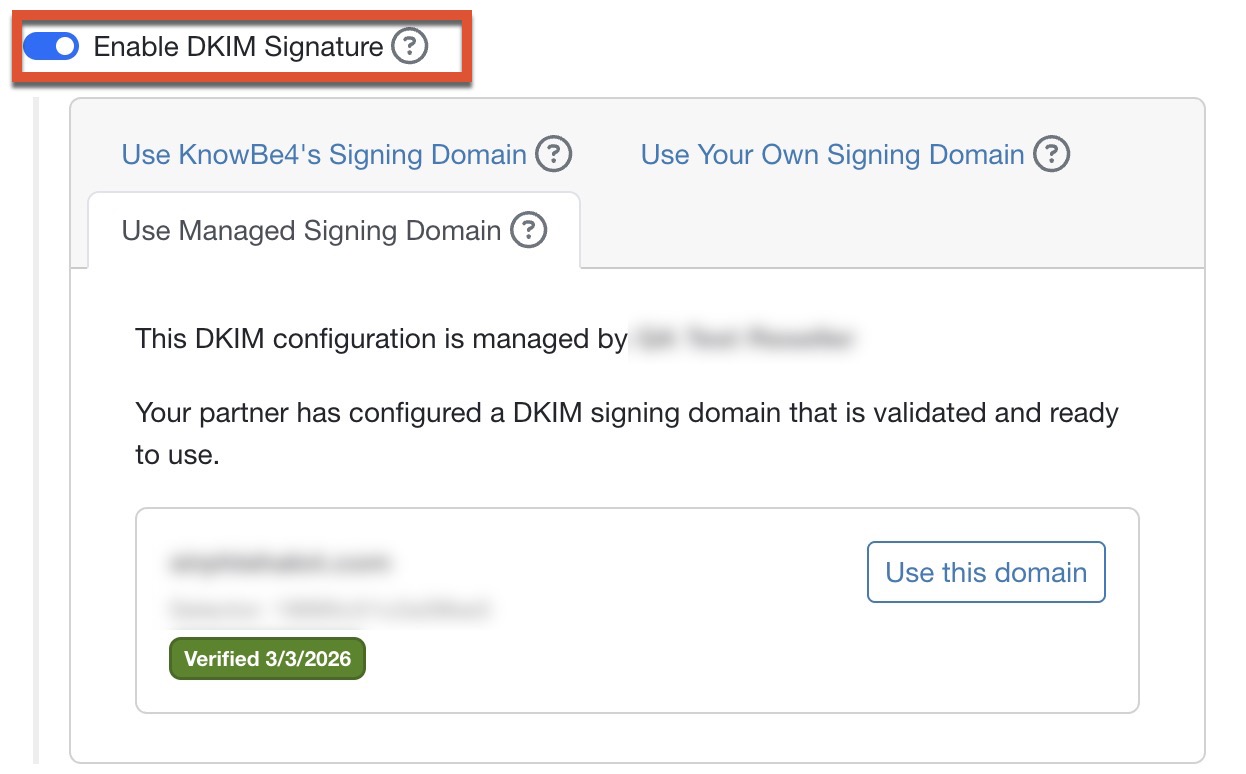
- Select the Use Managed Signing Domain section.
- Choose the domain you want to use. To add a domain to this drop-down menu, you will first need to add an allowed domain to your managed KnowBe4 account. For more information, see our Partner and Multi-Account: Add and Verify Domains article.
- Select Use this domain.
- Copy the host name and values provided in the fields of the pop-up window.
- Navigate to your DNS provider and add a TXT record containing the copied information.
- To verify that your DNS provider has recognized the TXT record, select the Validate the DNS TXT record for this DKIM selector button.
- Once you’ve created the TXT record in your DNS provider, select OK in the DKIM Selectors Details window in your managed KSAT console.
- Select the Save Changes button at the bottom of your Account Settings page.
Enabling and Using a Managed DKIM Signature for Training Emails
You can also use partner-level DKIM signatures for your managed training emails. To enable and use partner-level signing domains in managed training emails, follow the steps below:
- Log in to your managed KSAT console.
- Navigate to Account Settings at the top-right corner of the page.
- Navigate to Training > Training Settings.
-
Under the Training Settings section, select the Enable Custom DKIM Signature toggle if you haven’t enabled DKIM signatures already.
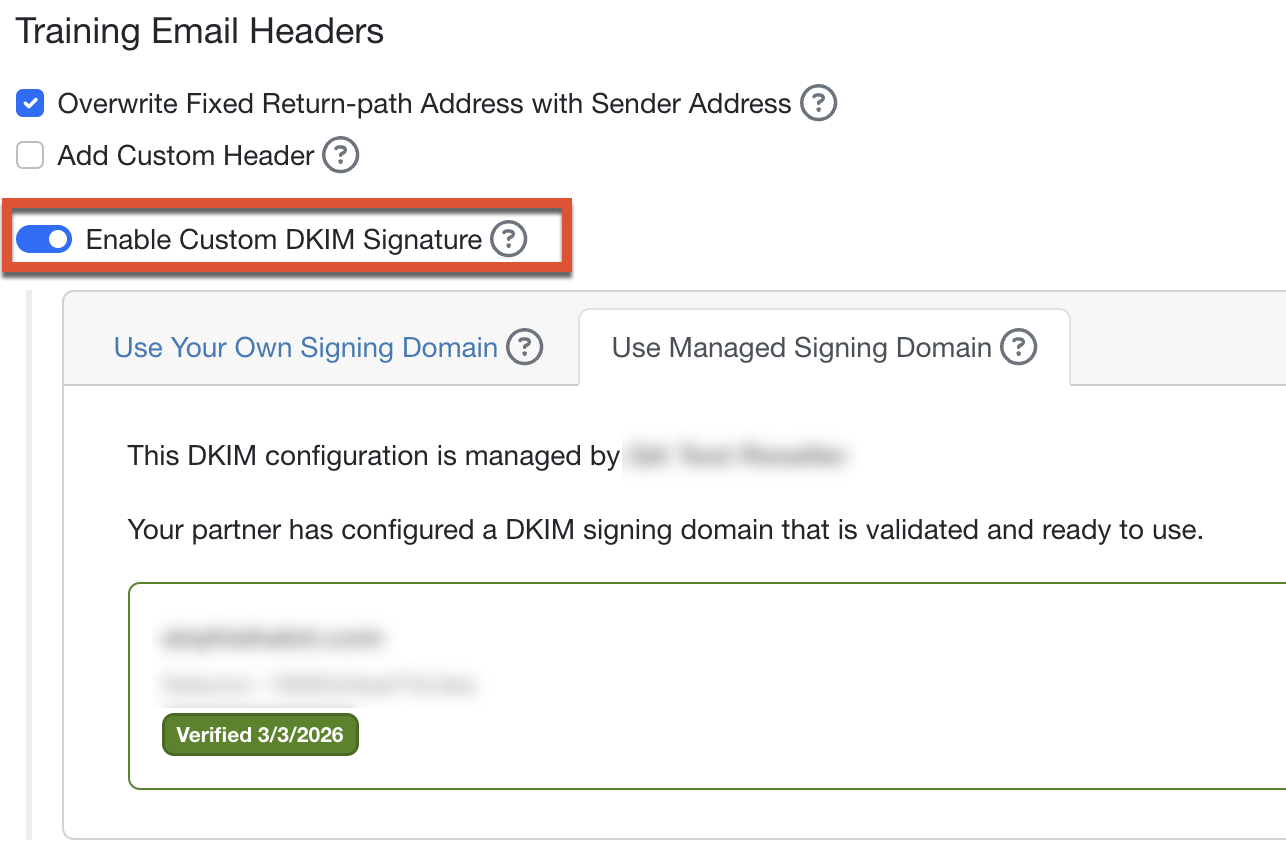
- Select the Use Managed Signing Domain section.
- Choose the domain you want to use. To add a domain to this drop-down menu, you will first need to add an allowed domain to your managed KnowBe4 account. For more information, see our Partner and Multi-Account: Add and Verify Domains article.
- Select Use this domain.
- Copy the host name and values provided in the fields of the pop-up window.
- Navigate to your DNS provider and add a TXT record containing the copied information. To verify that your DNS provider has recognized the TXT record, select the Validate the DNS TXT record for this DKIM selector button. If your TXT record exceeds 255 characters, it must be split into multiple entries. For more information, see Pagely's Resolving TXT Record Size Limits Resolving TXT Record Size Limits (link opens in new window) article.
- Once you’ve created the TXT record in your DNS provider, select OK in the DKIM Selectors Details window in your managed KSAT console.
- Select the Save Changes button at the bottom of your Account Settings page.
For further assistance with this feature, contact KnowBe4’s support team contact KnowBe4’s support team (link opens in new window).