In this article, you’ll learn how to integrate Microsoft Edge for Business with SecurityCoach. Once the integration is complete, data provided by Microsoft Edge for Business will be available under the SecurityCoach tab of your KnowBe4 console. You can view this data in your SecurityCoach reports and you can use this data to create detection rules for your real-time coaching campaigns. For more information about SecurityCoach, see our SecurityCoach Product Manual.
Setting Up the Integration in SecurityCoach
To set up the Microsoft Edge for Business integration in SecurityCoach, follow the steps below:
- Log in to your KnowBe4 console.
- Navigate to SecurityCoach > Setup > Security Vendor Integrations.
-
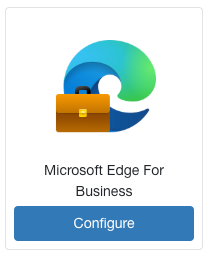
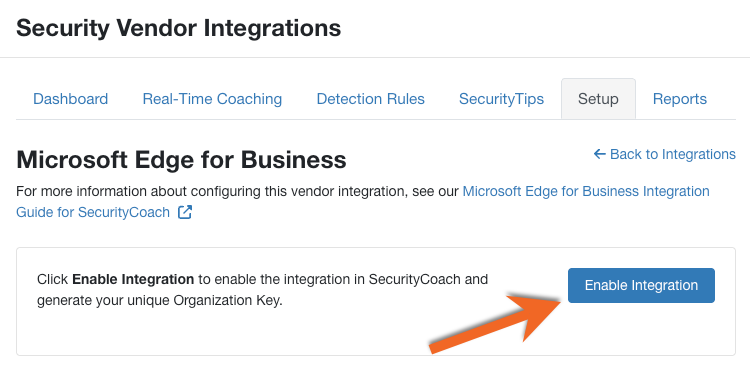
Locate the Microsoft Edge for Business vendor tile and click Configure. The Microsoft Edge for Business integration page will open.
-
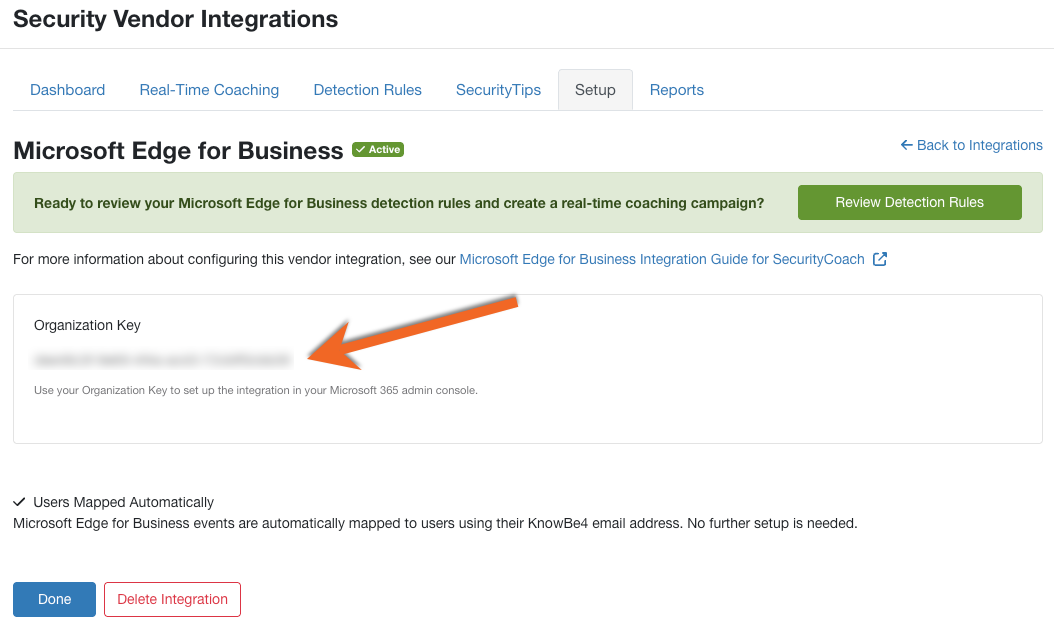
Click Enable Integration to enable the integration in SecurityCoach and generate your Organization Key.
-
Copy and save your Organization Key value to use later. You’ll need your Organization Key to complete the next Setting Up the Integration in Microsoft 365 article section.
Setting Up the Integration in Microsoft 365
To set up the Microsoft Edge for Business integration in your Microsoft 365 account, see the sections below.
Setting Up a Business Policy in Microsoft 365
- Log in to your Microsoft 365 admin center.
-
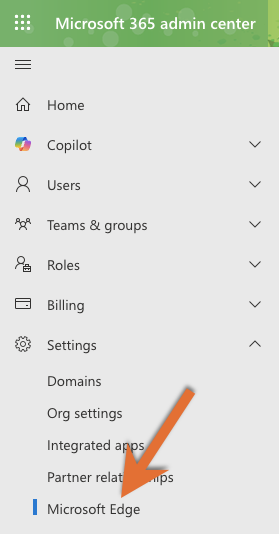
From the navigation menu on the left side of the screen, navigate to Settings > Microsoft Edge.
-
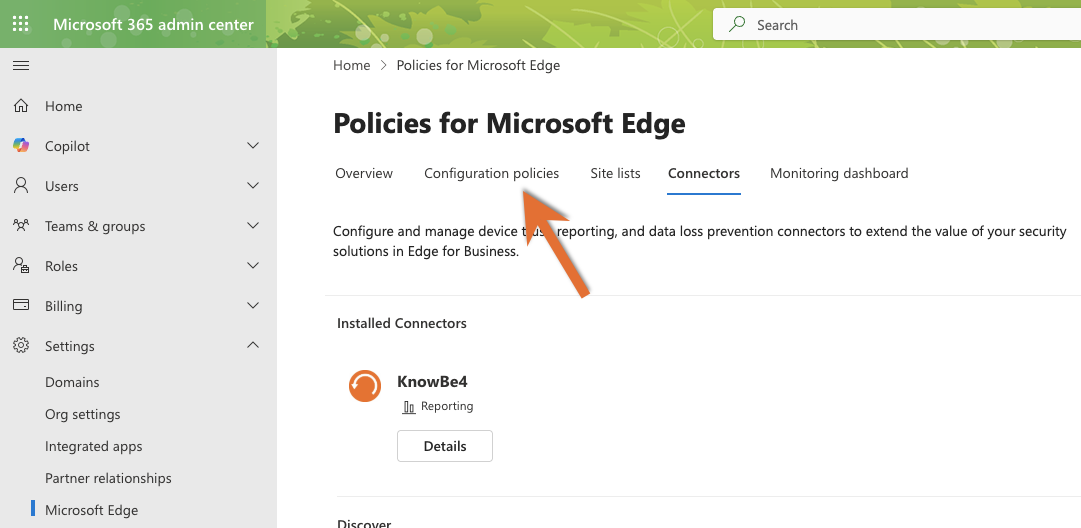
In the new tab that loads, navigate to the Configuration policies subtab.
-
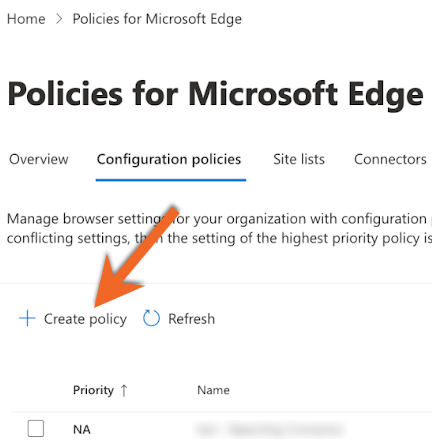
In the Configuration policies subtab, click Create Policy.
-
In the Basics section, use the screenshot and list below to fill in the required details:
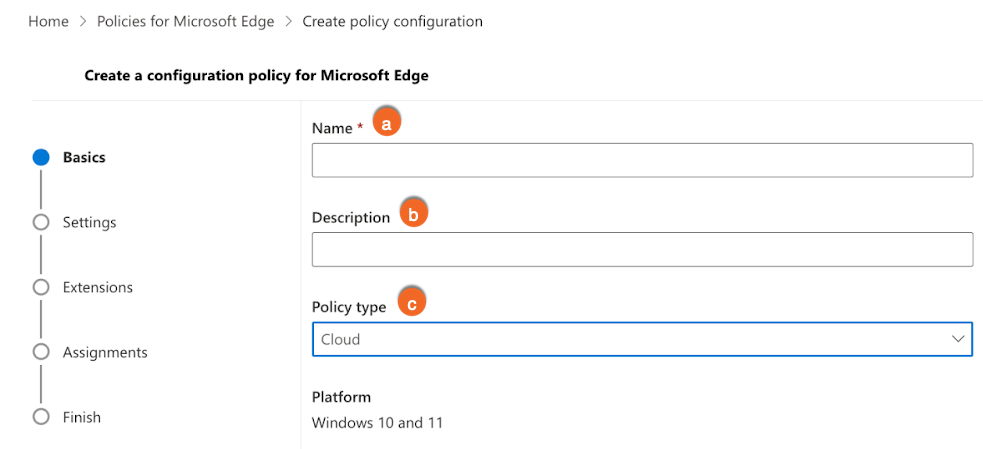
- Name: Enter your preferred policy name.
- Description: Enter your preferred policy description.
- Policy type: Choose Cloud from the dropdown menu.
- In the Settings section, click Add setting, then add the following settings:
- SmartScreenEnabled
-
PasswordProtectionLoginURLs
Important:To use this setting, you must first configure your preferred URLs. For more information, see Microsoft’s documentation Microsoft’s documentation (link opens in new window). - PasswordProtectionWarningTrigger
- In the Extensions section, use the default settings, then click Next.
- In the Assignments section, use either Select group to select and add the specific security groups for this policy, or select Add all users. Then click Next.
- In the Finish section, verify that your selections are accurate, then click Review and create to create the new policy.
Setting Up Reporting in Microsoft 365
- Log in to your Microsoft 365 admin center.
-
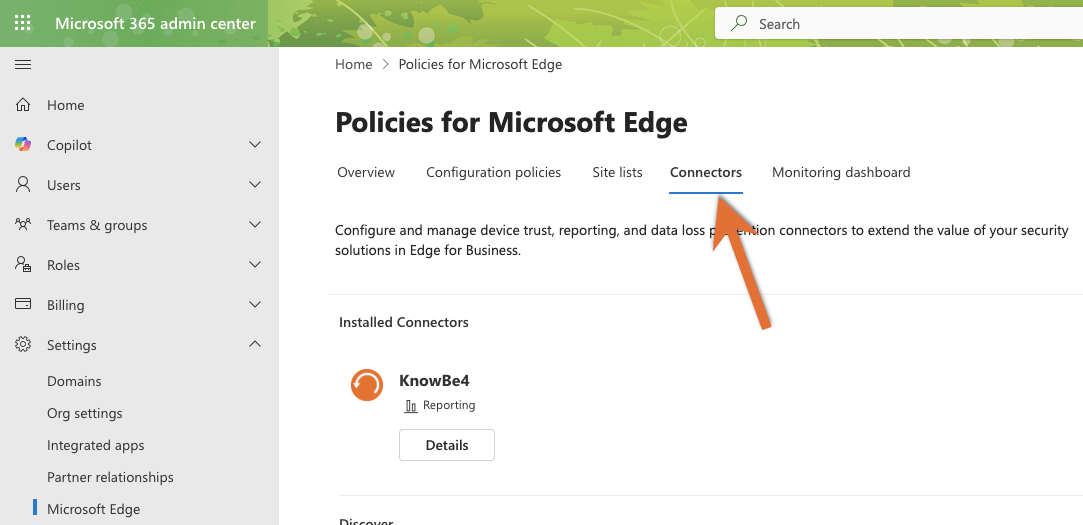
From the navigation menu on the left side of the screen, navigate to Settings > Microsoft Edge.
-
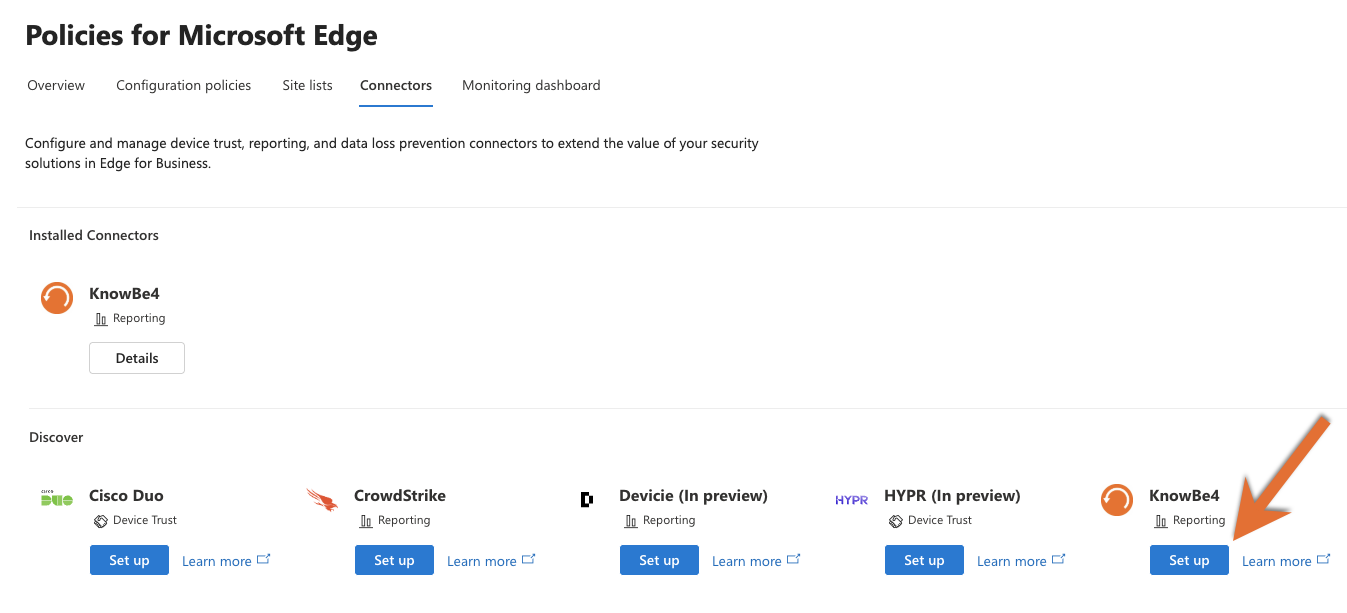
In the new tab that loads, navigate to the Connectors subtab.
-
In the Connectors subtab, navigate to Discover > KnowBe4 > Set up. A new KnowBe4 SecurityCoach window will appear.
-
Use the screenshot and list below to fill in the required fields:
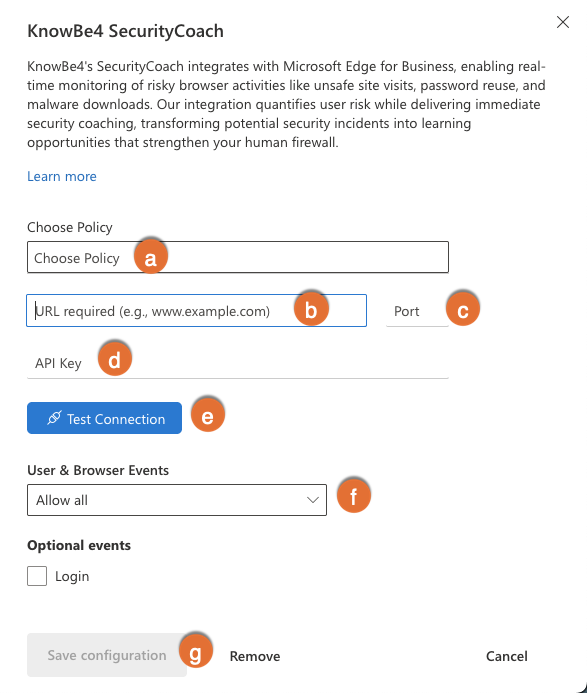
- Choose Policy: Select the policy you configured earlier in the Setting Up a Business Policy in Microsoft 365 section.
-
URL field: Use the table below to enter the URL for your KnowBe4 instance.
KnowBe4 Instance URL United States https://msedge.vendor.training.knowbe4.com/v1/webhook/msedge European Union https://msedge.vendor.eu.knowbe4.com/v1/webhook/msedge Canada https://msedge.vendor.ca.knowbe4.com/v1/webhook/msedge United Kingdom https://msedge.vendor.uk.knowbe4.com/v1/webhook/msedge Germany https://msedge.vendor.de.knowbe4.com/v1/webhook/msedge - Port field: Enter 443 for the port number.
- API key field: Enter the Organization Key you copied earlier in the Setting Up the Integration in SecurityCoach section of this article.
- Test Connection: Use this button to verify the connection. Verifying the connection is required to save the configuration.
-
User & Browser Events: Use this drop-down menu to select Allow selected events, then verify the following events are enabled: Unsafe Site Visit, Malware Transfer, and Password Reuse.
Tip:These User & Browser Events enabled are supported by SecurityCoach system detection rules. To coach your users on additional User & Browser Events, first enable the additional events, then create associated custom detection rules in SecurityCoach. For more information, see our Detection Rules Guide. - Save Configuration: Use this button to save your configuration.
-
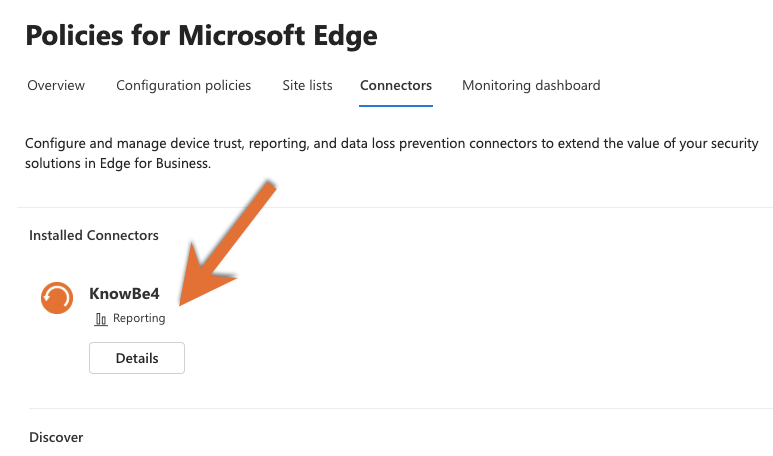
The saved reporting connector will now be visible in the Connectors subtab, under Installed Connectors.
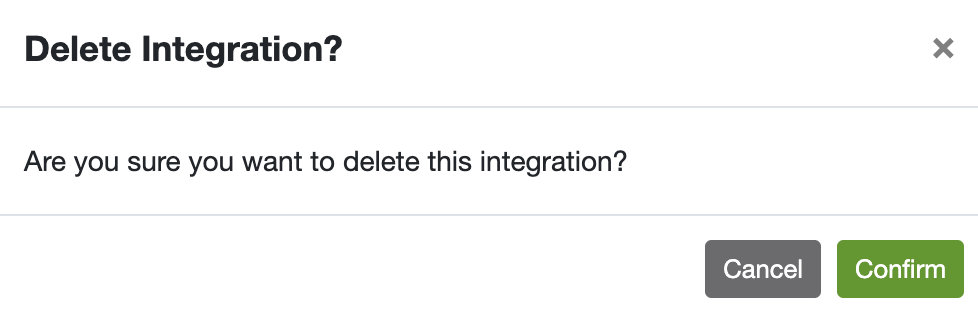
Deleting the Integration in SecurityCoach
If you want to delete the Microsoft Edge for Business integration from SecurityCoach, follow the steps below:
- Log in to your KnowBe4 console.
- Navigate to SecurityCoach > Setup > Security Coach Vendor Integrations.
- Locate the Microsoft Edge for Business vendor tile and click Edit.
- Click Delete Integration near the bottom of the page. A new pop-up window will open.
-
Click Confirm to delete the integration.