In KCM GRC, a template holds a set of requirements that you can work toward under a scope. To help you meet your compliance objectives, we offer a variety of managed templates that you can use in your platform. We are continually adding new templates to KCM GRC based on the number of requests that we receive. For a current list of all managed templates that we offer, please see our Managed Templates article.
If your organization needs to work toward a scope that we do not offer as a managed template, you can create a custom template for your platform. You can add requirements to the custom template by importing requirements in bulk, mapping existing requirements, or creating requirements one-by-one. Then, you can convert the custom template into a scope and begin working toward its scoped requirements.
Please see the sections below to learn how to create a custom template, prepare a set of requirements, and add requirements to the custom template.
Creating a Custom Template
First, create a custom template by following the instructions below.
- From the navigation panel, select Compliance > Templates.
- Click the Create button in the top-right area of the page.
- In the Create Template window, add details to your template by following the instructions below.
Note:We recommend that you avoid including the < and > special characters in these fields.
- Name: Enter a name for the custom template. The name should either represent the type of requirements that you will add to the template or the objective of meeting the requirements in the template.
- Version: Enter the template's version or revision number. This information is for your own reference.
-
Tag(s): (Optional) If you'd like, add one or more tags to group similar templates in your platform.
- To create a new tag, type one or more words into the field, and press Enter on your keyboard. Tags have a maximum of 25 characters, including spaces.
- To select an existing tag, select a tag from the drop-down menu.

- Click Create to save your new template.
Once you've created a template, the next step is to add requirements. See the sections below to learn about requirements and the methods that you can use to add requirements to a template.
Identifying Actionable Requirements
As a best practice, the requirements that you add to your template should all be actionable. Actionable requirements include an action that your organization must perform to meet an objective. Often, actionable requirements clearly state what you need to do to comply with a regulation or standard. Requirements that are not actionable do not prompt your organization to perform a specific action. Many requirements that are not actionable only involve other parts of the document, such as other requirements or chapters. By only adding actionable requirements, your organization will be able to focus on the objectives that you are working to meet.
Please see the table below for examples of requirements that are actionable and requirements that are not actionable.
| Actionable | Not Actionable |
|
164.508 (c)(4) Authorization - Copy to the Individual If a covered entity seeks an authorization from an individual for a use or disclosure of protected health information, the covered entity must provide the individual with a copy of the signed authorization. Explanation: This requirement clearly tells you what you need to do to comply with the regulation. The action is to give a copy of the signed authorization to the person who authorized the disclosure. |
164.414 (a) Administrative Requirements and Burden of Proof A covered entity is required to comply with theadministrative requirements of 164.530(b), (d), (e), (g), (h), (i), and (j) with respect to the requirements of this subpart. Explanation: The only action in this requirement applies to other requirements in the document. This requirement does not clearly tell you what to do to comply with a regulation. |
|
164.404 (a)(1) Breach Notification to Individuals - Notification A covered entity shall, following the discovery of a breach of unsecured protected health information, notify each individual whose unsecured protected health information has been, or is reasonably believed by the covered entity to have been, accessed, acquired, used, or disclosed as a result of such breach. Explanation: This requirement clearly tells you what you need to do to comply with the regulation. The action is to notify individuals that their information was involved in a data breach. |
164.502 (g)(1) Personal Representatives As specified in this paragraph, a covered entity must, except as provided in paragraphs (g)(3) and (g)(5) of this section, treat a personal representative as the individual for purposes of this subchapter. Explanation: The only action in this requirement applies to the subchapter of the document. This requirement does not clearly tell you what to do to comply with a regulation. |
|
164.502 (a)(4) Business Associates: Required Uses and Disclosures A business associate is required to disclose protected health information:(i) When required by the Secretary under subpart C of part 160 of this subchapter to investigate or determine the business associate's compliance with this subchapter.(ii) To the covered entity, individual, or individual's designee, as necessary to satisfy a covered entity's obligations under 164.524(c)(2)(ii) and (3)(ii) with respect to an individual's request for an electronic copy of protected health information. Explanation: This requirement clearly tells you what you need to do to comply with the regulation. The action is to disclose protected health information in the two situations that are listed in (i) and (ii). |
164.502 (b)(2) Minimum Necessary Does Not Apply This requirement does not apply to:(i) Disclosures to or requests by a health care provider for treatment; (ii) Uses or disclosures made to the individual, as permitted under paragraph (a)(1)(i) of this section or as required by paragraph (a)(2)(i) of this section;(iii) Uses or disclosures made pursuant to an authorization under 164.508; (iv) Disclosures made to the Secretary in accordance with subpart C of part 160 of this subchapter; (v) Uses or disclosures that are required by law, asdescribed by 164.512(a); and (vi) Uses or disclosures that are required for compliance with applicable requirements of this subchapter.Explanation: The requirement only applies to the document and does not include an action. This requirement does not clearly tell you what to do to comply with a regulation. |
Importing Requirements in Bulk
Importing your requirements in bulk is the most efficient way to add requirements to a template. We recommend that you import your requirements in bulk if your requirements directly come from an existing regulation or framework.
See the subsections below to learn how to prepare a spreadsheet of requirements and import the spreadsheet into your platform.
Preparing a Spreadsheet of Requirements
After you create your custom template, you can prepare a spreadsheet of requirements.
To prepare your spreadsheet, follow the steps below.
- Open a spreadsheet in your preferred spreadsheet program, such as Microsoft Excel.
- In the spreadsheet, use the header line below.
primary_id,sub_id,name,description
- In a separate window, open the regulation or framework that your template is based on.
- In the regulation or framework, identify an actionable requirement in the regulation or framework. To learn how to differentiate between requirements that are actionable and requirements that are not actionable, see the Identifying Actionable Requirements section above.
- By using the table below, enter the requirement's information into the spreadsheet.
Header Description Character Limit primary_id Enter a Primary ID for the requirement. To learn about the Primary ID, see the Using the Primary ID and Sub ID Fields section below. 1-20 characters sub_id Enter a Sub ID for the requirement. To learn about the Sub ID, see the Using the Primary ID and Sub ID Fields section below. 1-20 characters name Enter a name that you can use to identify the requirement. 1-255 characters description Enter a requirement description. This description can include objectives, processes, or procedures that your organization must implement and document to meet the requirement. 1-65,535 characters Important:We recommend that you avoid including the < and > special characters in your spreadsheet. When you import the CSV file into your platform, these special characters can cause fields to import unsuccessfully. - Repeat step 4 and step 5 until you have entered all actionable requirements into the spreadsheet.
Note:When you import a CSV file into your platform, KCM GRC automatically removes duplicate entries. For example, if you enter two requirements with the same Primary ID, Sub ID, name, and description, only one of the requirements will import.
- Save the spreadsheet as a CSV file.
Important: If you are using Microsoft Excel for your spreadsheet, you must save your CSV file in the CSV UTF-8 (Comma-delimited) format.
Using the Primary ID and Sub ID Fields
In the Primary ID and Sub ID fields, you can enter the Primary ID and Sub ID for each requirement. Then, when you add requirements to a template, the characters you entered into the Primary ID and Sub ID fields will combine to create the requirement's Requirement ID. For example, if your Primary ID is "a" and your Sub ID is "1", the Requirement ID would be "a.1".
Requirements are ordered by their Requirement IDs in templates and in the scopes that are converted from templates. KCM GRC uses natural sort order to sort requirements by Requirement ID. By using this method, Requirement IDs are sorted in alphabetical and numerical order, and numbers with multiple digits are considered as one number. For example, a requirement with Requirement ID "a.3" would appear before a requirement with Requirement ID "a.20." You can select a separator, including as a comma, hyphen, period, or space, when you import or add requirements into your platform.
Importing the Spreadsheet into KCM GRC
After you save your spreadsheet, follow the steps below to import your requirements into KCM GRC.
- From the Template Requirements section of the template page, click the Import button.

- From the Import Requirement CSV window, click the Click to Upload button.
- Select the CSV file that contains your requirements.
- (Optional) In the preview of requirements that will be imported, click the trash can icon to remove any requirements from the import.

- (Optional) Use the ID Separator menu to select a character that the system will place between the Primary ID and Sub ID for each of your requirements. This is a visual preference. If you do not make a selection, the default ID separator will be used, as described below.
Note: If your Primary ID and Sub ID only contain numbers, the default separator will be a period (.). If your Primary ID and Sub ID contain numbers and letters, the default separator will be a space ( ).
- Click the Add Requirements button to import the requirements into your template.
Once you have added all of the necessary requirements to this template, you can convert it to a scope. See our How to Convert a Template to a Scope article for instructions.
Mapping Existing Requirements
You can map requirements that already exist in your account to your template. This includes requirements that you've added from the View All Requirements page, requirements that you've added to other custom templates, and requirements in managed templates.
Follow the steps below to map requirements to your template.
- From the Template Requirements area of the template page, click the Map button.

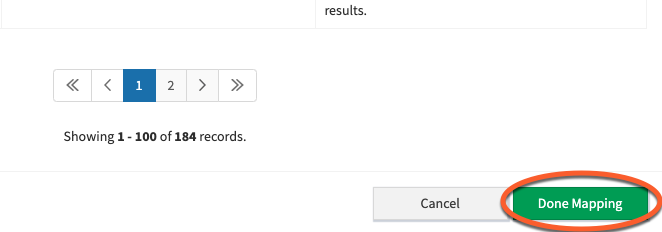
- In the Map Requirements to Template modal window, use the check boxes to select the requirements that you want to map.

- Scroll to the bottom of the window and click Done Mapping.
Once you have added all of the necessary requirements to this template, you can convert it to a scope. See our How to Convert a Template to a Scope article for instructions.
Creating Requirements One-By-One
Follow the steps below to create template requirements individually. Please see the Identifying Actionable Requirements section for examples of requirements.
- From the Template Requirements area of the page, click the Create button.

- Add details for your requirement by following the instructions below.
- Name: Add a name to identify your requirement.
- Description: Describe the purpose of the requirement. The requirement description can include objectives, processes, or procedures that need to be implemented and documented in order to meet the requirement.
- Primary ID and Sub ID: Enter a Primary ID and Sub ID for the requirement. To learn about the Primary ID and Sub ID, see the Using the Primary ID and Sub ID Fields section below.
-
ID Separator: (Optional) Use the drop-down menu to select a character that the system will place between the Primary ID and Sub ID for each of your requirements. This is a visual preference. If you do not select a character, the default ID separator will be used, as described below.
Note:If your Primary ID and Sub ID only contain numbers, the default separator will be a period (.). If your Primary ID and Sub ID contain numbers and letters, the default separator will be a space ( ).

- Click the Create button.
- Repeat steps 1-3 for each requirement that you want to add to your template.
Once you have added all of the necessary requirements to this template, you can convert it to a scope. See our How to Convert a Template to a Scope article for instructions.