When your users complete their assigned training content, they will have the option to download a training certificate. You can customize these training certificates by creating and uploading custom background images that match your organization's brand, such as an image with your organization’s brand colors and logo. By branding your training certificates, you can provide your users with a familiar learning experience.
Creating Branded Certificates
To create a branded certificate, you can use one of our templates or create your own certificate. You can customize elements on the certificate by adding your organization's logo, choosing specific font colors, and adding a background image.
To create your branded certificate, follow the steps below:
- Download one of our certificate templates from the Certificate Templates section below or create your own template. Please note that your template must meet the requirements listed in step 3 below.
- Customize the template. When you customize the template, make sure to include the following elements:
- A heading, such as "Certificate of Achievement".
- A black line where the user's name will be added.
- Additional text, such as "has successfully completed".
Important:The elements in our templates align with text that is automatically generated from your KSAT console, such as the user’s name. If you change the location of these elements in our templates, the elements may not align with the text. - Before you upload your certificate, make sure that your certificate meets the following specifications:
- The certificate must be saved as either a PNG or JPEG file. If you save your certificate as a PNG file, you will need to save the file as non-interlaced.
- The certificate's dimensions must be 2200 x 1700 pixels.
- The file size should be no larger than 5 MB.
After you create your branded certificate, follow the steps in the Uploading Branded Certificates section of this article.
Certificate Templates
We offer four templates that you can use to help you create a branded certificate. You can download any of these templates and modify them however you would like.
We offer templates for PNG files, PDF files, Apple Keynote, and Microsoft PowerPoint. For more information about our templates and to learn about our recommended use cases for each template, see the sections below.
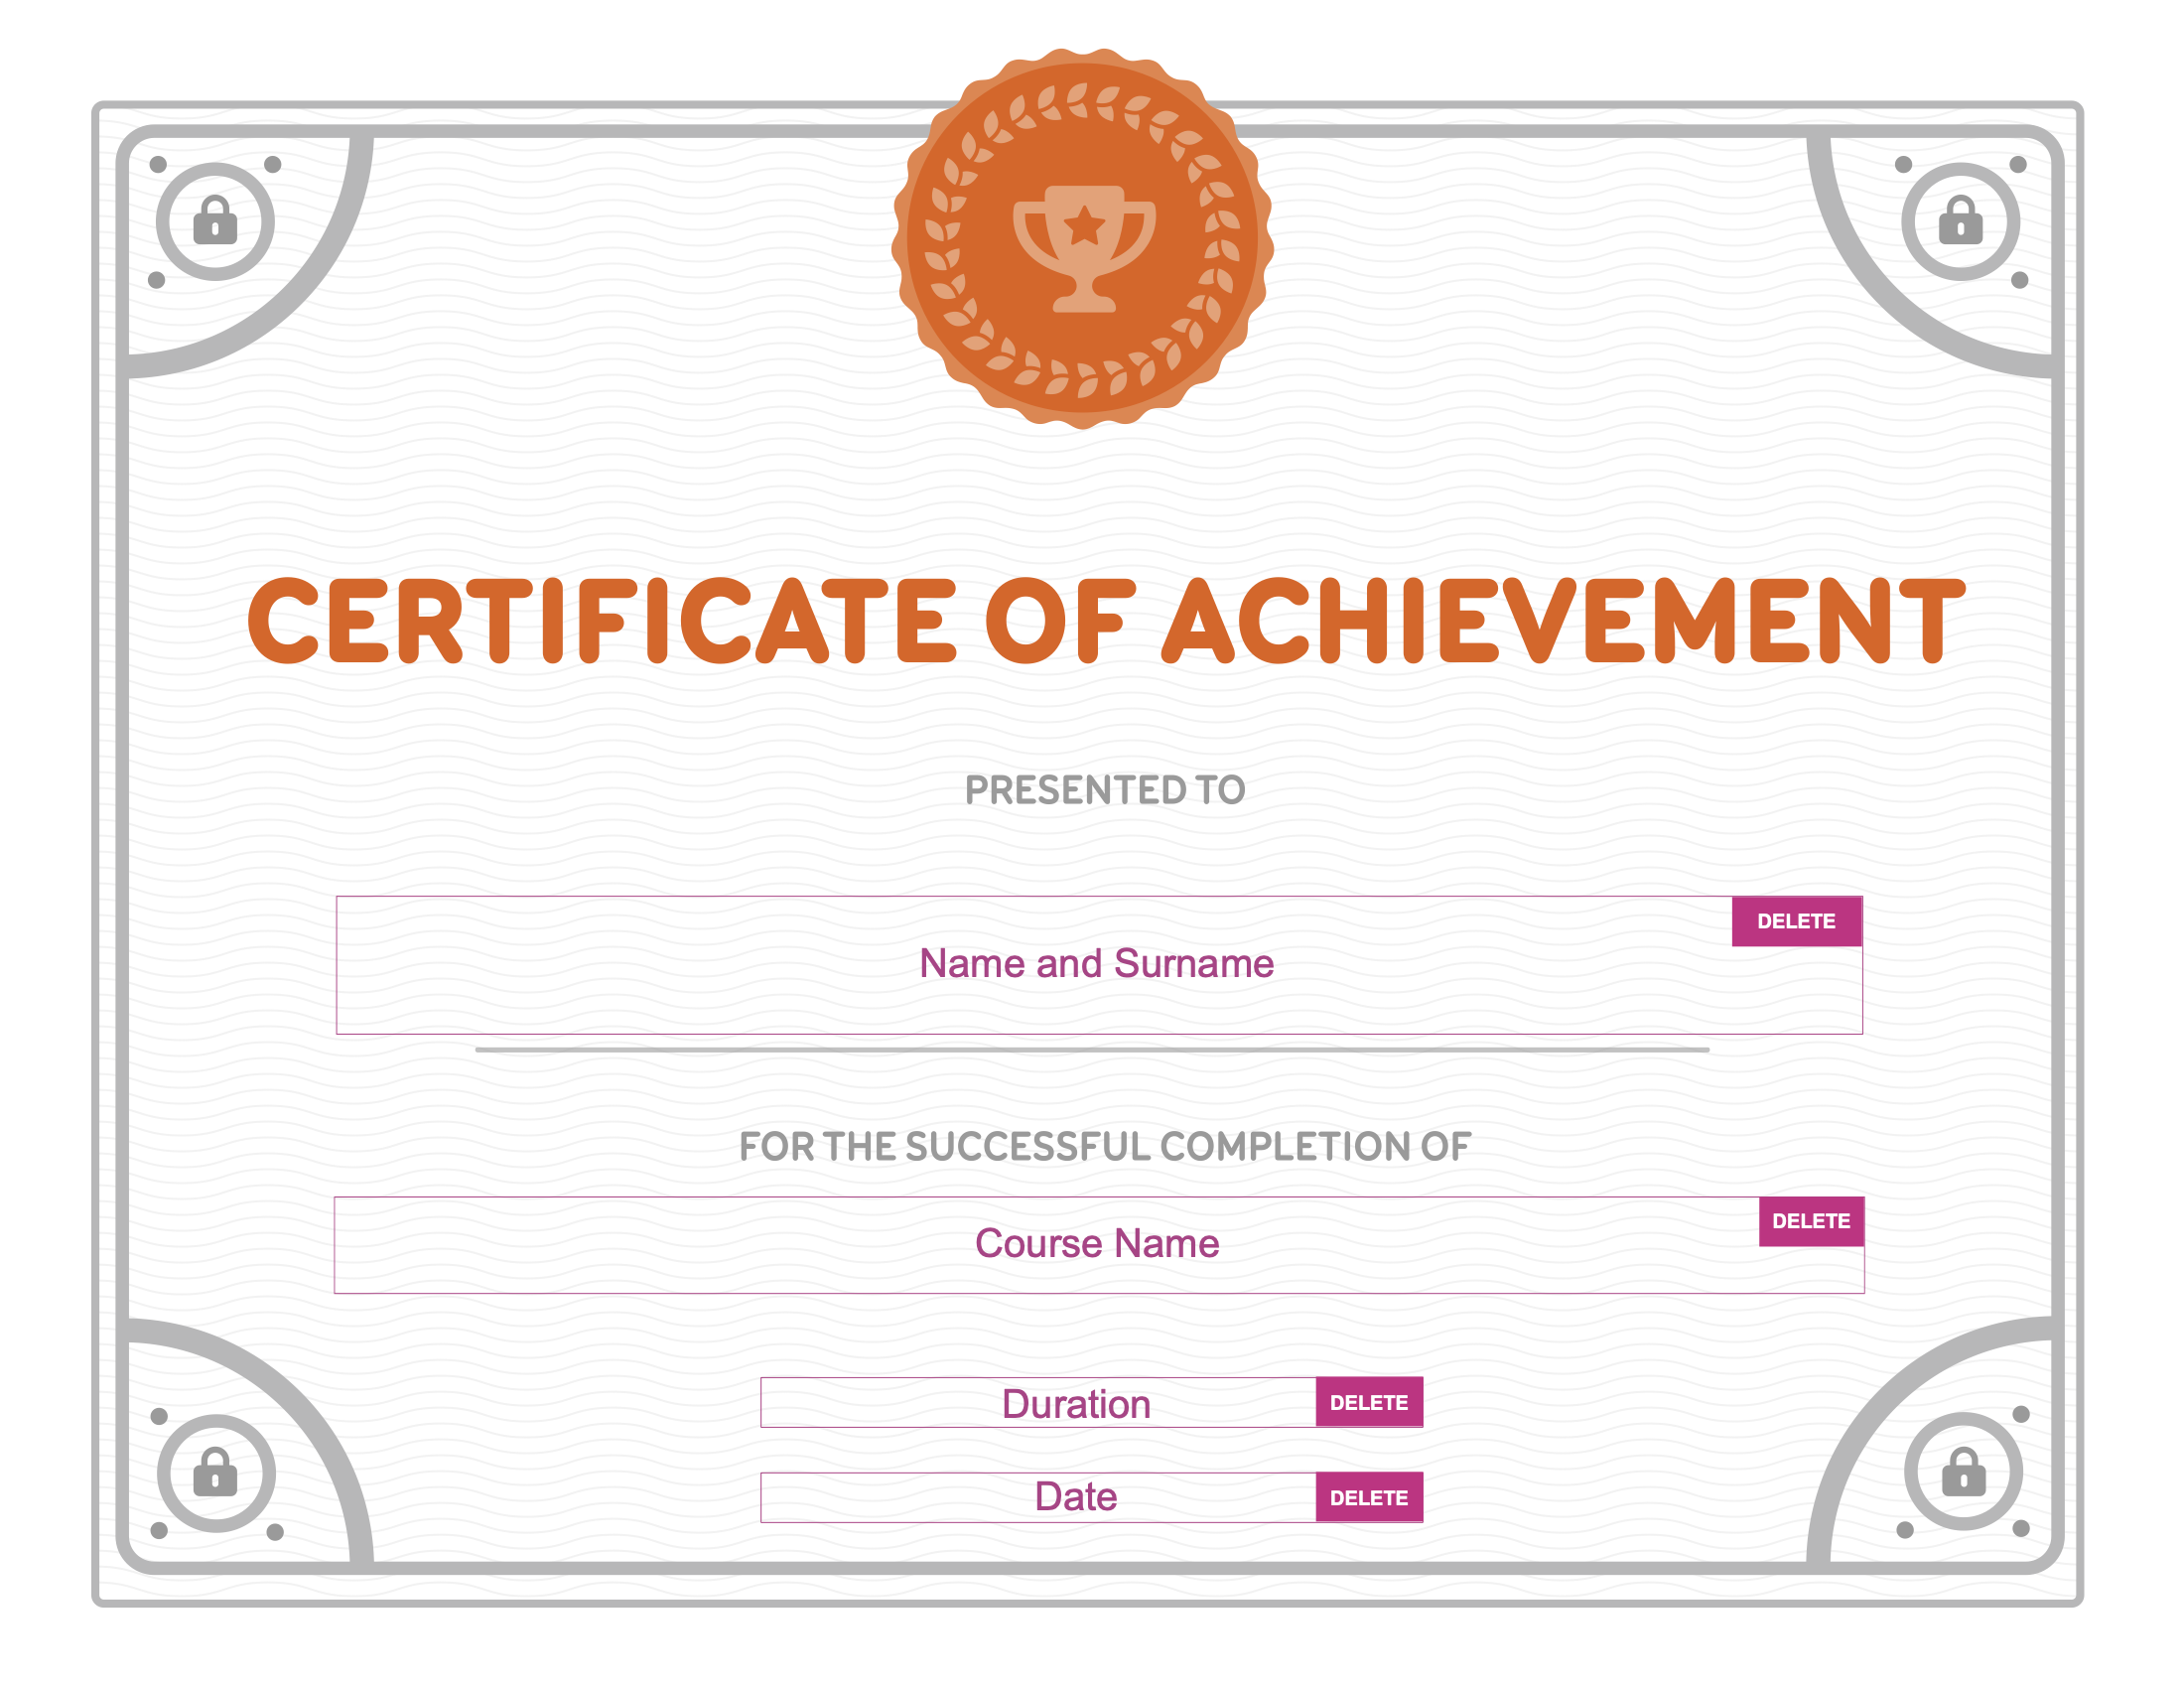
Plain PNG Template
We recommend that you use this template if you would like to create a branded certificate but don't have access to design programs such as Adobe Photoshop. This template is quick and easy to edit.
To customize this template, follow the steps below:
- Click here to download the template as a PNG file.
- Open the file in an image editor.
- Customize the template in the image editor.
For an example of a PNG file template, see the image below:

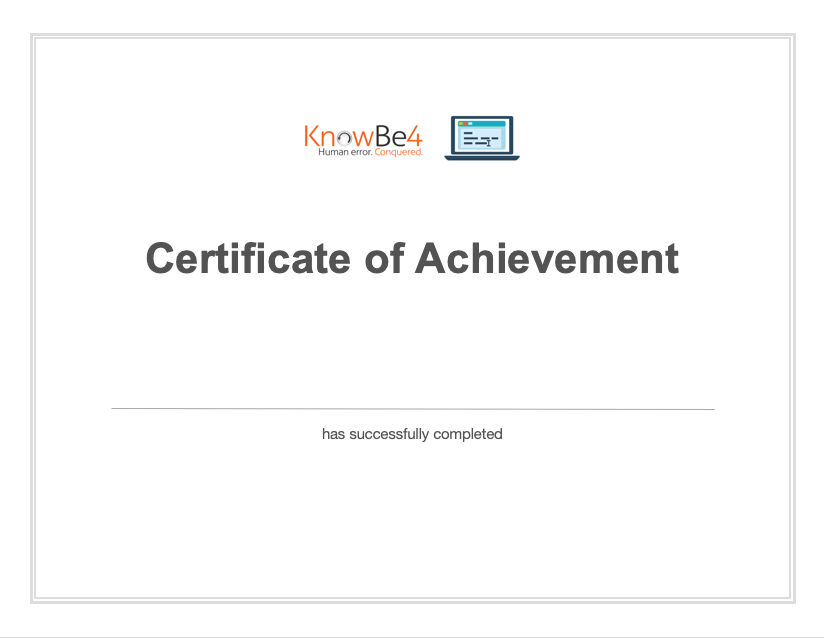
PDF Template
We recommend that you use this template if you have access to design programs and you would like to make more advanced changes to your certificate.
To customize this template, follow the steps below:
- Click here to download the template as a PDF file.
- Open the file in a design program, such as Adobe Photoshop.
-
Customize the template in the design program. The pink boxes in the file show you where generated text, such as the user's name, will be displayed. Delete these boxes before you save the file as a PNG file or a JPEG file.
- After you have customized the template, save the file as a PNG or JPEG file.
For an example of a PDF file template, see the image below:

Apple Keynote Template
If you use Apple Keynote, you can use this template to add your company logo to the certificate. To customize this template, follow the steps below:
- Click here to download the template file.
- Open the file in Keynote.
- Customize the template. Please note that you can't change the font size, color, or positioning of the automatically generated text.
- After you've customized the template, convert the file to a PNG file by clicking File > Export To > Image. Then, select PNG.
For an example of an Apple Keynote template, see the image below:

Microsoft PowerPoint Template
If you use Microsoft PowerPoint, you can use this template to add your company logo to the certificate.
To customize this template, follow the steps below:
- Click here to download the template file.
- Open the file in Microsoft PowerPoint.
Note:This template is a Microsoft PowerPoint file. However, you can also edit this file in other presentation programs.
- Customize the template. Please note that you can't change the font size, color, or positioning of the automatically generated text.
- After you've customized the template, convert the file to a PNG file or a JPEG file by clicking File > Export. Then, change the file type to PNG or JPEG.
For an example of a Microsoft PowerPoint template, see the image below:
Uploading Branded Certificates
Once you've created your branded certificate, you can upload it to your KSAT console.
To upload your branded certificate, follow the steps below:
- Log in to your KSAT console.
- Click on your email address at the top-right corner of the page and select Account Settings.
- From the menu on the left side of the page, navigate to Account Information > Branding.
- Under Upload Branded Certificate, click Choose File.

- In the pop-up window that opens, select the file for your branded certificate.
- Click Save Changes at the bottom of the page.
You can preview your certificate at any time by clicking Preview Current Certificate.
Removing Branded Certificates
If at any time you want to remove your branded certificate, you can do so from your Account Settings page. To remove a branded certificate, follow the steps below:
- Log in to your KSAT console.
- Click your email address at the top-right corner of the page and select Account Settings.
- From the menu on the left side of the page, navigate to Account Information > Branding.
- Under the Upload Branded Certificate section, click Remove.

- Click Save Changes at the bottom of the Account Settings page.