You may want to change the default image used for the Phish Alert Button (PAB) to personalize your experience. This can be useful if you already have a system in place for reporting phishing emails and don't want to retrain your users on the icon they should be looking for when they get a suspicious email.
Image Requirements
Before you change your PAB icon, you'll need to make sure that your image meets the requirements below:
- The image must be in PNG format
- The image must be a square between 32 x 32 and 256 x 256 pixels
- The image must be less than 1 MB in size
How to Upload a Custom PAB Icon
To upload a custom PAB icon, follow the steps below:
- Log in to your KSAT console and click your email address in the top-right corner of the page. Then, click Account Settings.
- Navigate to Account Integrations > Phish Alert.
- Click the drop-down arrow next to the settings for your PAB instance.
-
Under Icon, click the Browse... button.

- When you click this button, your computer's default file explorer will open. Find the image you want to use and select it.
- Click Save Phish Alert Settings at the bottom of the Phish Alert section to save your changes.
- Restart your mail client.
- After three minutes, restart your mail client again.
Resetting the PAB Icon to the Default Icon
To reset the PAB icon to our default fish hook icon, follow the steps below:
- Log in to your KSAT console and click your email address in the top-right corner of the page. Then, click Account Settings.
- Navigate to Account Integrations > Phish Alert.
- Click the drop-down arrow next to the settings for your PAB instance.
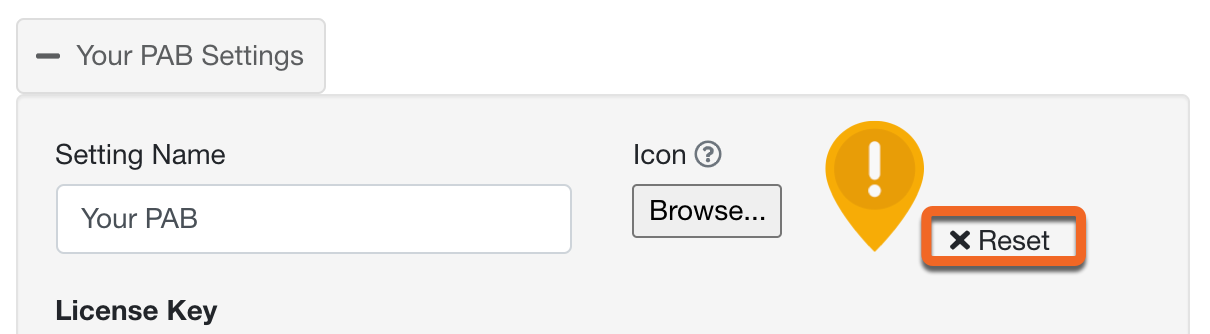
-
Next to the icon, click Reset.
- Click Save Phish Alert Settings at the bottom of the Phish Alert section to save your changes.
If you remove your custom icon, it will default to the fish hook icon. If you previously had the KnowBe4 fish hook with an envelope icon and would like to use this icon again, right-click the image and select Save Image As... to download the image. After following these steps, you can then upload the image as a custom icon.
![]()
![]()
Clearing Your Cache
In some cases, in order to be able to see your changes, you may need to clear the cache of your browser or mail client. For more information on how to clear the cache for your specific system, please see the table below:
If you use Microsoft Windows, delete the content of the folder: C:\Users\[user_name]\AppData\Local\Microsoft\Office\16.0\Wef
If you are using the new Outlook for Windows, you may also need to delete the two folders below:
- C:\Users\[user_name]\AppData\Local\Microsoft\Outlook\RoamCache: This is the main Microsoft Outlook cache directory.
- C:\Users\[user_name]\AppData\Local\Microsoft\Olk\EBWebView\Default\Cache: This is for “Edge-Based WebView” that is used in the modern versions of Microsoft Outlook.
If you use macOS, delete the following: /Users/[user_name]/Library/Containers/com.Microsoft.Outlook/Data/Library/Application Support/Microsoft/Office/16.0/Wef
If you use Android, follow the steps in Android Central's How (and when) to clear app cache or data on Android How (and when) to clear app cache or data on Android (link opens in new window) article.
If you use iOS, follow the steps in Microsoft's Clear Outlook cache files on iPhone Clear Outlook cache files on iPhone (link opens in new window) article.
If you use Google Chrome, follow the steps below:
- Click the three dots in the top-right corner of your browser and select More Tools.
- Select Clear Browsing Data and mark the Check Cached Images and Files check box.
- Click Clear data.
If you use Microsoft Edge, follow the steps below:
- Click the menu button by clicking the three dots in the top-right corner.
- Click History and select Clear History.
- Select the Cached Data and Files check box.
- Click Clear.
If you use Firefox, follow the steps in the Firefox section of the Indiana University Information Technology Service's Clear your web browser's cache, cookies, and history Clear your web browser's cache, cookies, and history (link opens in new window) article.
If you use Chrome with the Chrome Extension PAB, follow the steps in Google Chrome's Clear cache & cookies Clear cache & cookies (link opens in new window) article.