In your PhishER console, rules are logical expressions that allow you to automatically disposition and tag messages in your PhishER Inbox. The assigned tags trigger PhishER to run actions on the messages. You can create rules from the Rules tab. If you would like to create an action, see our How to Create and Manage PhishER Actions article.
The Rules tab contains two types of rules: custom rules and system rules. Custom rules are rules that you can create by using the Yara Rule Editor. System rules are default rules provided by KnowBe4. The Rules tab also contains global variables, which are variables that you create to use in multiple rules with the same strings. By updating a global variable, you can update all of the rules that contain those strings.
Creating Rules
You can create custom rules in your PhishER console to disposition messages that have been forwarded to your PhishER Inbox. To create your rules, you can use either the Basic Editor or the Advanced Editor. All custom rules must follow Yet Another Recursive/Ridiculous Acronym (YARA) logic. YARA is a tool used to identify and classify malware samples.
To create a rule, follow the steps below:
- Log in to your PhishER console.
- From the sidebar on the left side of the page, select the Rules tab to open the Rules List page.
- Click the New Rule button at the top-right corner of the page to open the Rule Details page.
Note:If you want PhishER to automatically generate a rule based on a description of your needs, see the Creating Rules Using the YARA Rule Generator section.

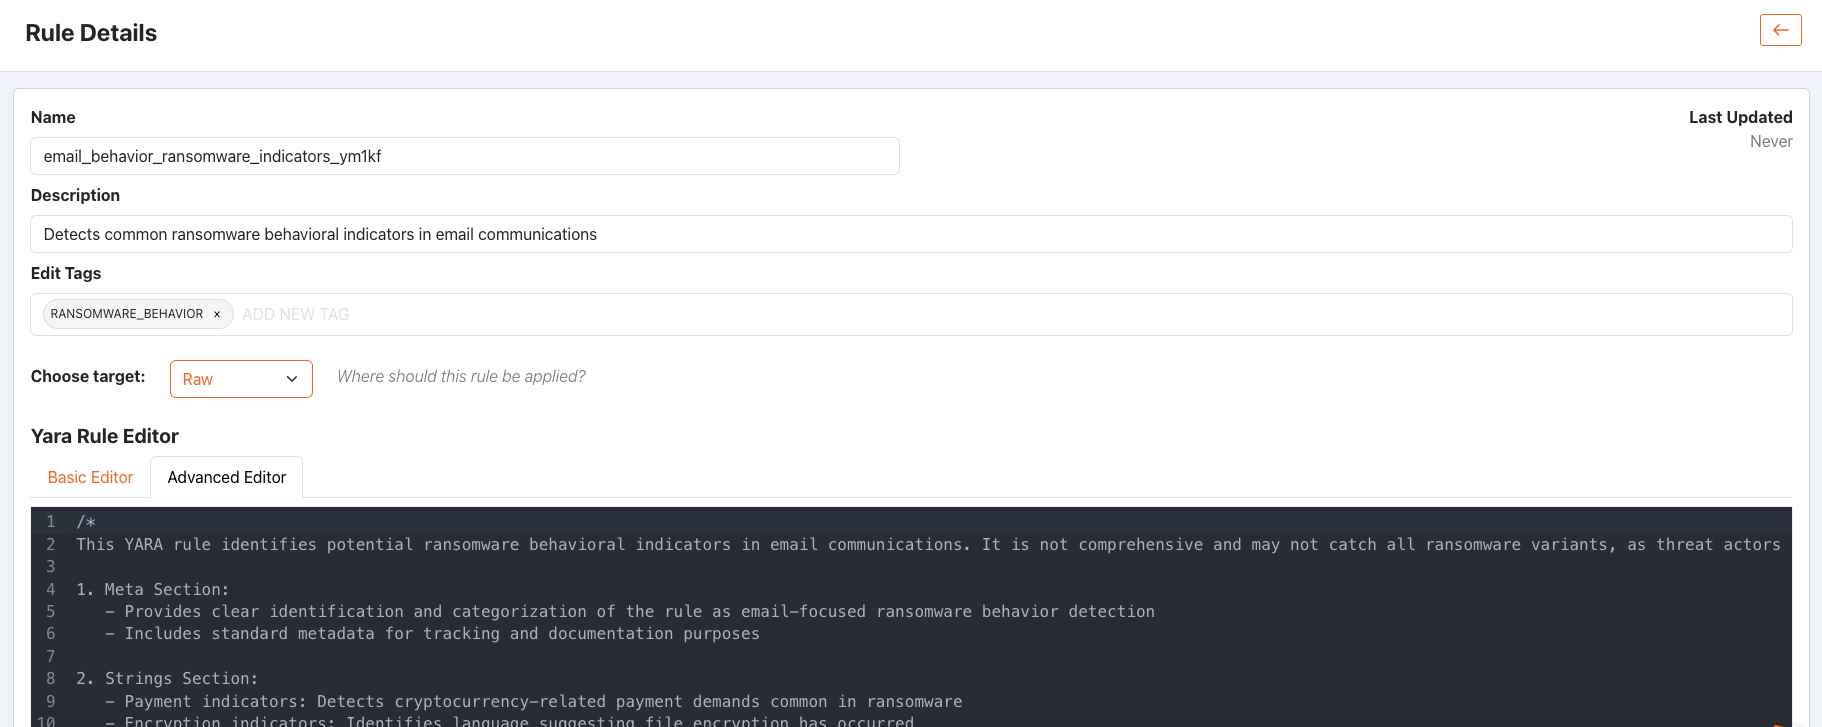
- In the Name field, enter a unique name for your rule. We recommend that you enter a name that briefly describes the function of the rule. The name cannot start with a numerical value, exceed 64 characters, or include any of the keywords listed in YARA's Writing YARA Rules documentation.
- (Optional) In the Description field, enter a description of your rule. As a best practice, we recommend that you enter a description of the rule's intended function. The description cannot exceed 64 characters.
- In the Edit Tags: section, add a custom tag that you would like to see attached to a message if the message matches this specific rule. To add a tag, click Add new tag and enter a name for your tag. Then, click outside of the Add new tag field to create the tag.
- From the Choose target: drop-down menu, select the part of the message you would like the rule to be applied to or run on. The targets you can select are Raw, Headers, Body, or Attachments. By default, Raw will be selected.
- In the Yara Rule Editor section, write your rule using either the Basic Editor or the Advanced Editor. For more information, see the subsections below.
Creating Rules Using the Basic Editor
The Basic Editor allows you to create a custom rule without writing all of the YARA rule logic. You can enter values for strings and select conditions for your rule, and the Basic Editor will process your input to create the rule logic for your rule. To learn how to create a rule using the Basic Editor tab, see the screenshot and list below:

- Basic Editor: Select this tab to display the options you can use to create a rule.
- Create Strings: Create and define strings to use when creating your conditions. For more information, see our How Do I Create Strings and Conditions in the Basic Editor? article.
- New String: Click this button to add a string to the rule. You can create up to five strings per rule.
-
Create Conditions: Create conditions by selecting how your defined strings should relate to each other. Conditions allow you to specify what messages you want your rule to affect. For more information, see our How Do I Create Strings and Conditions in the Basic Editor? article. You can select from the following options:
- Match any of the defined strings: Select this option to detect messages that match any of your defined strings.
- Match all of the defined strings: Select this option to detect messages that match all of your defined strings.
- Custom conditions: Select this option to detect messages that match your custom conditions.
- New Condition Group: If Custom conditions is selected, you can click this button to create custom conditions that messages must meet to be affected by the rule.
-
Save Rule: Click this button to save your rule. Your rule will display on the Rules List page under the Custom Rules subtab. After saving your rule, you can enable your rule by turning on the toggle under the rule's Status column. Then, click on the Apply Changes button in the top-right corner of the page.

- Apply Rule to Inbox: Click this button to run your rule against all of the messages in your Inbox. At least one message must match your rule and preview rule criteria for this option to become available.
Creating Rules Using the Advanced Editor
The Advanced Editor allows you to write the logic of your YARA Rule without guidance. If you edit a rule in the Advanced Editor, the Basic Editor will be disabled for the rule. To learn about writing rules with YARA rule logic, see our How to Write YARA Rules article. To learn how to create a rule using the Advanced Editor tab, see the screenshot and list below:

- Advanced Editor: Select this tab to display the code block section where you can write a rule with YARA rule logic.
-
Save Rule: Click this button to save your rule. Your rule will appear on the Rules List page under the Custom Rules subtab. After saving your rule, you can enable your rule by turning on the toggle under the rule's Status column. Then, click on the Apply Changes button in the top-right corner of the page.
- Apply Rule to Inbox: Click this button to run your rule against all of the messages in the Inbox. At least one message must match your rule and preview rule criteria for this option to become available.
Creating Rules Using the YARA Rule Generator
The YARA Rule Generator allows you to create a custom rule by describing what you want the rule to do. You can enter the detection requirements for your rule, and the YARA Rule Generator will process your input to create the rule logic for your rule. To learn how to create a rule using the YARA Rule Generator tab, follow the steps below:
To create a rule, follow the steps below:
- Log in to your PhishER console.
- From the sidebar on the left side of the page, select the Rules tab to open the Rules List page.
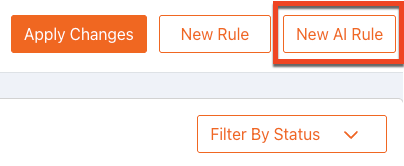
- Click the New AI Rule button at the top-right corner of the page to open the Rule Details page.
- In the Describe your detection requirements field, enter a description of the rule you want to create.

- Click Generate Rule. The YARA Rule Generator will convert your detection requirements into a PhishER rule with a name, description, tag, and complete YARA syntax.
- You can edit the generated rule as needed. Then, click Save Rule to save your rule.
Previewing Rules
Before you save a new rule, we recommend previewing how the rule will affect your PhishER messages. To preview a rule, follow the steps below:

- Log in to your PhishER console.
- From the sidebar on the left side of the page, select the Rules tab to open the Rules List page.
- Click the New Rule button in the top-right corner of the page or select a rule on the Rules List page. When you click the New Rule button, the Rule Details page will open.
- Write or modify your YARA rule using the YARA Rule Editor section.
- Before saving your rule, click the Run Preview button. A list will display of all the messages in your Inbox that match your rule.
Note:PhishER will only check up to the last 1000 messages for a rule preview. If a message that matches the rule isn't within the last 1000 messages, it will not be included in the preview.
- You can update the preview list by modifying the following criteria options:
- Saved Query (Optional): Choose a custom Saved Query to see how the rule affects messages in that query.
- Last 7 days: Select a date range for the messages you would like to preview. The options are Last 24 hours, Last 7 days, and Last 30 days: By default, Last 7 days will be selected.
- Matched Messages: If you preview a rule, additional options will display to filter the messages in the preview list.
- Matched Messages(default): Select this option to only display messages in your PhishER Inbox that match the condition of the rule.
- Unmatched Messages: Select this option to only display messages in your PhishER Inbox that do not match the condition of the rule.
-
All Messages: Select this option to display all messages in your PhishER Inbox. The Matched column will indicate if the message matched (true) or did not match (false) the rule.
 Note:If you would like to open a message displayed in the preview list, we recommend you open the message in a new tab to avoid losing your new rule.
 - (Optional) If you would like to run this rule against all of the messages in the preview list, click the Apply Rule to Current Matches button.

Editing Rules
To edit a custom rule, click on the Name or Description of the rule from the Rules List page to open the Rule Details page. If you would like to edit a system rule, create a new custom rule. Then, copy and paste the logic of the system rule into the Yara Rule Editor of the custom rule. For more information about the system rules, read the Using System Rules section of this article.
Using Global Variables
From the Global Variables subtab of the Rules List page, you can create global variables or view the global variables you've created. If you use multiple rules with the same strings, you can use global variables to update all of these strings at once.
You can include global variables in rules by using the Basic Editor or the Advanced Editor to create strings containing global variables. If you edit a global variable, the rule will be automatically updated in all the rules that include the global variable.
To create a global variable, follow the steps below:
- Log in to your PhishER console.
- From the sidebar on the left side of the page, select the Rules tab to open the Rules List page.
- Navigate to the Global Variables subtab.

- Click the New Variable button at the top-right corner of the page. When you click this button, the Create Global Variable page will open.
- In the Name field, enter a name for the global variable.

- In the Value field, enter a value for the global variable.
Note:Global variables must meet the same requirements that apply to other variables and strings. The value cannot start with a numerical value, exceed 255 characters, or be one of the keywords listed in YARA's Writing YARA Rules documentation.
- Click Save to save your global variable. The global variable will appear on the Rules List page under the Global Variables subtab.
On the Rules List page, you can view information about the global variable, such as when the global variable was created and last updated. You can also edit a global variable’s value by clicking on the variable’s name to open the Edit Global Variable screen. The name of an existing global variable can’t be changed. If you would like to delete a global variable, click the trashcan icon.
To learn how to create a rule using global variables, see our How Do I Create Strings and Conditions in the YARA Rule Basic Editor? article.
Using System Rules
Your PhishER console provides system rules to help you disposition and tag messages. From the System Rules subtab of the Rules List page, you can enable these rules for your PhishER console. By default, the system rules are disabled.
For more information about system rules, view the screenshot and list below:

| Rule Name | Rule Description |
|---|---|
| KB4:COMMUNICATION | This rule detects messages that contain common words for the Subject or From fields in phishing attempts that are about communication. |
| KB4:NON_ENGLISH | This rule detects messages that contain common words for the Subject or From fields in phishing attempts that are not in English. |
| KB4:URGENCY | This rule detects messages that contain common words for the Subject or From fields in phishing attempts that reflect urgency. |
| KB4:SECURITY | This rule detects messages that contain common words for the Subject or From fields in phishing attempts that are about security issues. |
| KB4:SHIPPING | This rule detects messages that contain common shipping words for the Subject or From fields in phishing attempts. |
| KB4:FINANCIAL | This rule detects messages that contain common financial words for the Subject or From fields in phishing attempts. |
| KB4:BILLING | This rule detects messages that contain common billing words for the Subject or From fields in phishing attempts. |
| KB4:GENERAL | This rule detects messages that contain common general words for the Subject or From fields in phishing attempts. |
| KB4:BRANDS | This rule detects messages that contain common brand words for the Subject or From fields in phishing attempts. |
| KB4:419SCAM | This rule detects messages that contain common words for the Subject or From fields in 419 scams (also known as Nigerian Prince scams). |
| KB4:KSAT_HEADERS_TRAINING | This rule detects training notification messages that contain KnowBe4 headers. |
| KB4:KSAT_HEADERS_PST | This rule detects Phishing Security Test (PST) messages that contain KnowBe4 headers. |
| KB4:SPF_PASS | This rule detects messages that pass SPF checks. |
| KB4:DKIM_PASS | This rule detects messages that pass DKIM checks. |
| KB4:JAPANESE | This rule detects messages that contain common words for the Subject or From fields in phishing attempts that are in Japanese. |
QR Code Decoder Tags
The QR Code Decoder is a PhishER feature that operates in the background of your console to automatically scan for QR codes in reported emails. When the QR Code Decoder detects a QR code in the body of a message, it extracts the URL embedded in the QR code and assigns a tag to the message. The extracted URL will be displayed in the Domains and URLs tab on the Message Details page of your PhishER Inbox. For more information about the QR Code Decoder tags, view the list below:
| Tag Name | Tag Description |
|---|---|
| QR_CODE_FOUND | This tag is attached to a message when the QR Code Decoder detects a QR code in the body of the message. |
| QR_CODE_SCAN_FAILED | This tag is attached to a message when the QR Code Decoder is unable to scan a message. For example, a scan will fail if a QR code does not contain an embedded URL. |
Viewing the Rules List
The Rules List displays all of your rules and global variables. To learn more about the Rules List page, see the screenshot and list below.

- Name: This column displays the name assigned to the rule.
- Description: This column displays a description of the rule.
- Rule Target: This column displays the part of a message the rule is run against. For example, the rule target could be the email header.
-
Status: This column displays the current state of the rule. A rule can be enabled or disabled. To change the status of a rule, click the toggle.
Note:For a rule to run against messages in your PhishER Inbox, the rule must be enabled.
- Updated At: This column displays the date and time when the rule was last updated.
- Matched Count: This column displays the number of times the rule matched a message in your PhishER Inbox.
- Tags: This column displays all of the tags attached to a message. Tags will only be attached to a message if the message matches the rule.
- Filter by Status: Click this drop-down menu to select a filtered view of your enabled or disabled rules.