Follow the steps below to configure single sign-on (SSO) with Google Workspace. Enabling SSO will allow your users to automatically log in to the KSAT console for their security awareness training using their Google account.
To enable SAML SSO, you’ll need to set up SSO within your Google Workspace account, then upload the resulting certificates into your KSAT console. Finally, you’ll configure the certifications in your Google Workspace account.
Configure SSO
To configure SSO with Google Workspace, follow the steps below.
Prerequisites
Before you configure SSO with Google Workspace, make sure you gather the following information from your KSAT console by following the steps below:
- Log in to your KSAT console.
- Select your email address in the top-right corner and select Account Settings.
-
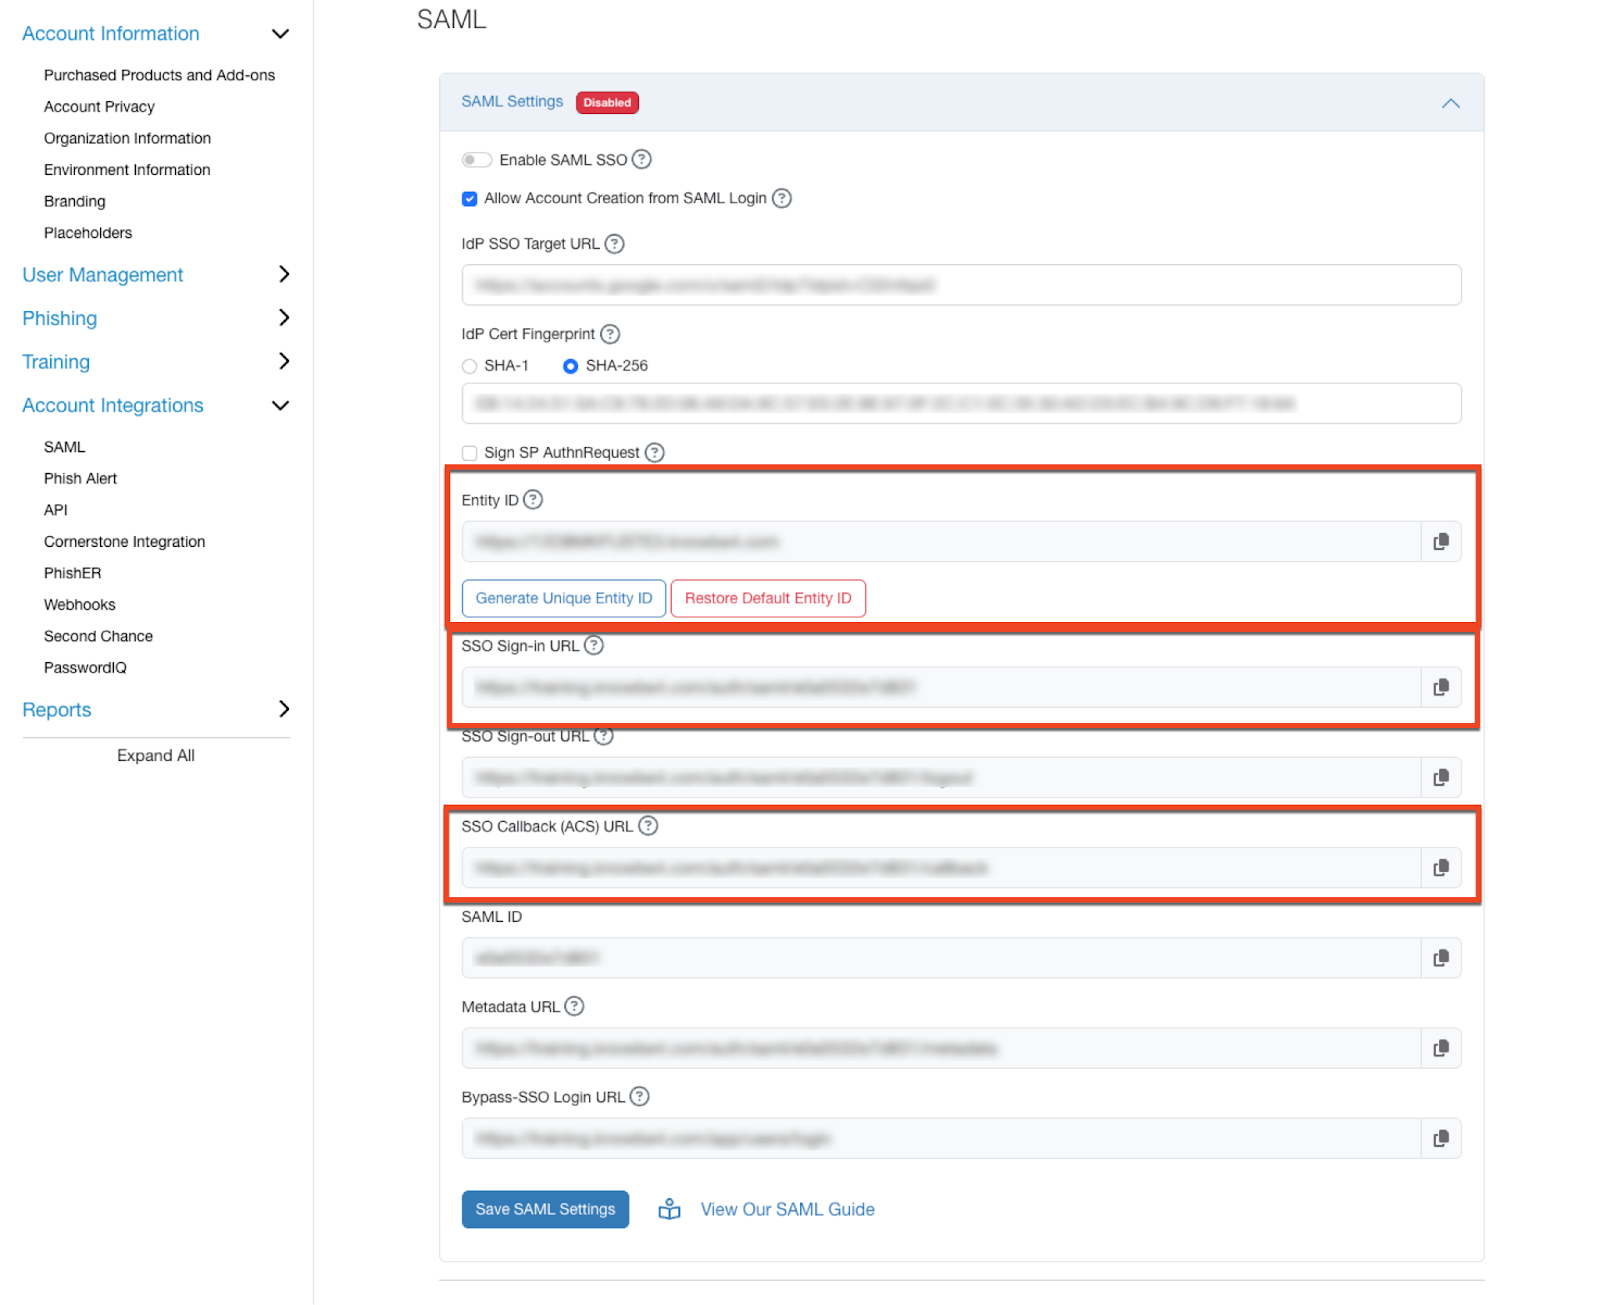
Navigate to Account Integrations > SAML > SAML Settings. Copy the Entity ID, SSO Sign-in URL, and SSO Callback (ACS) URL, and save them in a place you can easily access later.
Configure SSO with Google Workspace
After you’ve gathered the information in the section above, you can configure SSO with Google Workspace by following the steps below.
- Log in to your Google Workspace Admin console Google Workspace Admin console (link opens in new window).
-
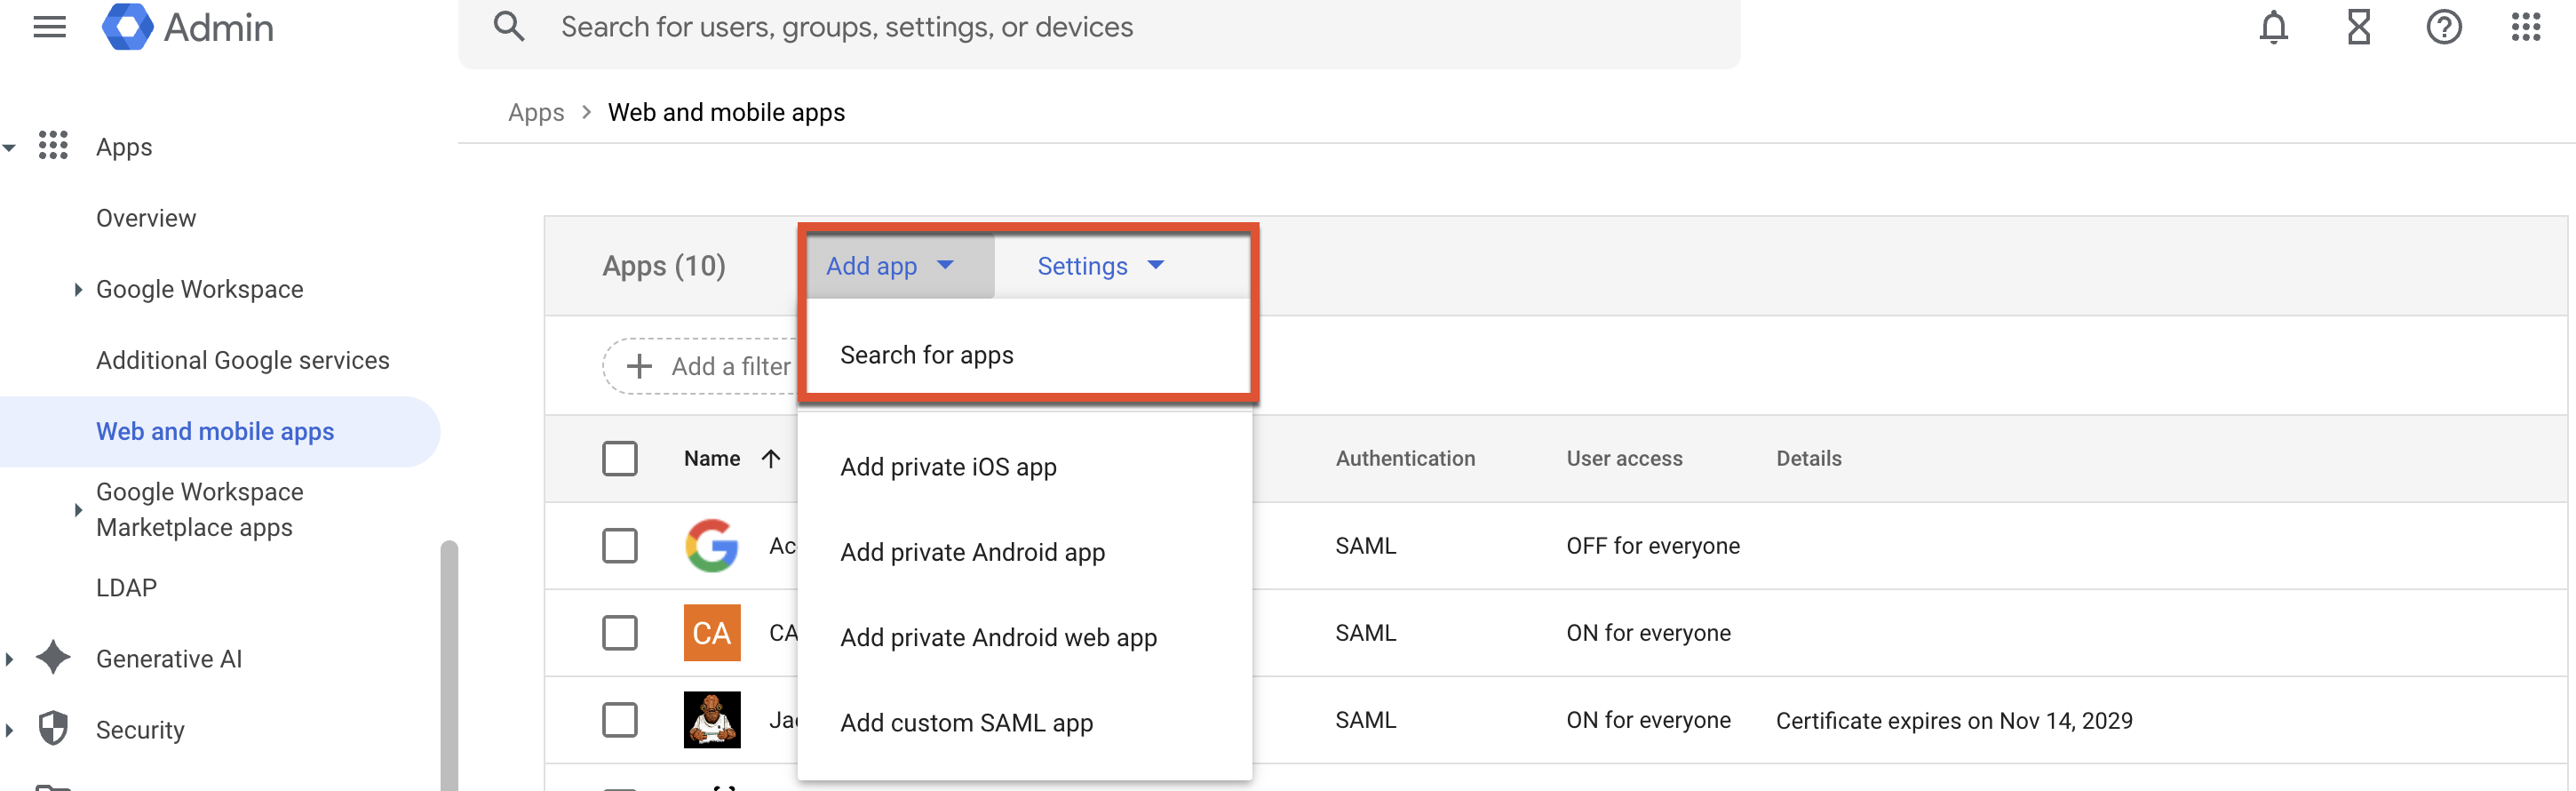
Navigate to Apps > Web and mobile apps.
Note:You must be a super admin with the Mobile Device Management Mobile Device Management (link opens in new window) administrator privilege in order to access the Web and mobile apps section.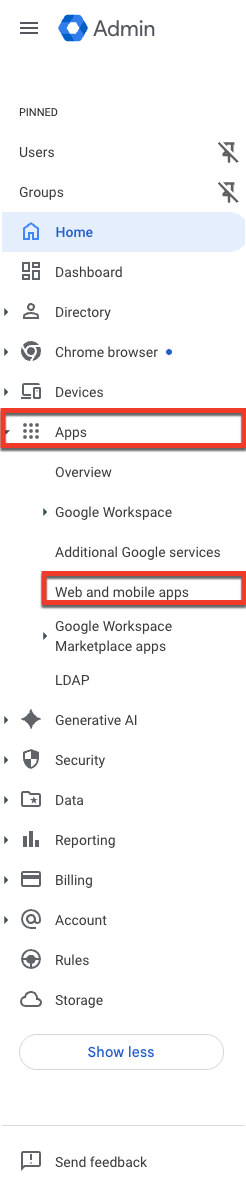
-
Select the Add app drop-down menu, then select Add custom SAML app.

- Enter “KnowBe4” as the App name. Select Continue.
-
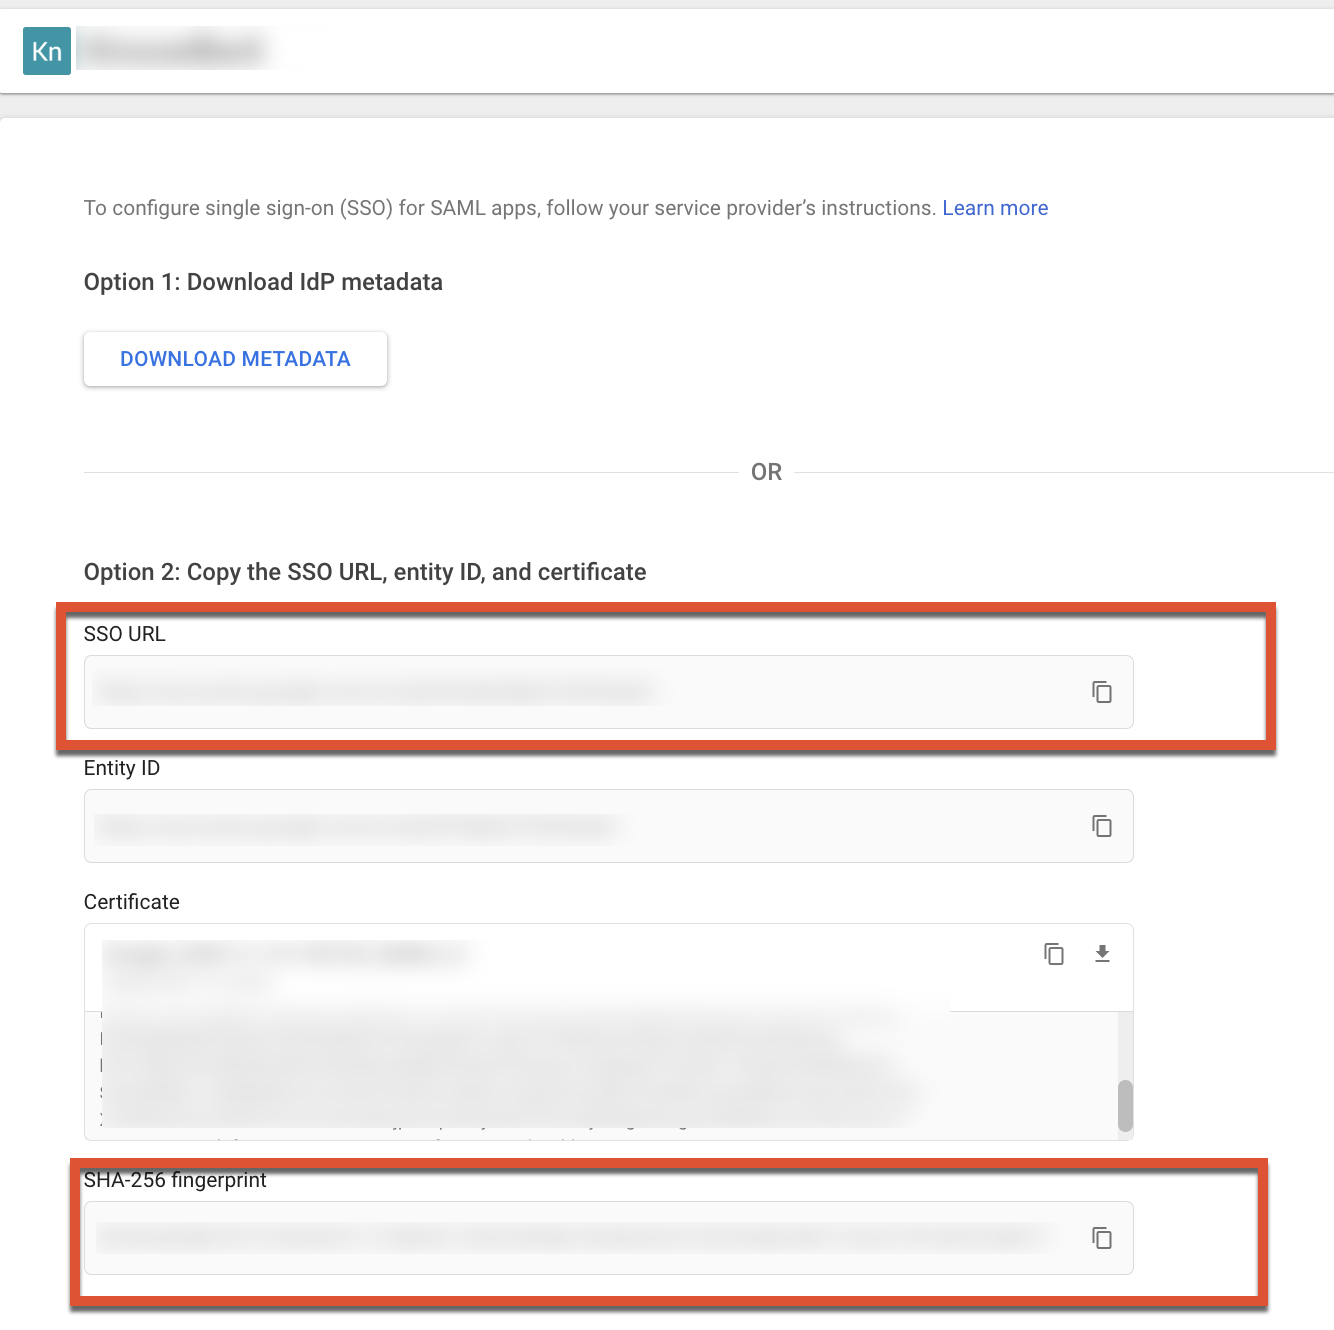
On the Google Identity Provider details page, copy the SSO URL and SHA-256 fingerprint and save them in a place you can easily access later. Then, select Continue.
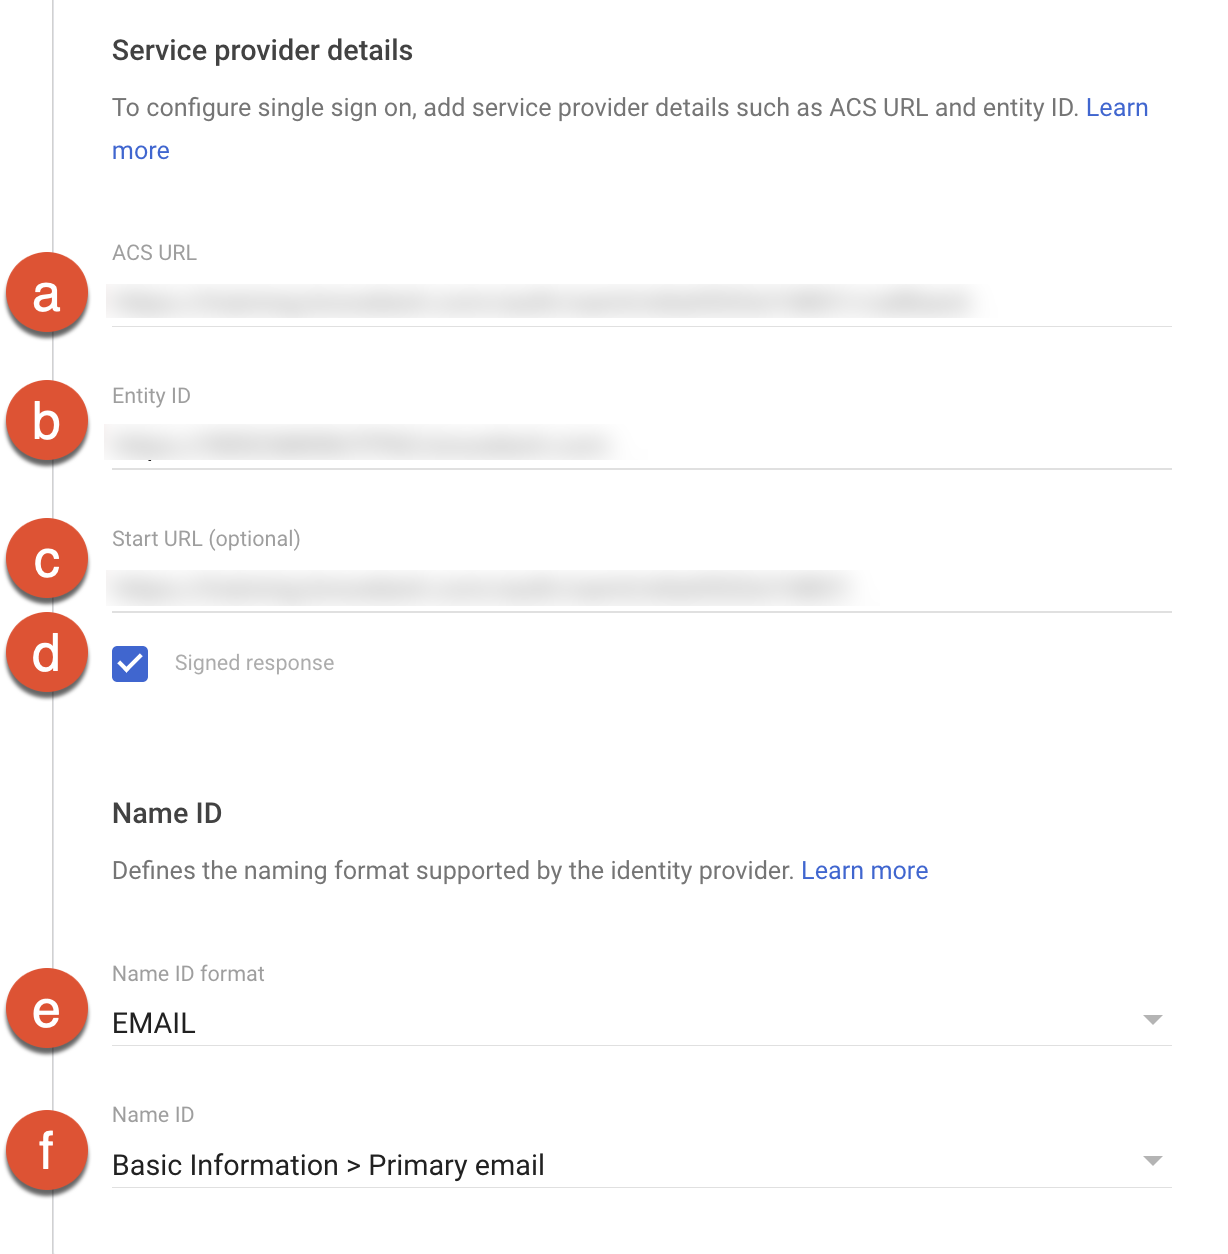
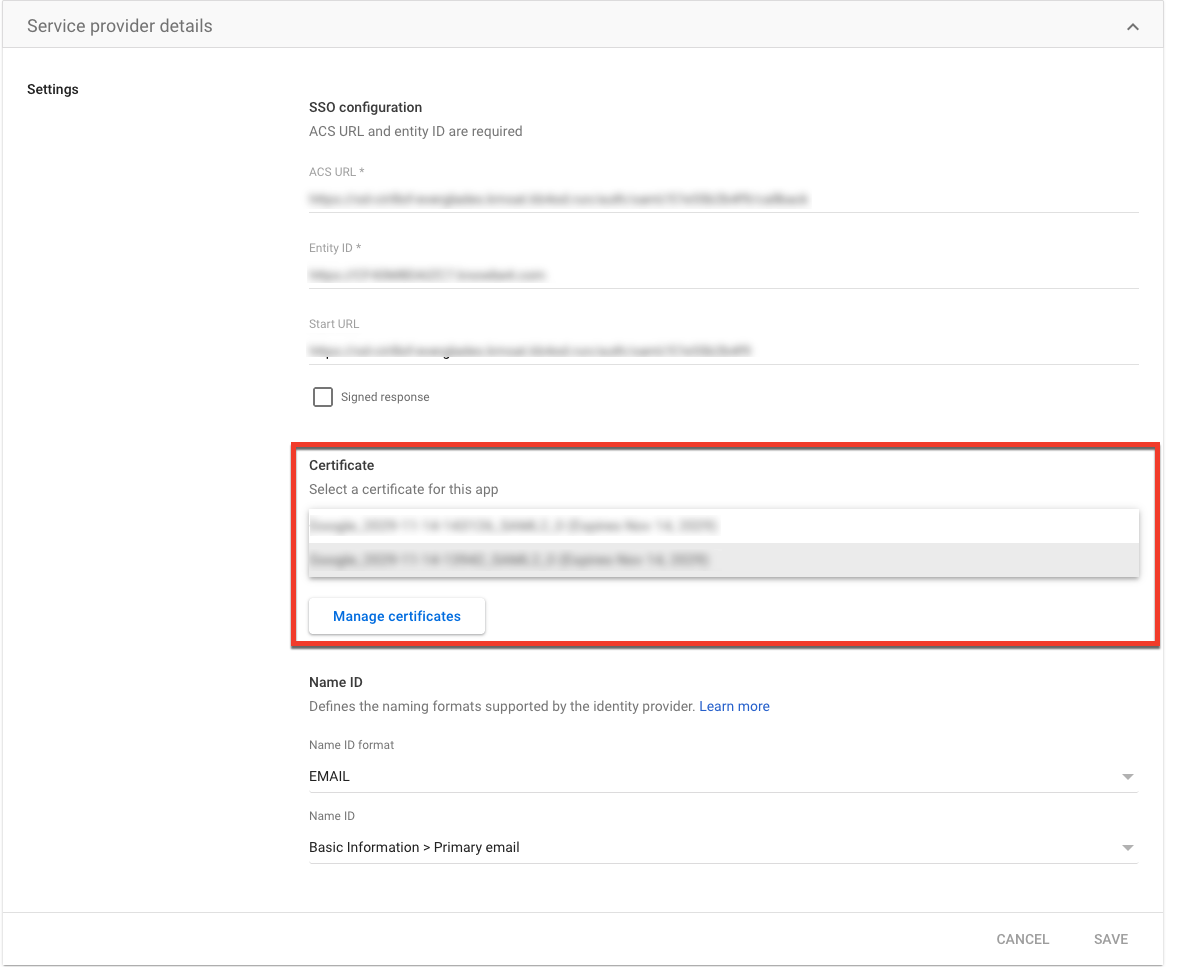
- On the Service provider details page, fill out the information to match the screenshot below:
- ACS URL: Paste the SSO Callback (ACS) URL that you copied earlier.
- Entity ID: Paste the Entity ID that you copied earlier.
- Start URL (optional): Paste the SSO Sign-in URL that you copied earlier.
- Signed response: Select this check box.
- Name ID format: Enter “EMAIL”.
-
Name ID: Select Basic information > Primary email.
- Select Continue.
- On the Attribute mapping page, navigate to the Google Directory attributes section and select Primary email.
- Select Finish.
-
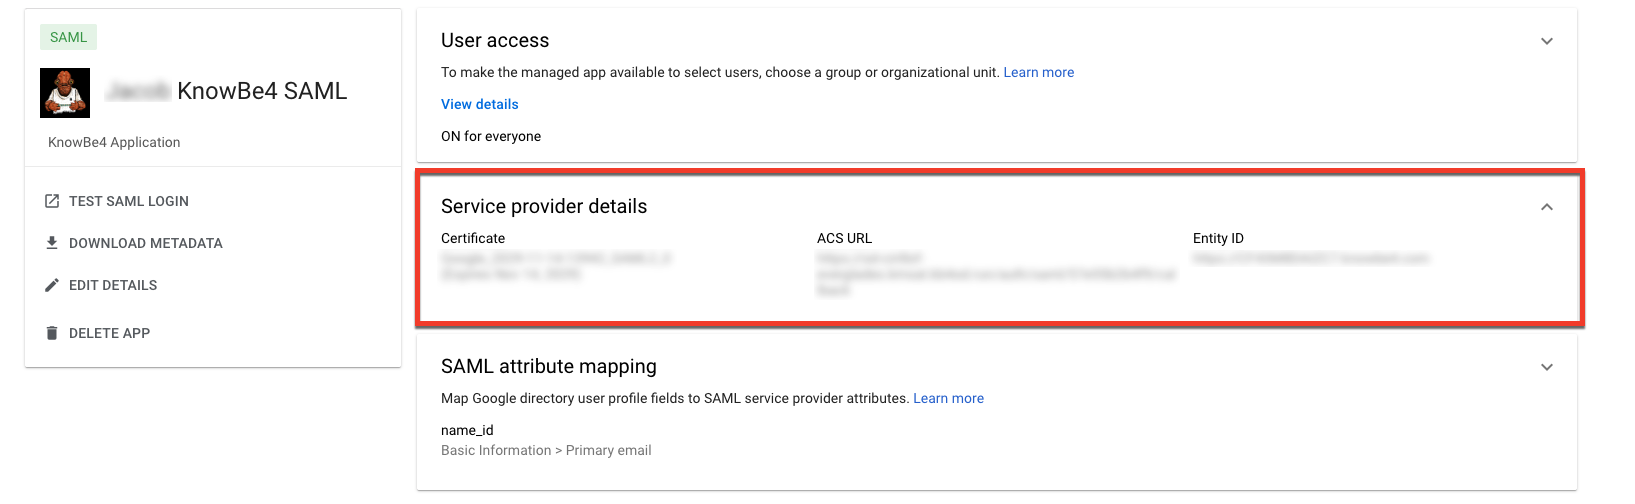
You will automatically return to the SAML app details page of your KnowBe4 app. In the User access section, select OFF for everyone.

- On the Service status page, select ON for everyone.
- Select Save.
Configure SSO with KnowBe4
After configuring SSO with Google Workspace, you'll need to add your SAML provider information to your KnowBe4 console.
- Log in to your KnowBe4 console.
- Select your email address in the top-right corner and select Account Settings.
- Navigate to the SAML section.
-
Expand the SAML Settings box.
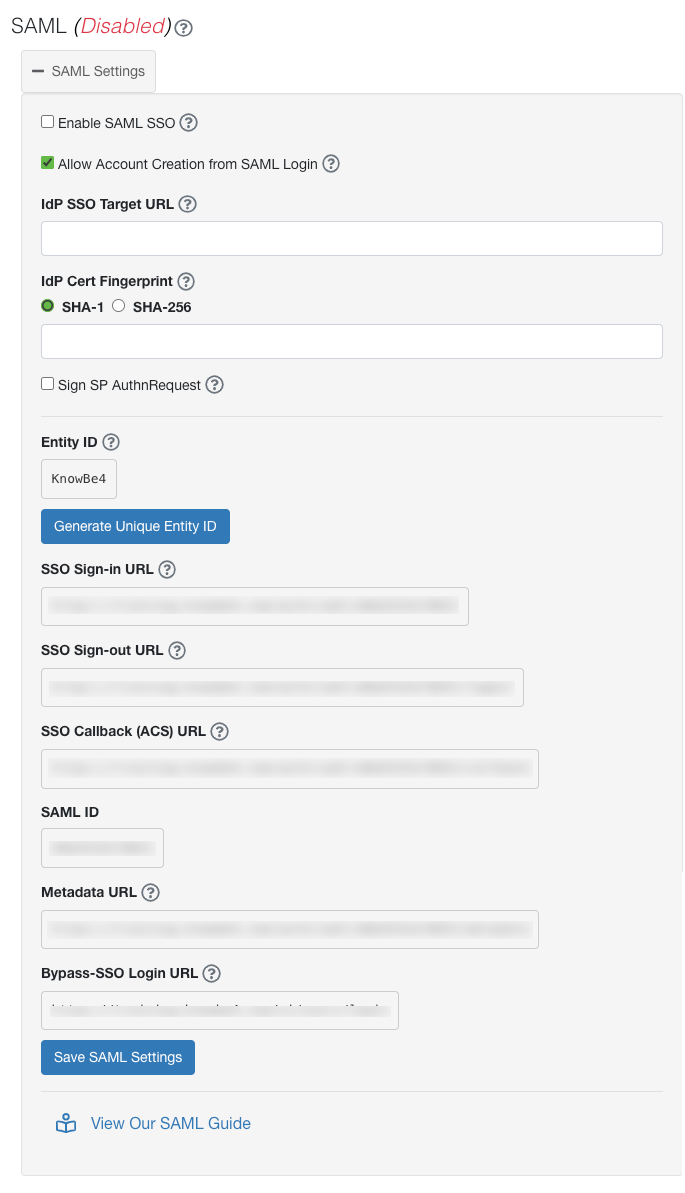
- Select the Enable SAML SSO check box.
- In the IDP SSO Target URL field, paste the SSO URL that you copied earlier.
- Select the SHA-256 button. By default, SHA-1 is selected. In the IdP Cert Fingerprint field, paste the SHA-256 Fingerprint that you copied earlier.
- Select Save SAML Settings.
If you need any additional assistance setting up SAML single sign-on with your Google Workspace, check out Google’s article to set up Google as a SAML identity provider.
Configure SAML Certificates
To configure SAML certificates with Google Workspace, follow the steps below.
- Log in to your Google Workspace Admin console Google Workspace Admin console (link opens in new window).
-
Navigate to Apps > Web and mobile apps.
Note:You must be a super admin with the Mobile Device Management Mobile Device Management (link opens in new window) administrator privilege in order to access the Web and mobile apps section. -
Select the Add app drop-down menu, then select Search for apps.
- Enter "KnowBe4".
-
On the KnowBe4 Web (SAML) app, select View app details.
 Note:If you don’t have KnowBe4 as a Web SAML app yet, follow the steps in the Configure SSO with Google Workspace section.
 -
Select the Service provider details section.
-
Select the Certificate drop-down menu and choose the certificate with the latest expiration date.
For further assistance with this feature, contact our support team contact our support team (link opens in new window).