KCM GRC's account settings area is where you can configure and customize several aspects of your platform. For instance, you can upload your organization's logo, choose a custom banner color for your email notifications, create custom categories for your Risk Register, and configure single sign-on for your account.
Navigating to Your Account Settings
There are six subtabs available on the View Account page of your KCM GRC platform. Each subtab offers different settings for your account.
To navigate to the View Account page, go to the top-right corner of the screen and click Settings > Account Settings, as shown below.
On the Account Overview subtab of the View Account page, you can see general information about your account. If you have questions about your account or if you need to modify the information on this subtab, please contact your Customer Success Manager or our support team.
See the following sections to learn about the additional subtabs of settings that are available on the View Account page.
Account Settings
From the Account Settings subtab, you can edit the settings for your account.
See the images and descriptions below for an explanation of the settings that are available under the Account Settings subtab.
Account Settings tab"
- Display Name: You can enter your organization's name in this field. The display name will display in the top-left corner of your account, next to the company logo you choose in step 3 below. The display name will also be included in any email notifications that are generated from your KCM GRC platform.
- Primary Color: Select a color to be the accent color in your KCM GRC notification emails. This is a great way to personalize your account to match your organization's branding.
-
Company Logo: Click Upload Logo or drag and drop a file to upload your organization's logo in this area. This logo will display in the top-left corner of your account. Your logo will also be included in any email notifications that are generated from your platform.
- The size specifications for this image are a 3:2 aspect ratio, with a maximum width of 240px and a maximum height of 160px.
- The logo file must be in JPEG, JPG, PNG, or GIF format.
-
Small Company Logo: This is where you can upload your organization's icon or mark. To upload an image, click Upload Small Logo or drag and drop a file in this area. This logo will display in the top-left corner of your account when the navigation sidebar is collapsed.
- The size specifications for this image are a 1:1 aspect ratio, with a maximum width of 50px and a maximum height of 50px.
- The logo file must be in JPEG, JPG, PNG, or GIF format.
-
Document Upload Allowed: Enabling this account-wide setting allows users to upload files to your platform. If you disable this setting, users will not have the option to upload policies or upload files as task evidence.
- You may want to disable this setting if your organization stores evidence on an internal network or uses a web-based file storage application.
Tip: As an alternative, you can restrict links or document uploads at the scope level or at the task schedule level. To learn more, see our How Can I Limit the Types of Evidence That Users Can Submit? article.
- You may want to disable this setting if your organization stores evidence on an internal network or uses a web-based file storage application.
-
Doculink Allowed: Enabling this account-wide setting allows users to provide links in your platform that point to externally hosted evidence or policies.
- If your organization chooses to store evidence on an internal network or uses a web-based file storage application, we recommend enabling this setting and disabling the Document Upload Allowed setting above.

- Enable Support: Enabling this setting allows our support team to view your account so they can better assist you.
- Session Timeout: From this drop-down menu, you can select the maximum amount of idle time you would like to allow before your users are logged out of their KCM GRC account.
-
Time Zone: Selecting your time zone in this drop-down menu will determine which time zone your policy management campaigns are scheduled in.
Note: All other dates and timestamps found in the console are based on Universal Time Coordinated (UTC).
-
Allowed IP Addresses: In this field, you can limit access to your KCM GRC platform by specifying the IP addresses that are allowed to access your account. For multiple entries, use commas to separate each IP address.
Tip: As an alternative, you can set up SAML single sign-on to increase the security of your account. This alternative is especially recommended if you are adding a Vendor User user role or an Auditor user role to your account. For details, see our How to Set up SAML/SSO for KCM GRC article.
- Domain Whitelist: This area dsiplays a list of the allowed domains for the users that you will add to your account under the Policy Management module in order to send policy acknowledgment campaigns. To add a policy end user to your account, they must have an email address with an allowed domain. If you need to add additional domains to your account, contact our support team.
-
Secure MFA Login: Enabling this account-wide setting mandates multi-factor authentication (MFA) for all users who log in to KCM GRC, regardless of their user role.
- Selecting Mandatory will require all users to set up MFA the next time they log into their account. Make sure your users have downloaded an authenticator application on their smartphones prior to making this change. See our How to Enable and Configure Multi-Factor Authentication (MFA) for KCM GRC for more information about configuring MFA in KCM GRC.
Tip: As an alternative to mandating MFA for all users, navigate to a user profile to require MFA on an individual user account. This is the best practice recommendation if you are adding a Vendor User user role or an Auditor user role to your account. For more information, see our How to Enable and Configure Multi-Factor Authentication (MFA) for KCM GRC article. -
Task Fail Interval: From this drop-down menu, specify the number of days after the due date that you would like your control tasks to remain in past due status before the tasks change to the failed status. For more information, see our How to Work with Tasks for Controls article.
Note: You can still complete a task once it reaches the failed status. However, the task will show a completed late status instead of a satisfied status.
When you are finished making changes, be sure to click the Save button at the bottom-right corner of the Account Settings section, as shown below.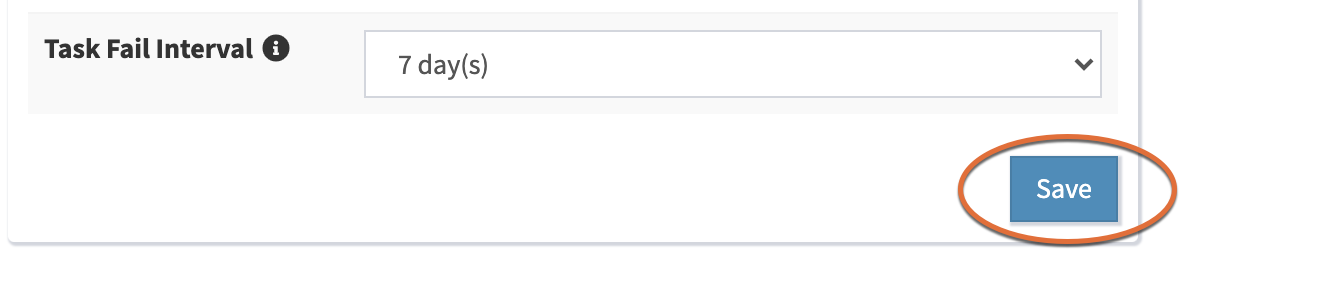
In addition to the settings outlined above, you will also see the Effective Date Range Settings section under the Account Settings subtab. Effective date range (EDR) is an optional feature that you can use with your task schedules. If you utilize EDR, you are choosing to show the time period that is covered by the task. Click the drop-down menu to learn more about the settings under this section.
-
By default, EDR may be disabled in your account. If you would like to enable this feature, turn on the Allow Effective Date Range in task schedules toggle.If EDR is enabled, you can optionally modify the Due After settings, which are shown below. For task schedules using EDR, the Due After settings shown below display the default amount of time that your users will have to submit evidence before the task is considered past due.
 Note: If you alter the default Due After settings on this page, the due after time interval can be modified when you are creating task schedules for controls. Therefore, it is not necessary for you to update these settings, here. For more information, see our How to Work with Tasks for Controls article.
If you make changes to these settings, be sure to click the Save button on the bottom-right corner of the page, as shown above.

Tags
From the Tags subtab, you can create tags to categorize similar items in your account.
You can create tags for the following items in KCM GRC: templates, requirements, scopes, scope requirements, controls, and risks.
Follow the steps below to create a new tag:
- Click the Create button toward the top-right side of the Tags subtab.
- In the Tag Name field, enter your tag. Tags can have a maximum of 25 characters.
- Click the Type drop-down menu and select the type of item that this tag will be used for.
To add a new tag to an existing item in your account, navigate to the item (such as a scope, template, or control), then click the Update button. From the Tags field, you can select or search for tags that match the item type.
Risk Settings
By default, there are six categories included in your Risk Register. If you would like, you can add custom categories to your Risk Register from the Risk Settings subtab.
From the View Account page, click the Risk Settings subtab, as shown below.
To learn how to manage your custom categories, see the details outlined below:
- Add a Category: Type the name of your category into the Category Name field; add a description in the Category Description field; then, click the +Add button.
- Delete a Category: Click the trashcan icon next to the category you want to delete.
- Edit a Category: Click the pencil icon next to the category that you wish to edit.
SSO Settings
The KCM GRC platform supports SAML 2.0, so your users can quickly and easily log in to KCM using your organization's single sign-on (SSO) or identity provider (IdP) without having to set up or use a password.
The SSO Settings subtab is where you will find the information that you need to set up SAML with your SSO provider. You will also need to add your SSO provider's information to this area to configure and test the SAML authentication. 
To see the full instructions for setting up SAML or SSO for your KCM GRC account, please refer to one of the following resources:
- How to Set Up SAML/SSO for KCM GRC
- How Do I Configure SSO/SAML for KCM GRC with OneLogin?
- How Do I Configure SSO/SAML for KCM GRC with Active Directory Federation Services (AD FS)?
Integrations
From the Integrations subtab, you can view and configure available integrations. To configure or update an integration, click the Open button.
For more information about integrations, see our KCM GRC Integrations article.