This article will show you how to create a custom policy and describe each component of the DLP Rule Builder.
Overview
The DLP Rule Builder allows you to create policies that monitor and nudge your users' outgoing emails based on your own criteria.
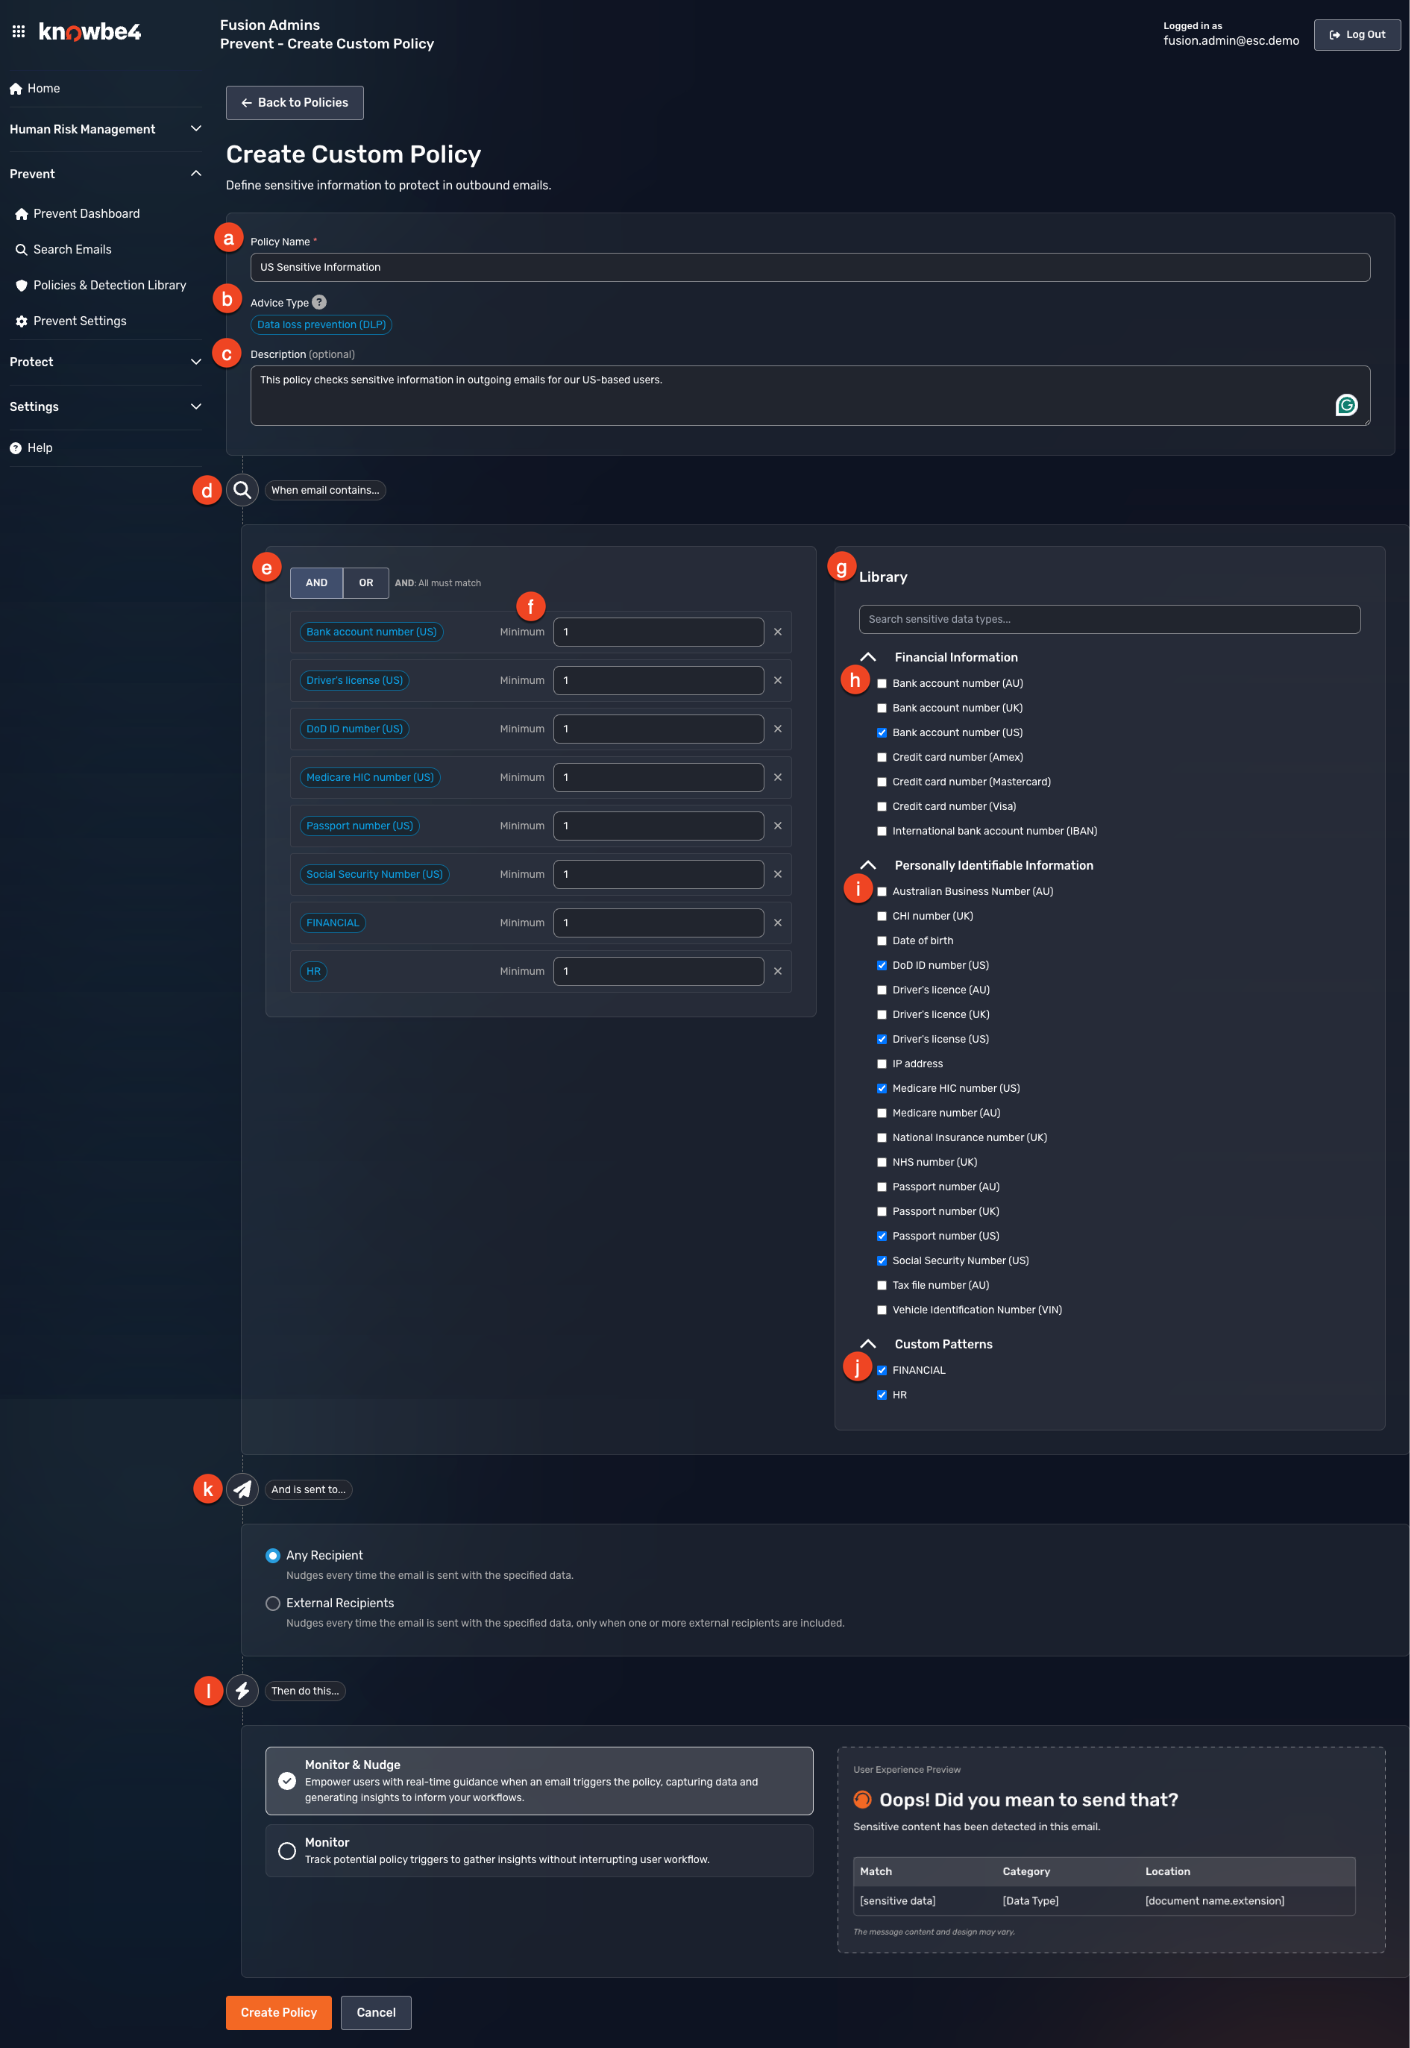
- Policy Name: Enter a name for your custom policy. The policy name helps you identify your policy.
- Advice Type: The category that identifies which type of policy triggered an event in reporting. DLP rules you create using the DLP Rule Builder are categorized as DLP in the Advice Type filter in the Prevent reporting console.
- Description (optional): In this field, you can enter a description for your policy. Use this field to note the policy's purpose or scope.
- When email contains…: In this section, you can select the conditions that trigger your policy. The sensitive information types selected determine which outgoing emails your policy will evaluate. The left side will display the sensitive data types you've added to your policy from the Detection Library on the right side.
- AND | OR: Select AND if you want all of the sensitive data types to match for your policy to trigger. Select OR if you want any of the sensitive data types to match for your policy to trigger.
- Minimum: Choose how many times you want the sensitive information to appear in a single email for your policy to trigger. This value must be a minimum of "1" and a maximum of "10". Increasing this value can help reduce false positives.
- Library: Select from pre-built and your custom patterns to add sensitive data types to your policy.
- Financial Information: Includes sensitive financial information such as credit card numbers, bank account details, and financial identifiers.
- Personal Identifiable Information: Includes personally identifiable information (PII) such as Social Security numbers, dates of birth, and other identifying details.
- Custom Patterns: Here, you can select any of the custom patterns that you've created using the custom pattern builder. For more information, see our Prevent - Custom Pattern Builder User Guide.
- And is sent to: Define which recipients will trigger your policy. You can either choose Any Recipient or External Recipient Only.
- Then do this: Select whether you want your policy to Monitor and Nudge or only Monitor when your policy triggers.
Creating a Custom Policy
To create a Custom Policy in Prevent, follow the steps below:
- Log in to your Prevent console.
- Select Policies & Library from the left menu on the left side of the page.
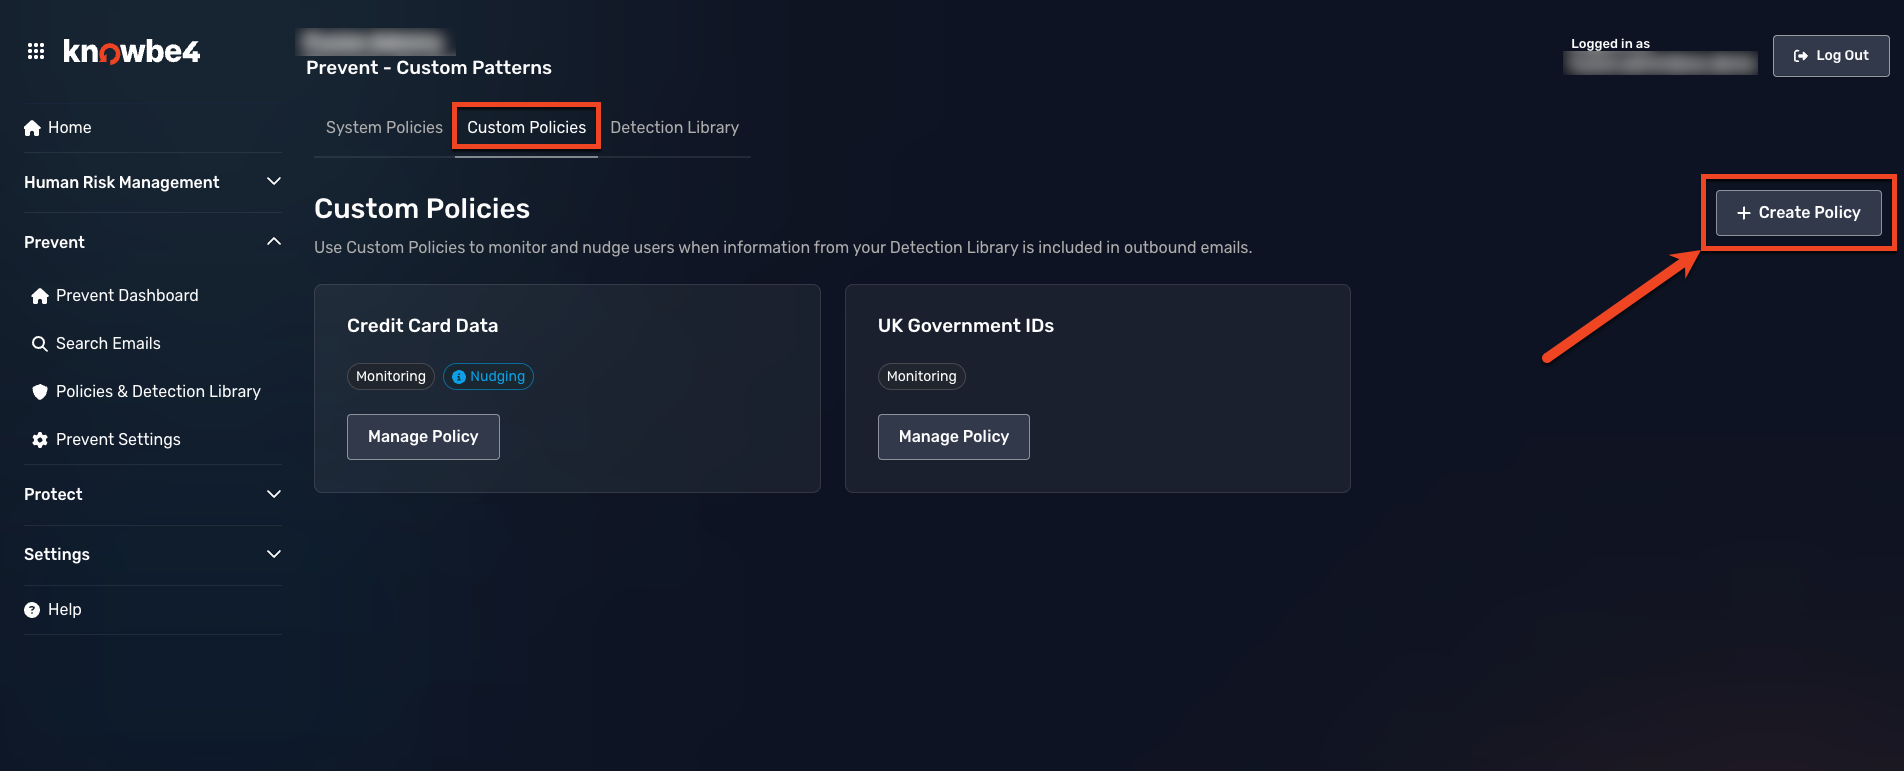
- Select the Custom Policies tab.
-
Click + Create Policy.
- In the Policy Name field, enter a name for your policy.
- (Optional) In the Description field, enter a description for your policy.
- Under When email contains…, select the conditions that will trigger your policy.
- Click Library to browse available sensitive information types.
- Select Financial Information, Personal Identifiable Information, or Custom Patterns to add those types to your policy.
- Repeat this step for each sensitive information type you want to include.
- Under And is sent to, select either Any Recipient or External Recipient Only.
- Under Then do this, select the action Prevent should take when your policy triggers.
- Click Create Policy.
Your new custom policy is now active and will evaluate outgoing emails based on the criteria you configured.