A zone in Workspace is a secure area designed for uploading, sharing, and collaborating on files with both internal and external recipients. This article provides a simple guide on how to create a new zone, allowing you to set a title, description, classification, and watch status for your secure workspace.
To create a Workspace zone, follow the steps below:
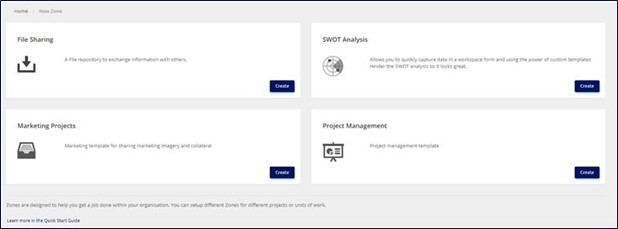
- Navigate to your Workspace and select My Zones > New Zone.
-
Select a zone template and select Create.
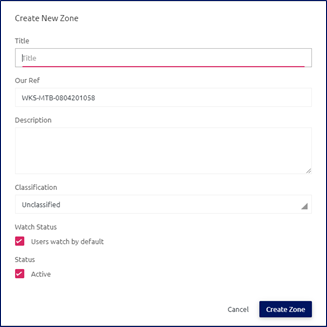
- In the dialog box that displays, enter a title and a description for the new zone.
-
Use the drop-down menu to select the classification of the zone. The options include Unclassified, Official, Secret, or Top Secret.

- Select the Watch Status check box to set if users watch the zone by default.
-
Activate the zone by selecting the Active check box at the bottom of the page. Leaving this option unchecked will place the zone in the archive. Archiving a zone preserves it in a read-only state.

-
To complete the zone creation, select Create Zone. To cancel the zone creation, select Cancel.
Zone templates can be customized according to specific requirements and may have different names and functionalities. The admin can make some basic changes to the template, such as editing the name and description, by using the admin panel.