You can integrate your Boomi Boomi (link opens in new window) platform into your KSAT console. Boomi allows you to connect applications, automate data flows, manage APIs, and orchestrate processes. Boomi utilizes KnowBe4’s Graph APIs to enable automated security awareness training workflows and data management, including groups, users, phishing, and training.
For more information about Boomi, visit its website website (link opens in new window).
Before You Connect Boomi to Your KSAT Console
Before integrating Boomi into your KSAT console, you must find your API address, create a Product API token, and set up a Runtime on your Boomi platform. See the sections below to complete these actions.
Finding Your KnowBe4 API Address and Token
To find your KnowBe4 API address and token, follow the steps below:
-
Your API address depends on where your KnowBe4 account is located. Please see the table below to find the API address for your region.
Region Base URL US https://us.api.knowbe4.com CA https://ca.api.knowbe4.com EU https://eu.api.knowbe4.com UK https://uk.api.knowbe4.com DE https://de.api.knowbe4.com - Log in to your KSAT console as an admin.
- Navigate to Account Settings in the top-right corner under your account’s email address.
- In Account Settings, navigate to Account Integrations.
- Under Product API, select Product API. The Product API subtab will open.
- At the top-right corner of the Product API subtab, select + Create New API Token.
- Fill out the fields on the Create New API Token page.
- Select Create Token. The Product API Token pop-up window will open.
- Select the Product API token to copy the token. Be sure to save your copied API token in a location that you can easily access. After you close this window, you will not be able to view this token again.
For more information about creating a Product API token, please see our Product API Overview article.
Setting Up A Runtime in Your Boomi Platform
To set up a runtime in your Boomi platform, follow the steps below:
- Log in to your Boomi platform as an admin.
-
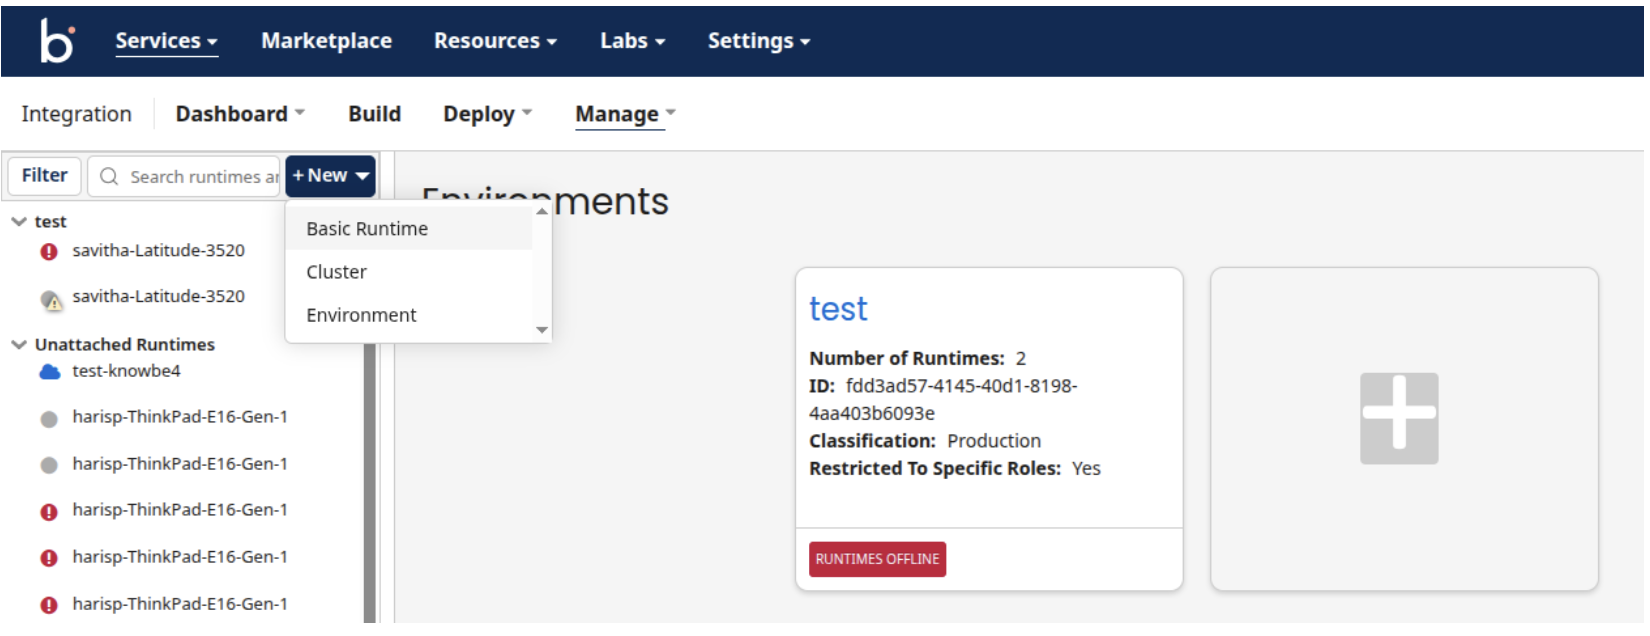
In the top menu, navigate to Manage > Runtime Management.

-
On the following screen, navigate to New > Basic Runtime.
- You can set up Runtime locally or in a cloud service.
Setting Up A Local Runtime
To set up runtime locally, follow the steps below:
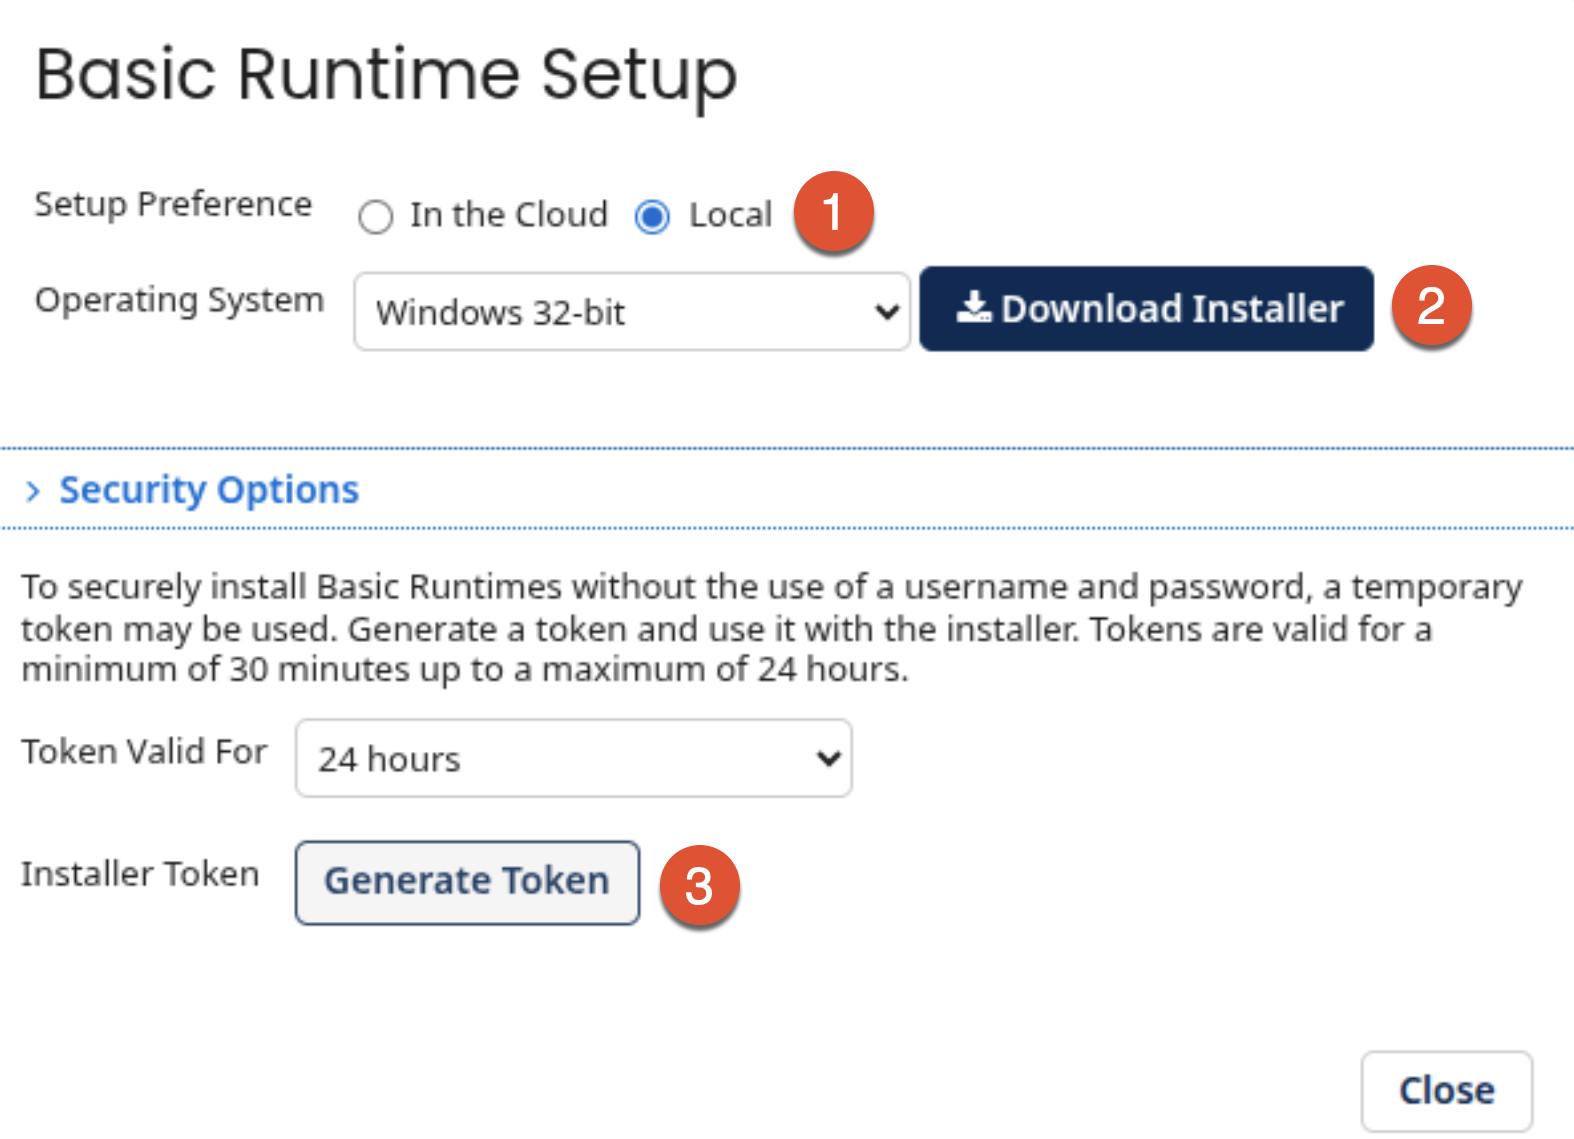
- In the Setup Preference section, select the Local option.
- Then, choose your Operating System and select Download Installer.
-
Under Security Options, select Generate Token.
-
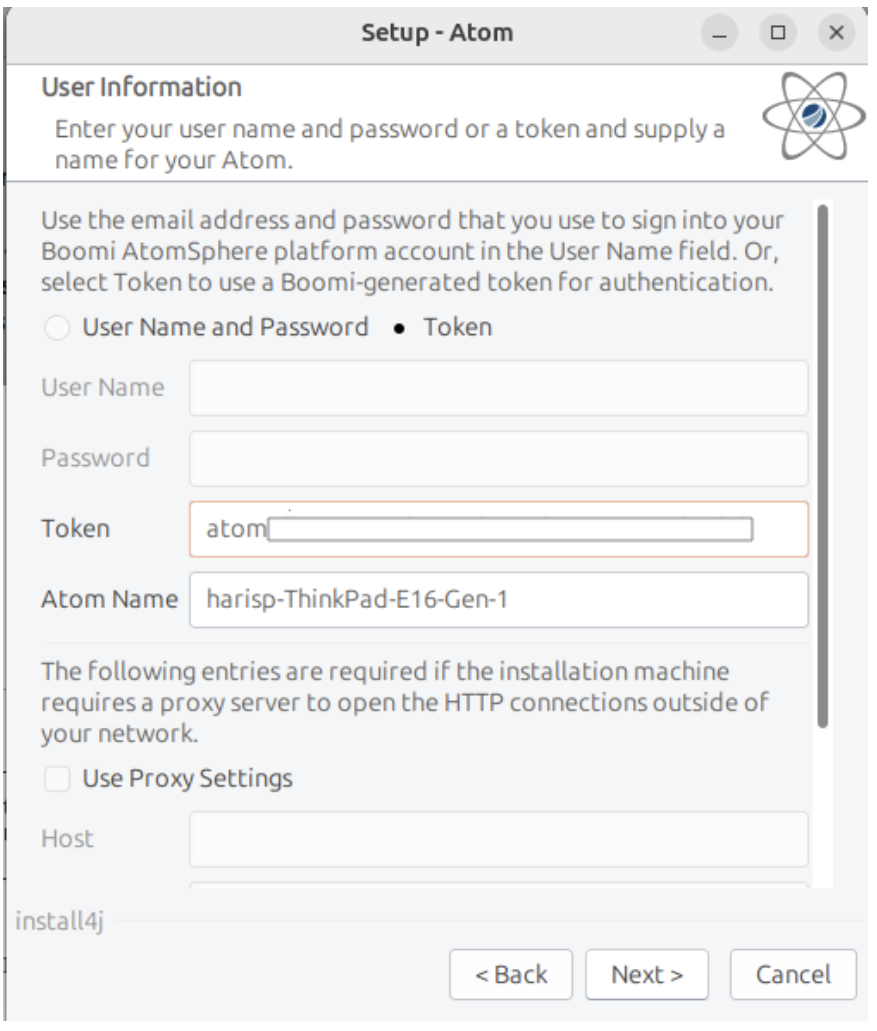
When you run the downloaded file, an Atom Setup Wizard will appear.
-
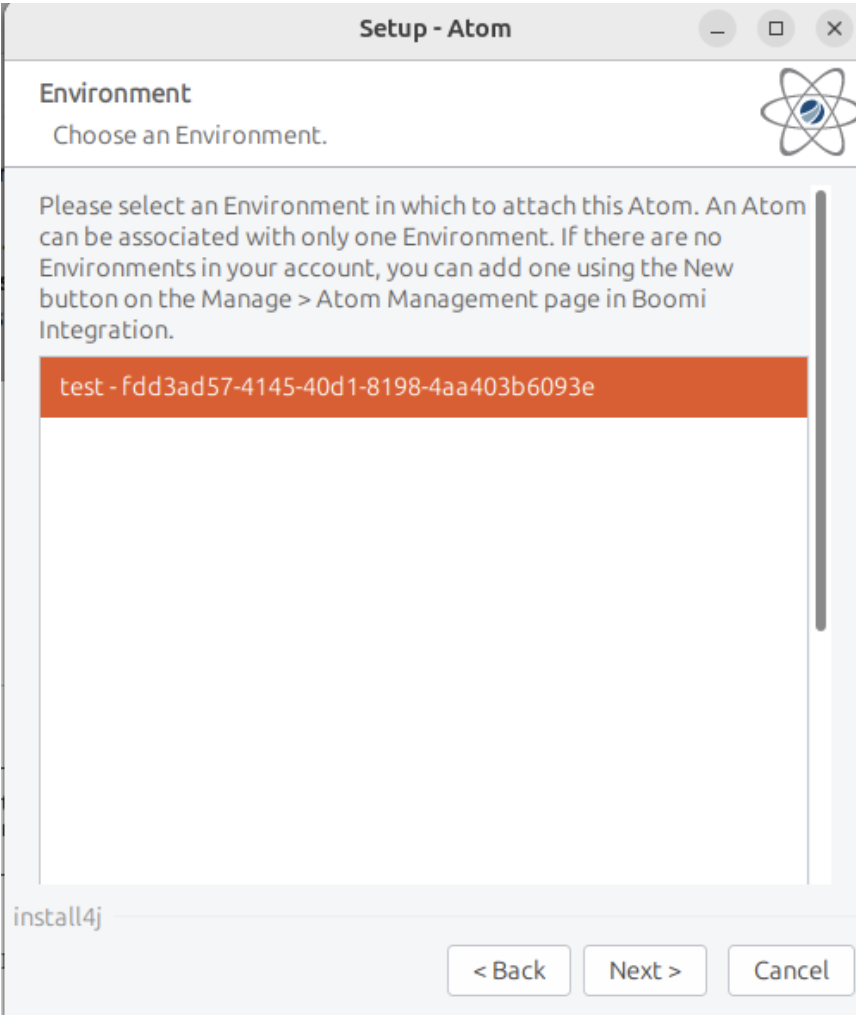
In the Wizard, you will enter the token you just created and choose an environment.
-
When finished, you should see the Runtime you created in the Runtime field.
Setting Up A Runtime In A Cloud Service
To set up Runtime in a cloud service, follow the steps below:
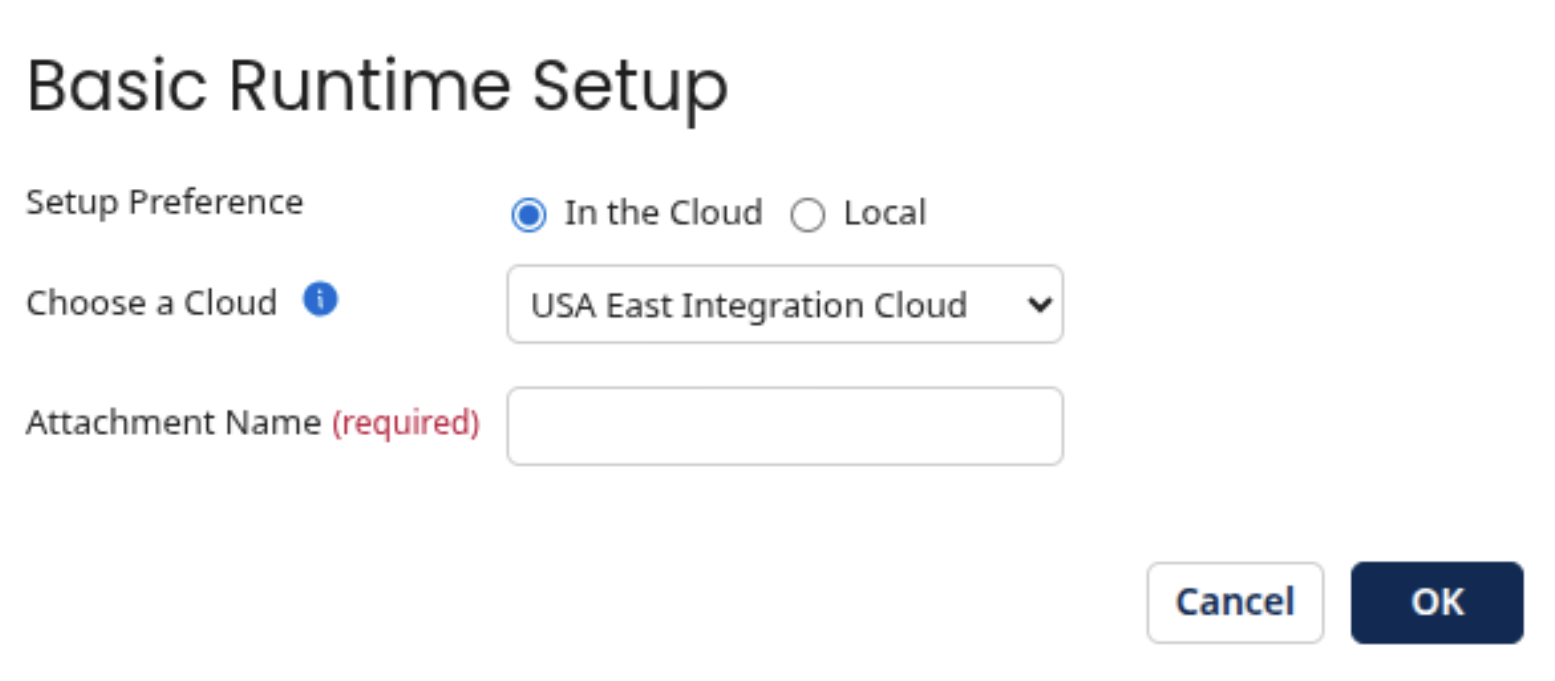
- In the Setup Preference section, select the In the Cloud option.
-
When you have chosen your desired cloud service, select OK.
To configure authentication in Boomi, log in to Boomi AtomSphere Boomi AtomSphere (link opens in new window).
Connecting Boomi to Your KSAT Console
You can connect your Boomi platform to your KSAT console by following the steps below.
-
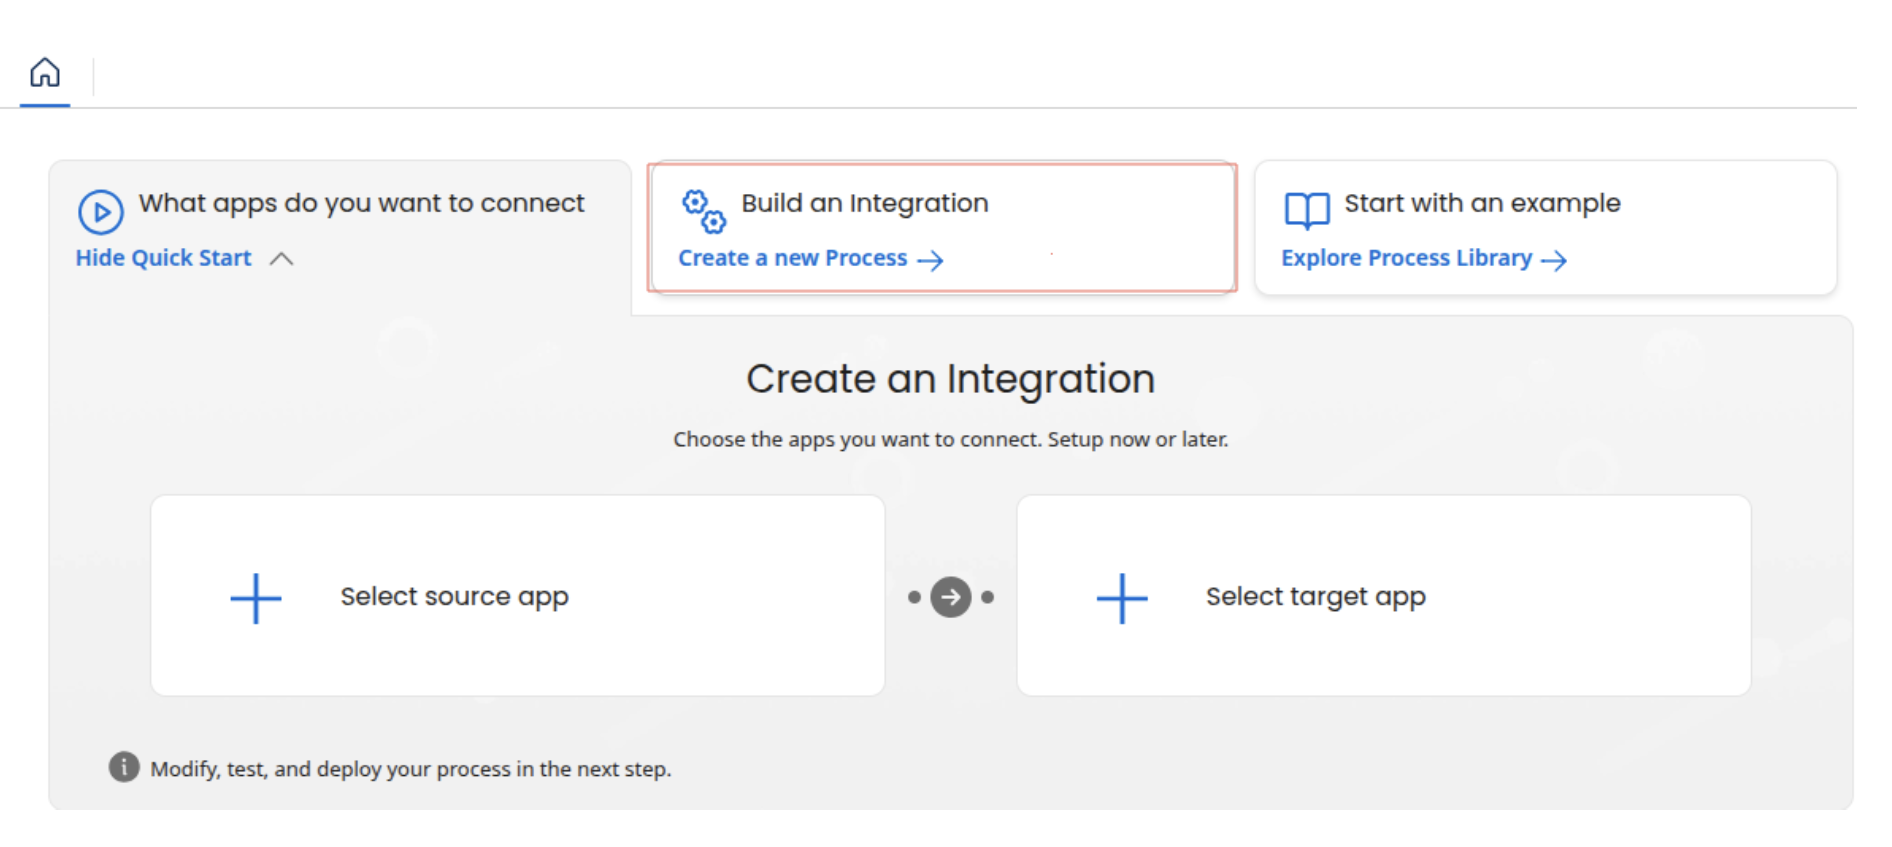
Under Build an Integration, select Create a new Process.
-
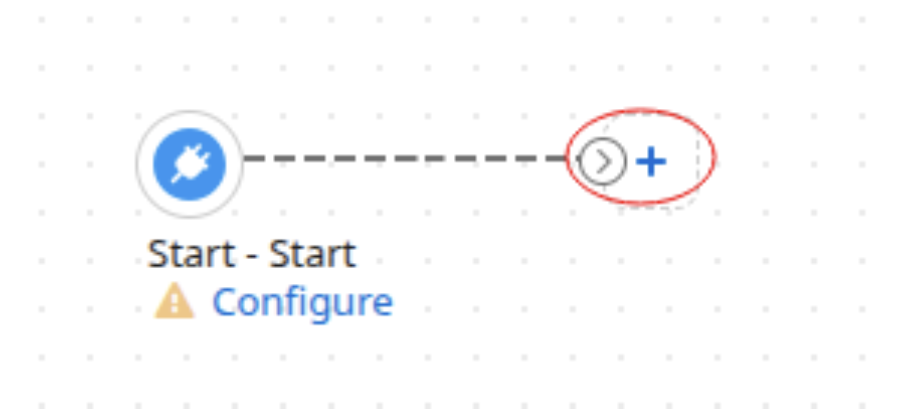
On the following screen, choose the connector by selecting the + icon and providing the connector’s name.
-
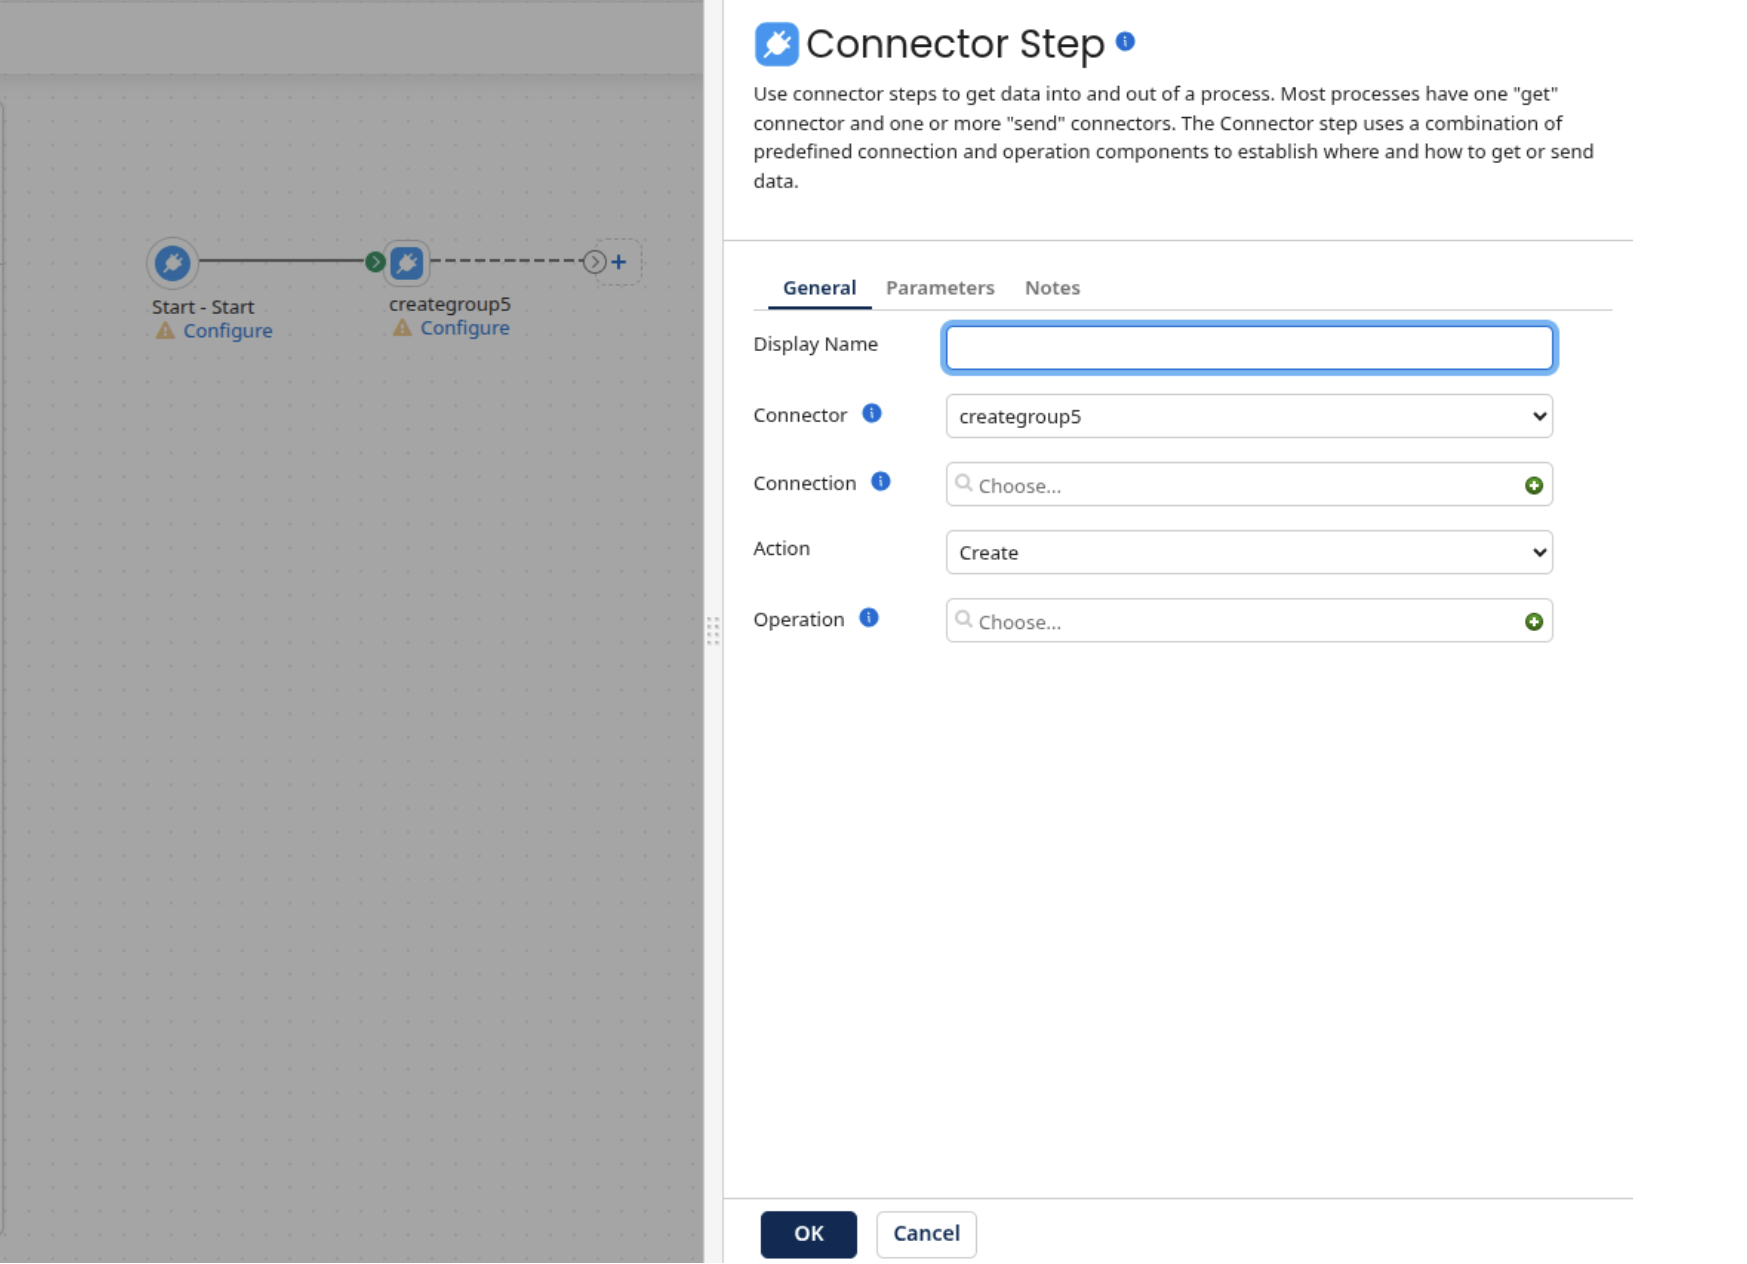
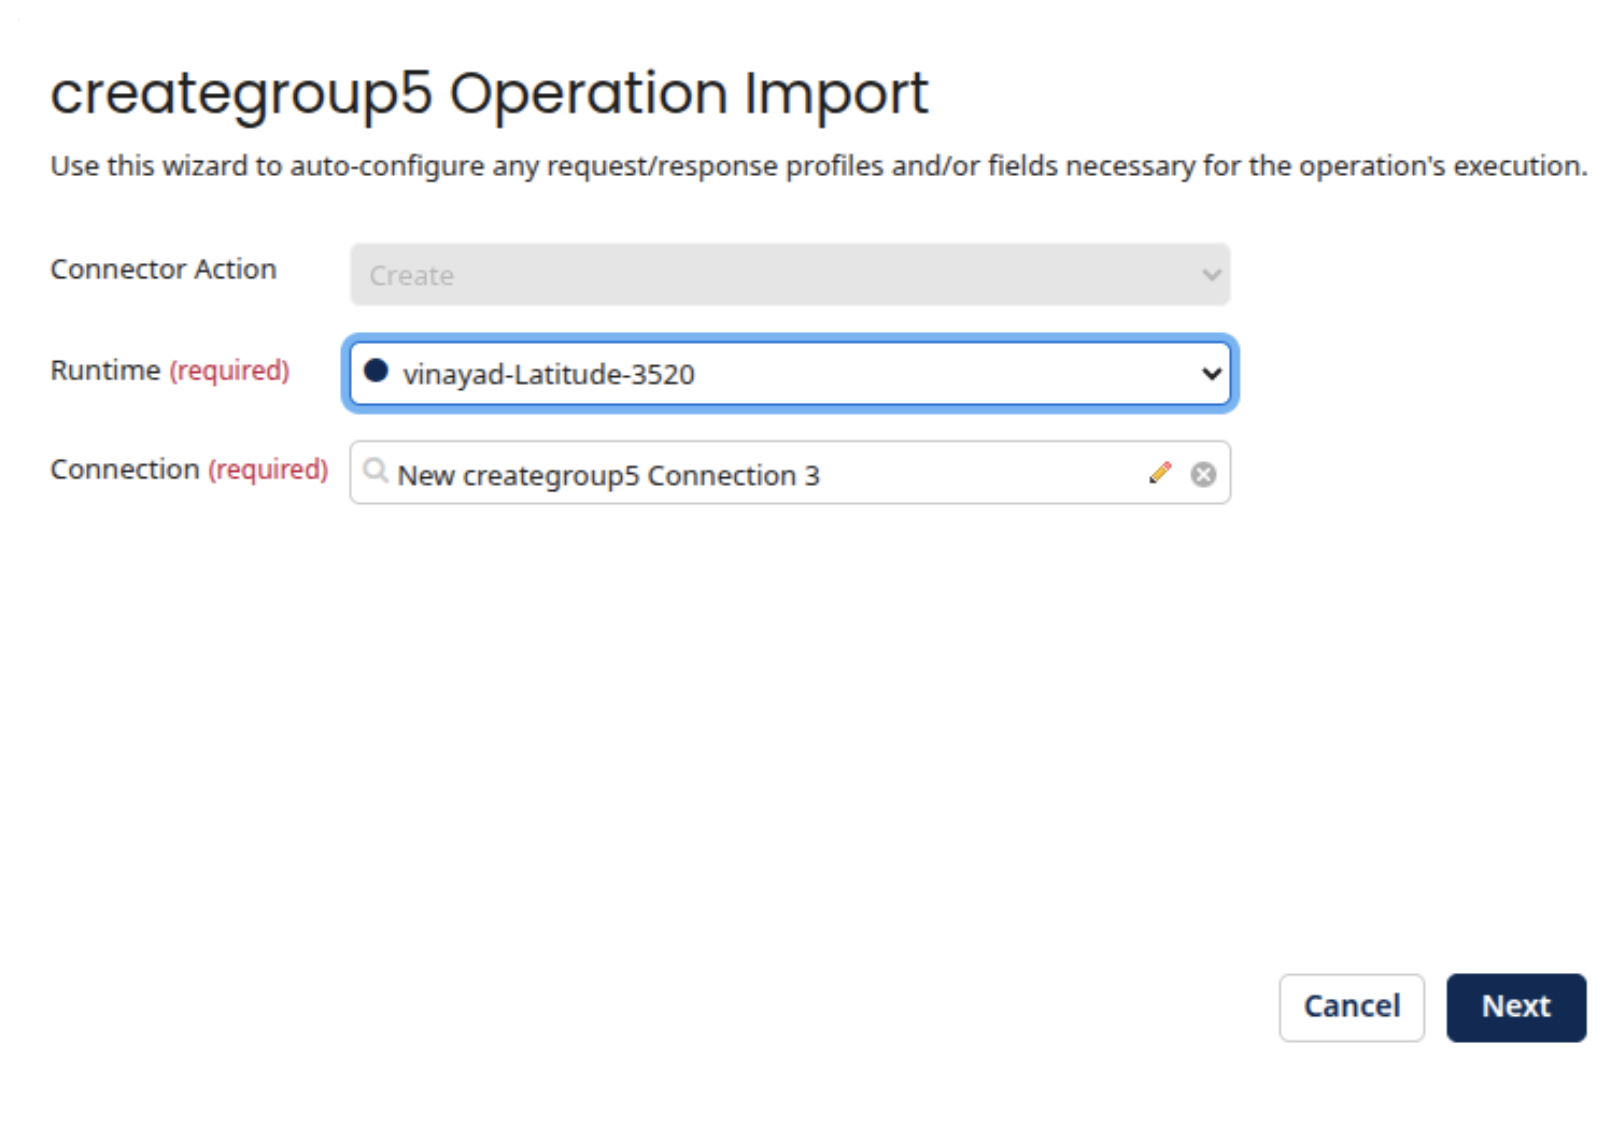
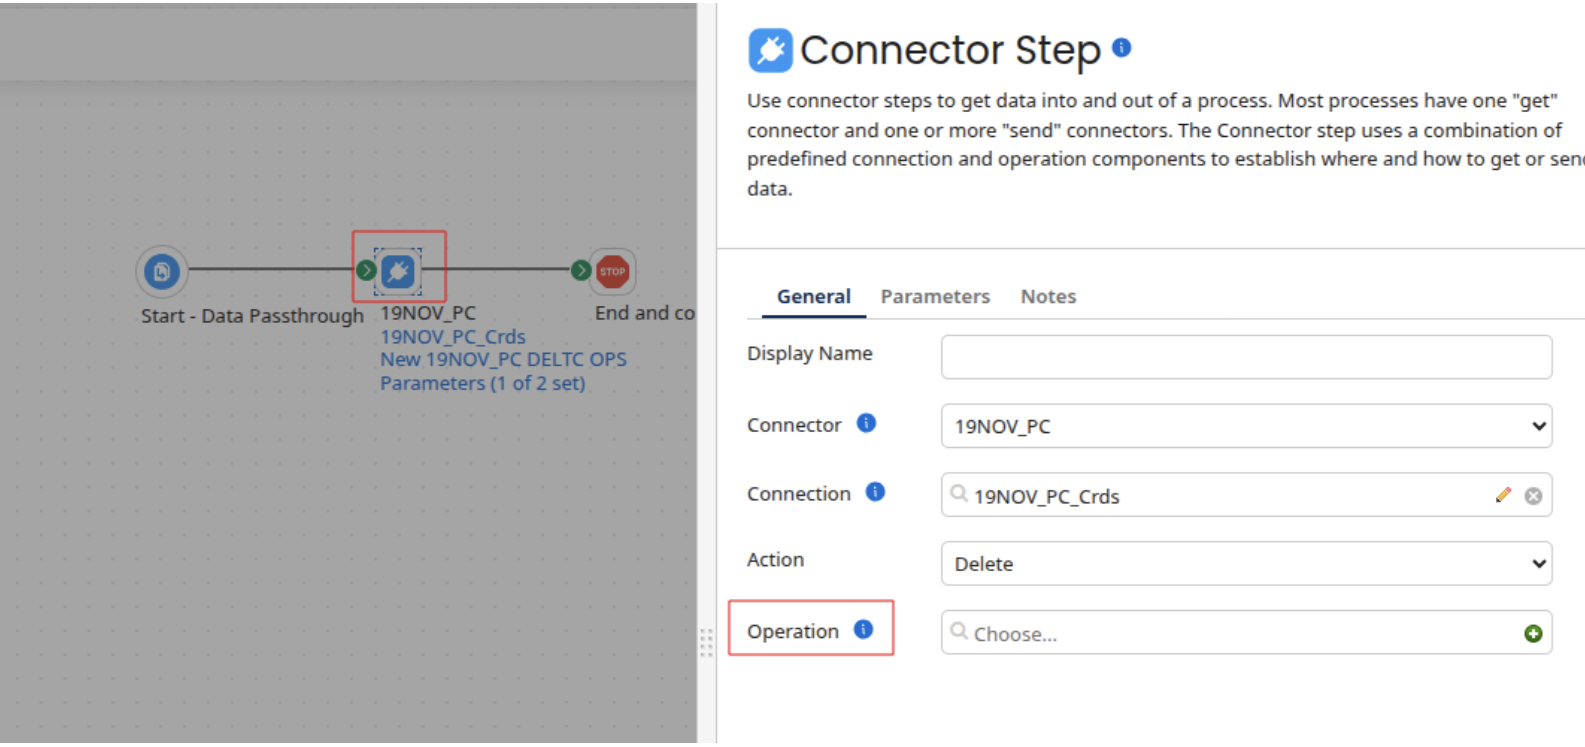
On the Connector Step screen, you will begin configuring your connector. Select the + icon in the Connection field.

-
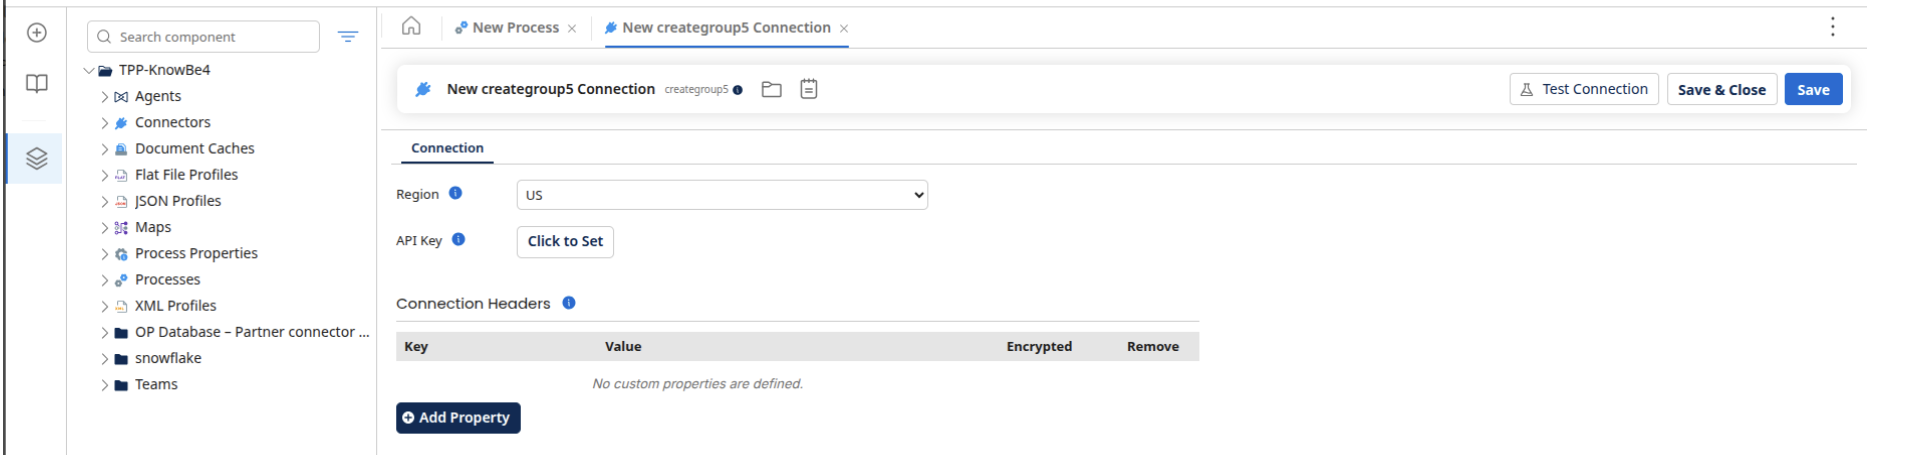
Select your Region, enter the KnowBe4 Product API token from the previous steps, and then select Save & Close.
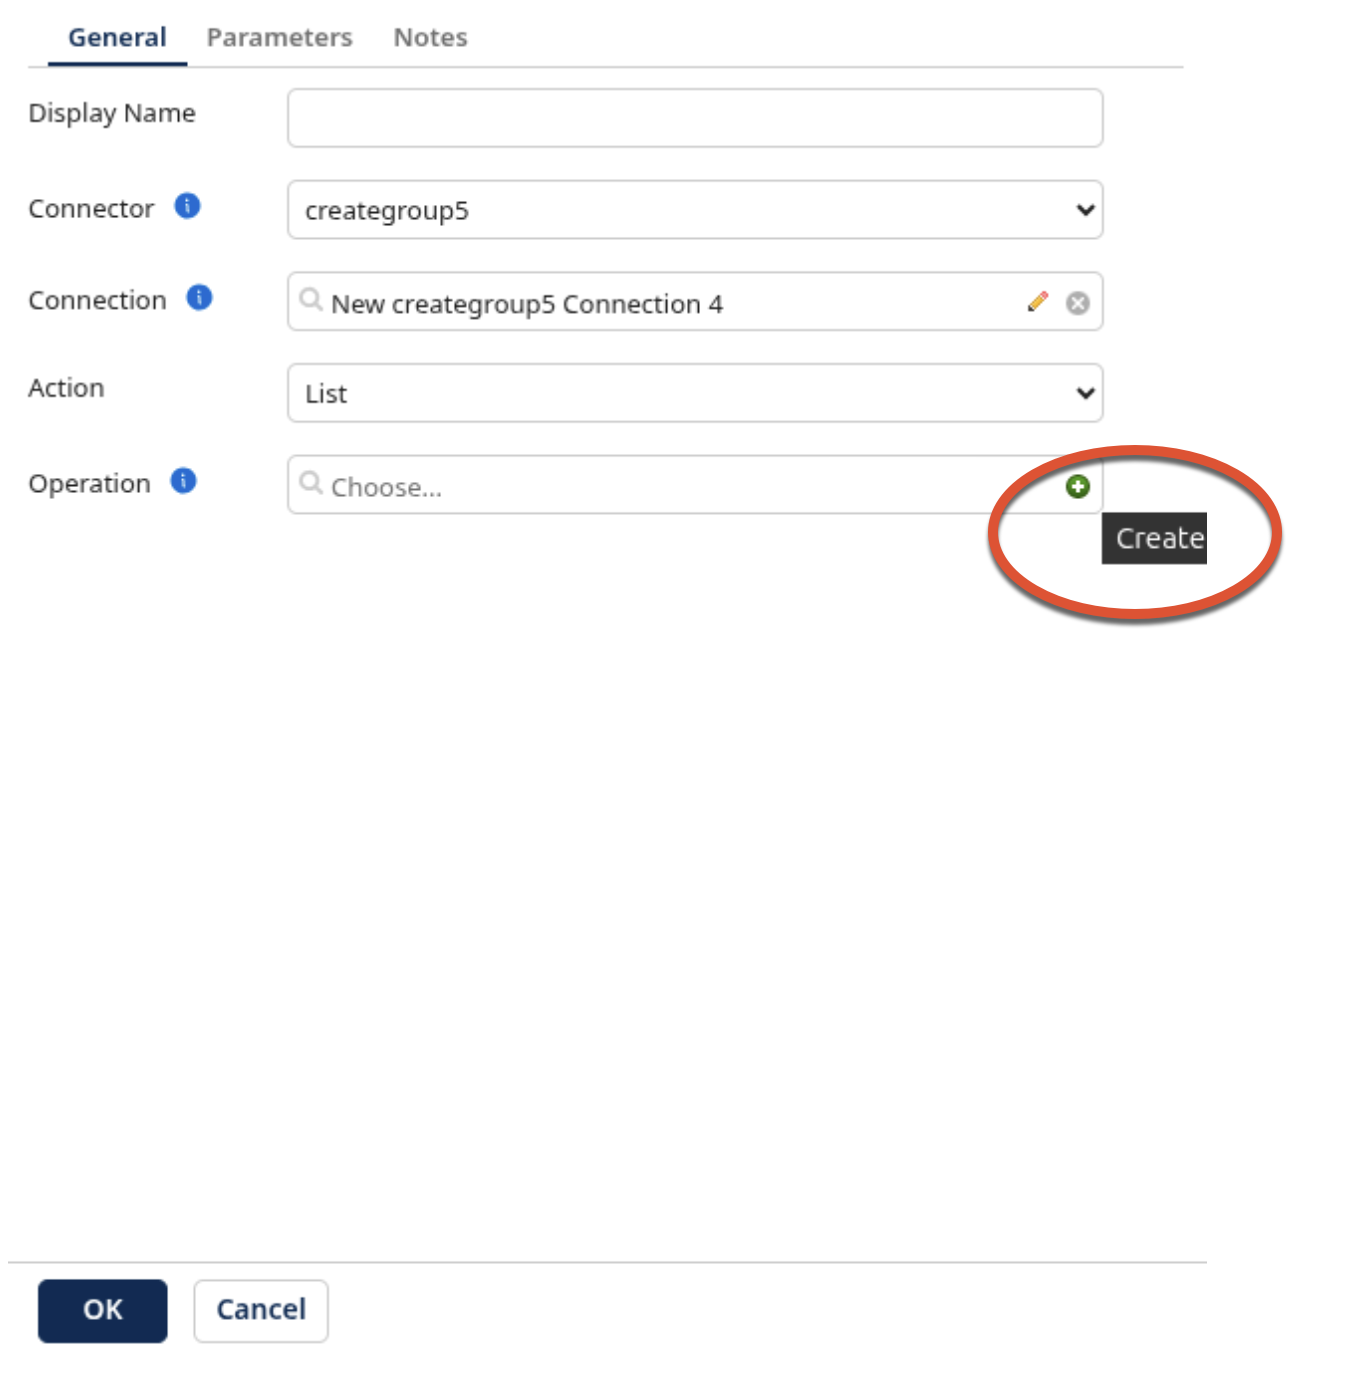
-
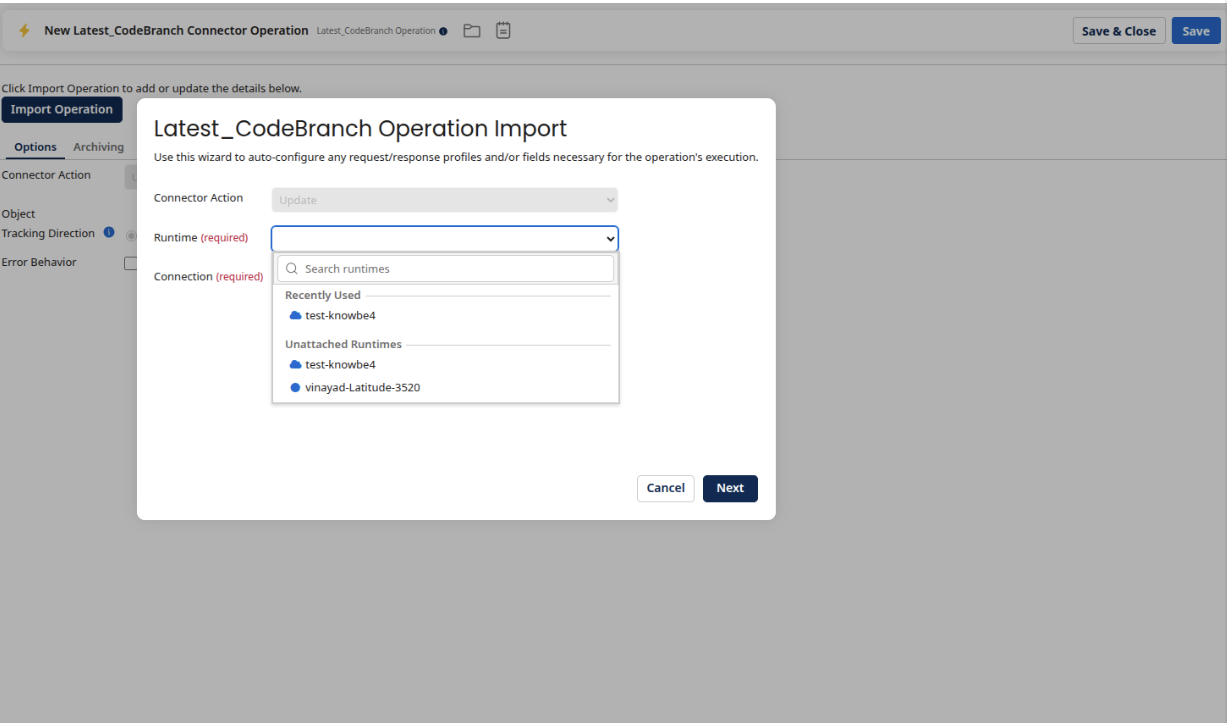
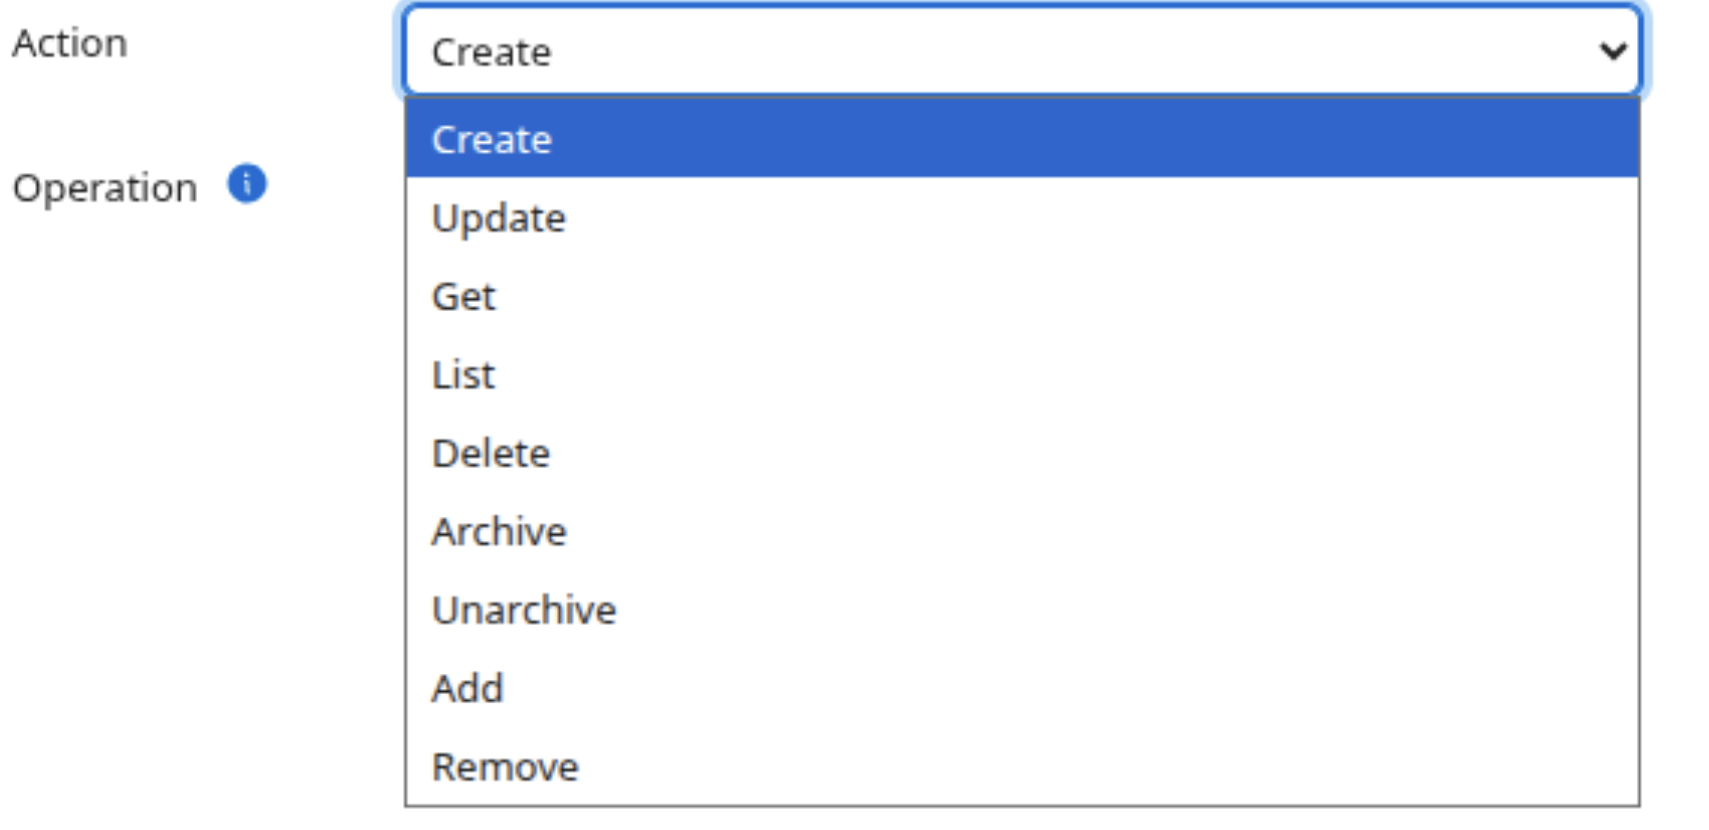
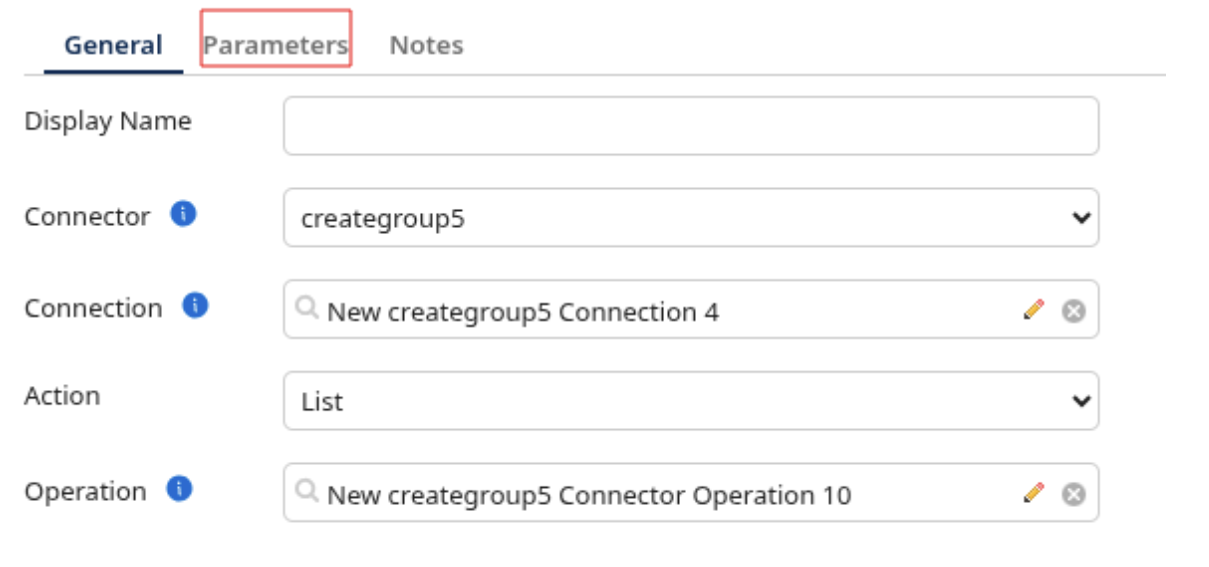
From the following Operation drop-down menu, select the action you need to perform.
-
Select the operation by selecting the + icon.

-
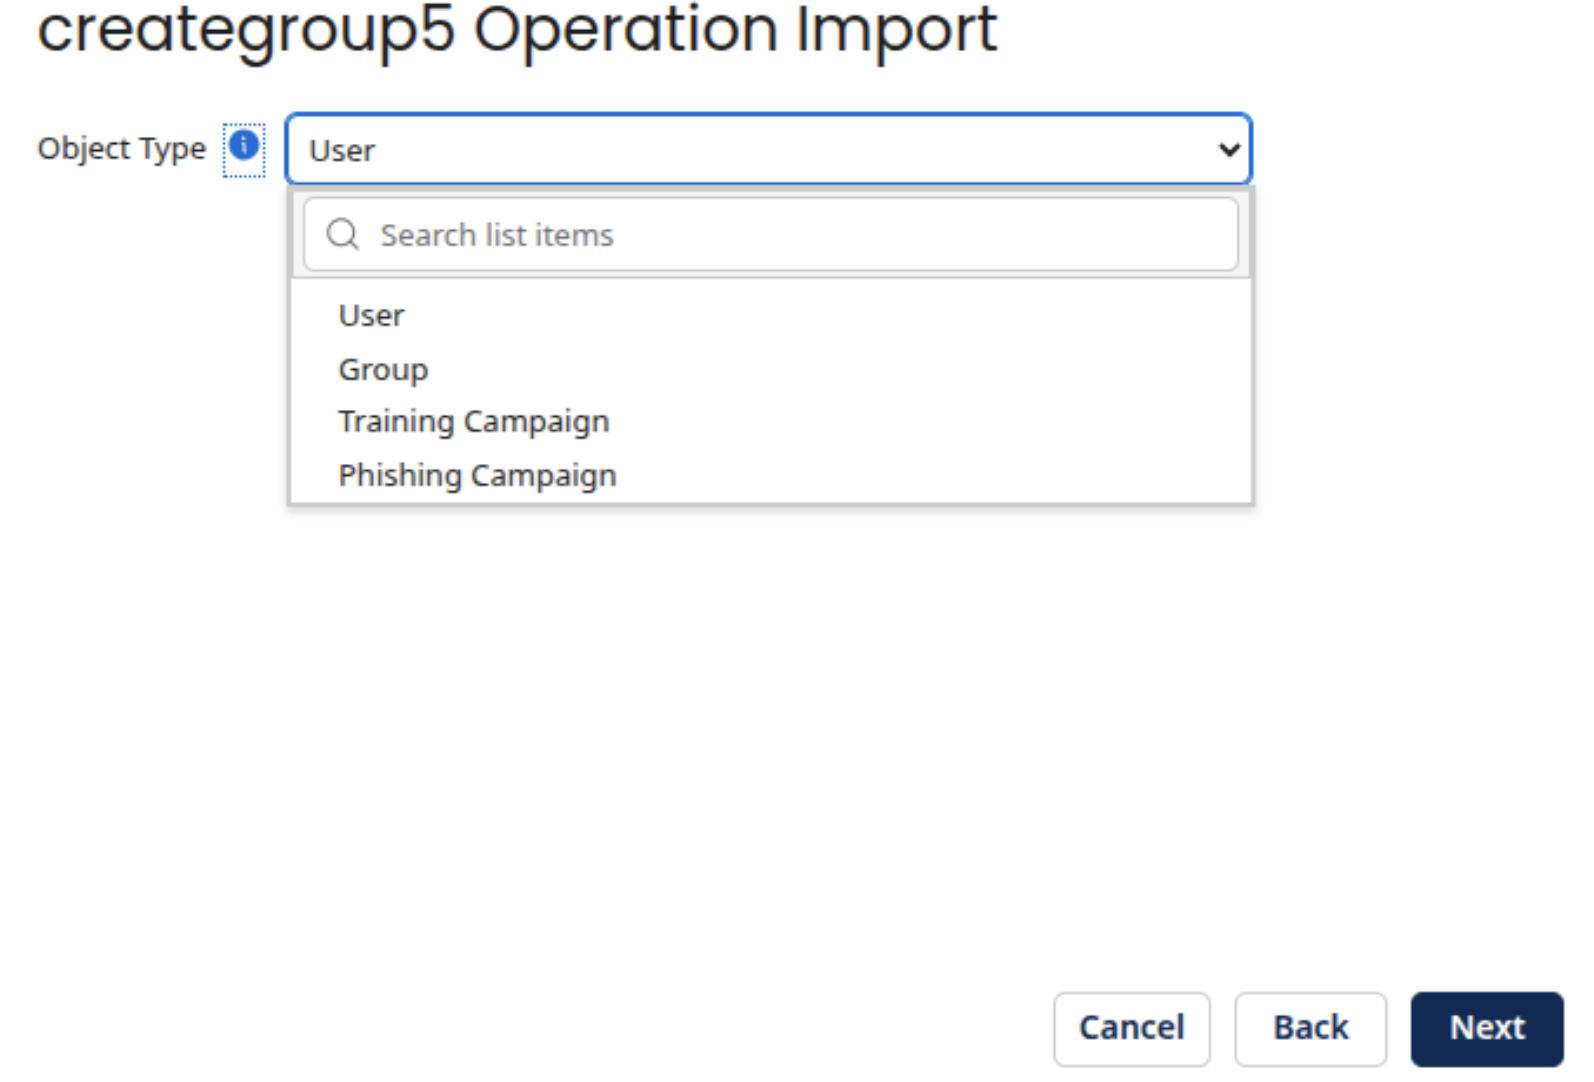
Choose the Runtime you created in the previous steps.
-
After selecting Next, choose the Object Type. You can choose from User, Group, Training Campaign, or Phishing Campaign.

Message Handling for Boomi Actions
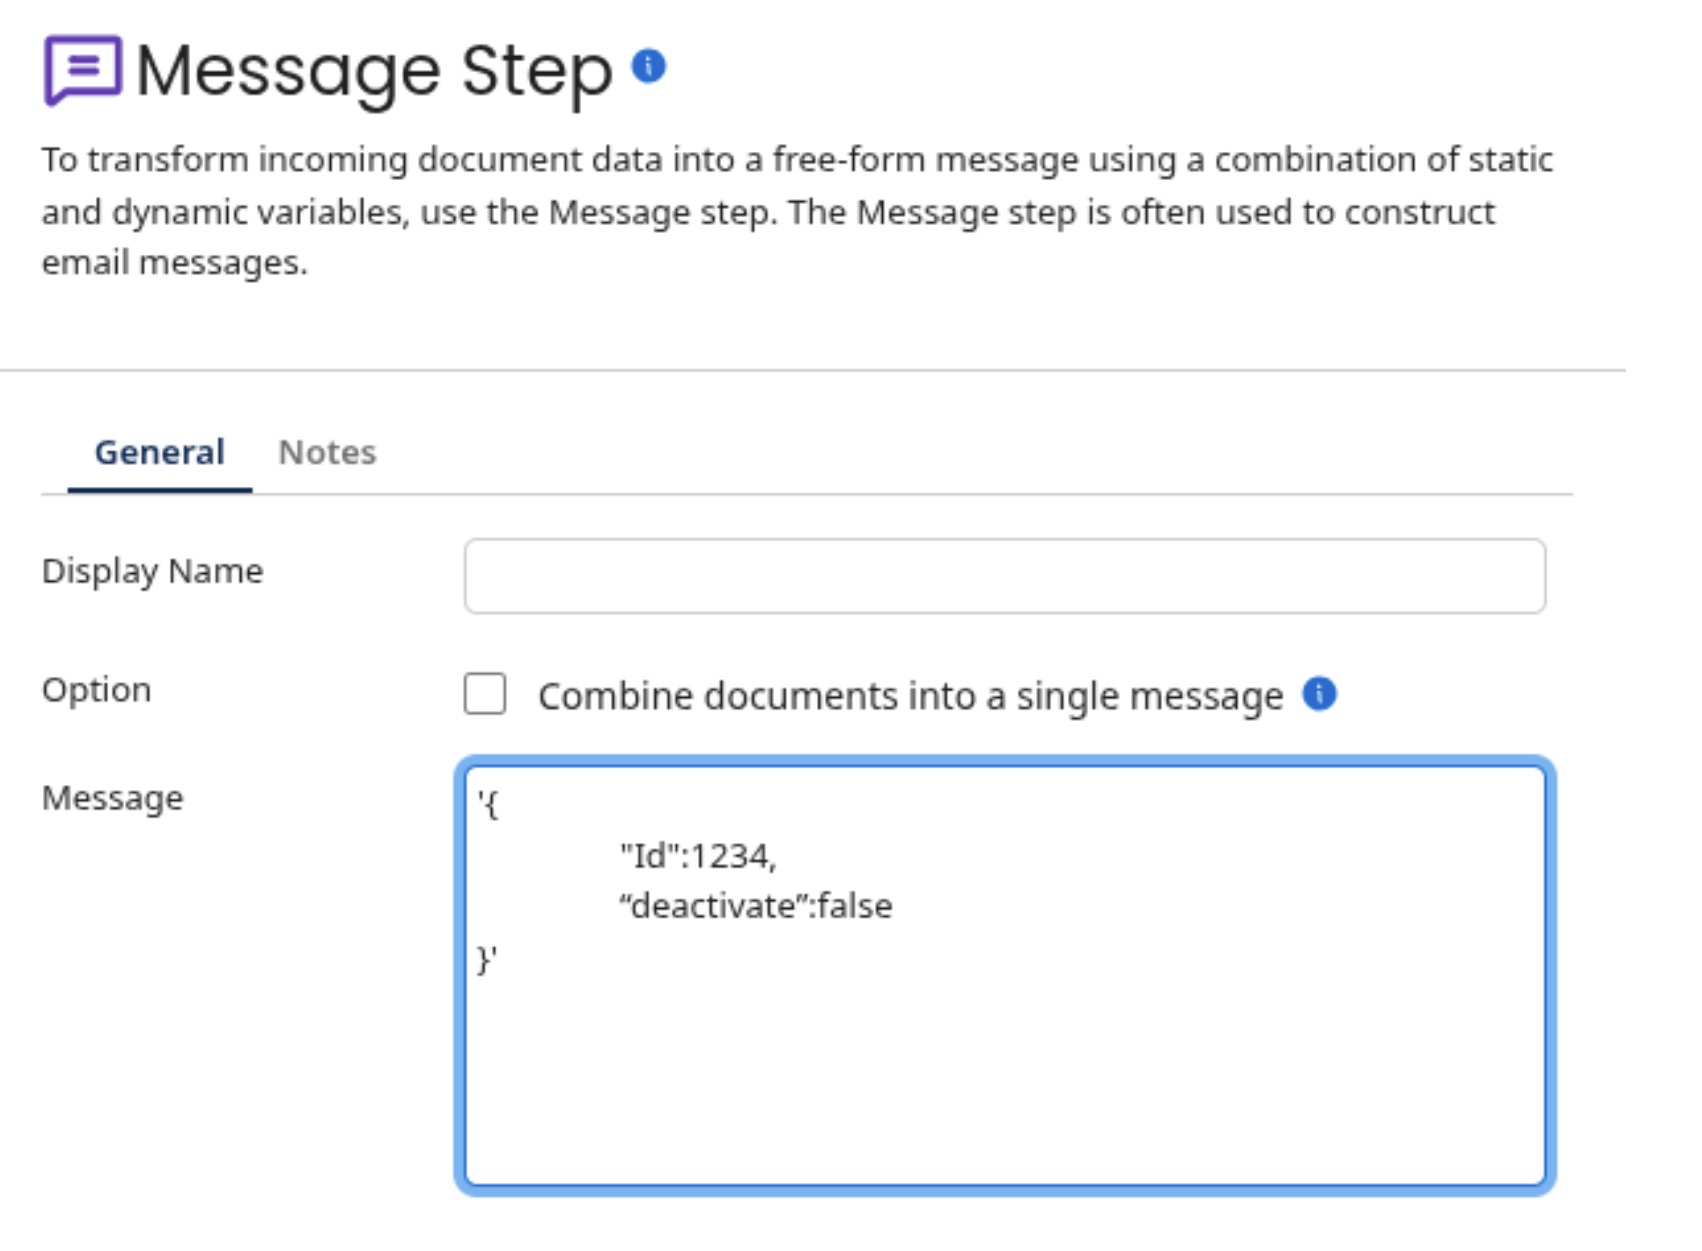
In Boomi, a Message step is used to pass required data into the connector, which includes actions such as Create, Update, Add, Remove, Archive, and Unarchive.
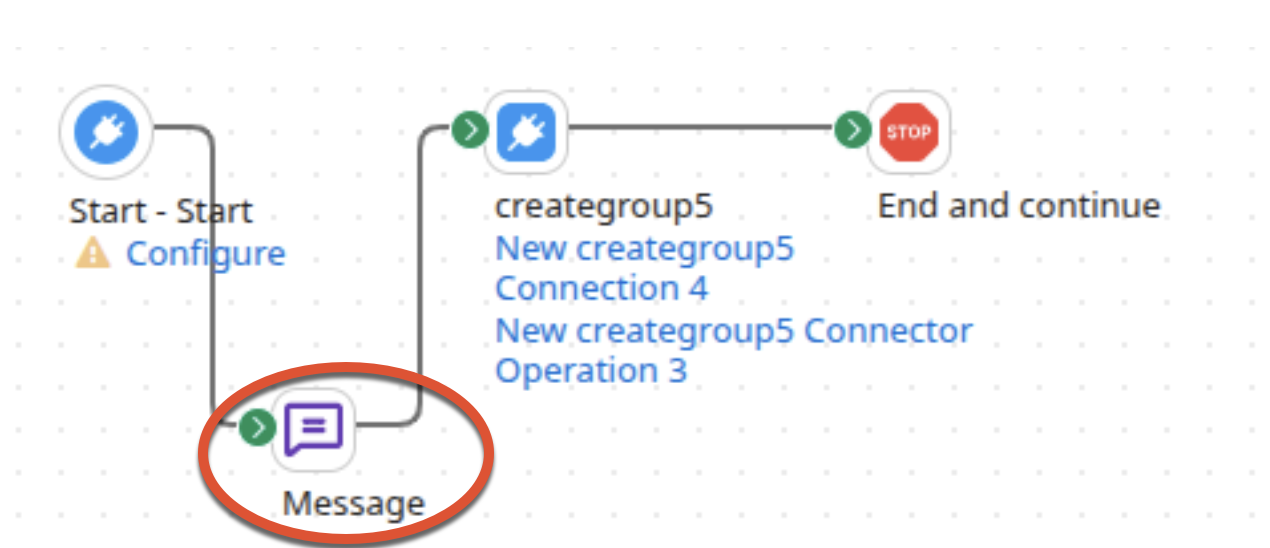
You add a Message step the same way you add a connection. You can select the + icon in Boomi’s process canvas, and then search for Message in the component list.
Get, Delete, and List Actions
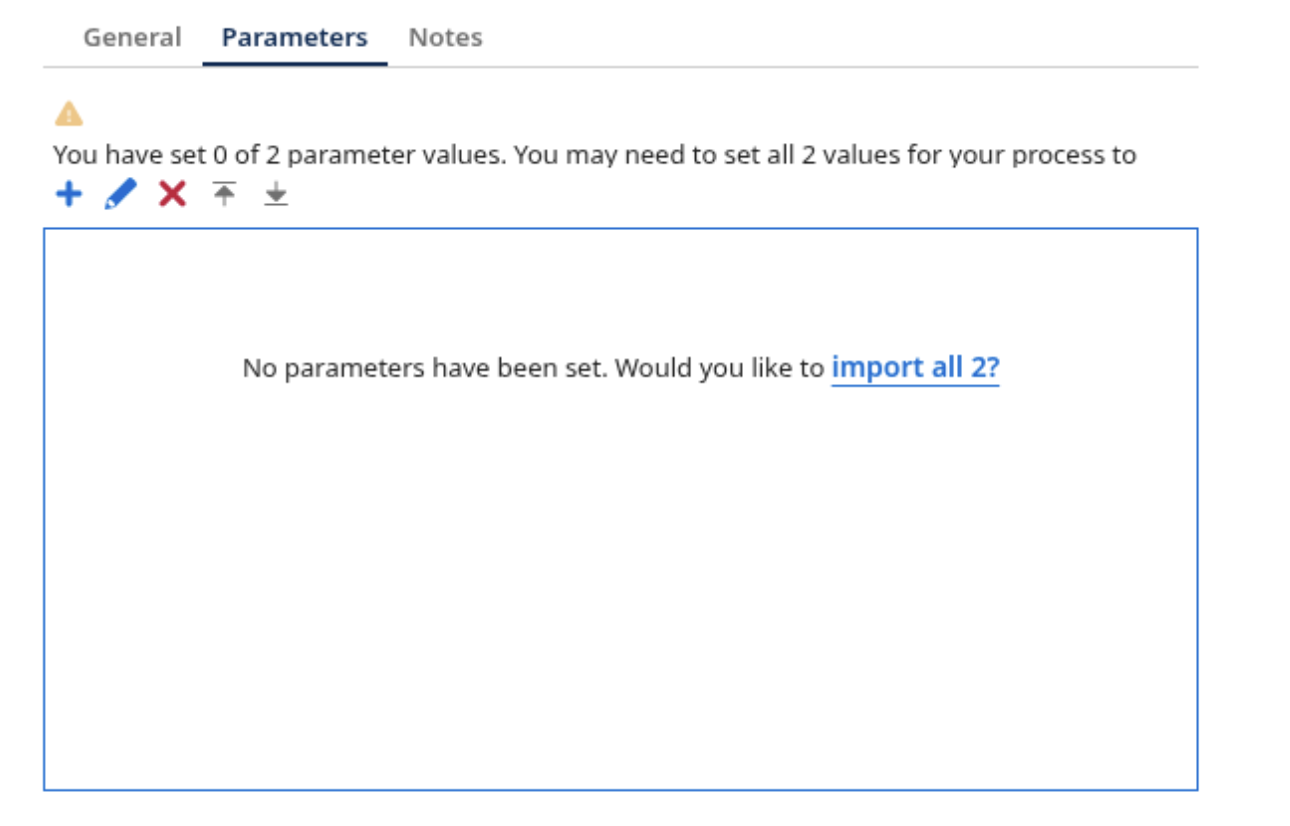
For the Get, Delete, and List actions, data must be provided in the Parameters tab, which is located on the Connector Step screen used in previous steps, instead of the Message step. Examples of these actions are provided below.
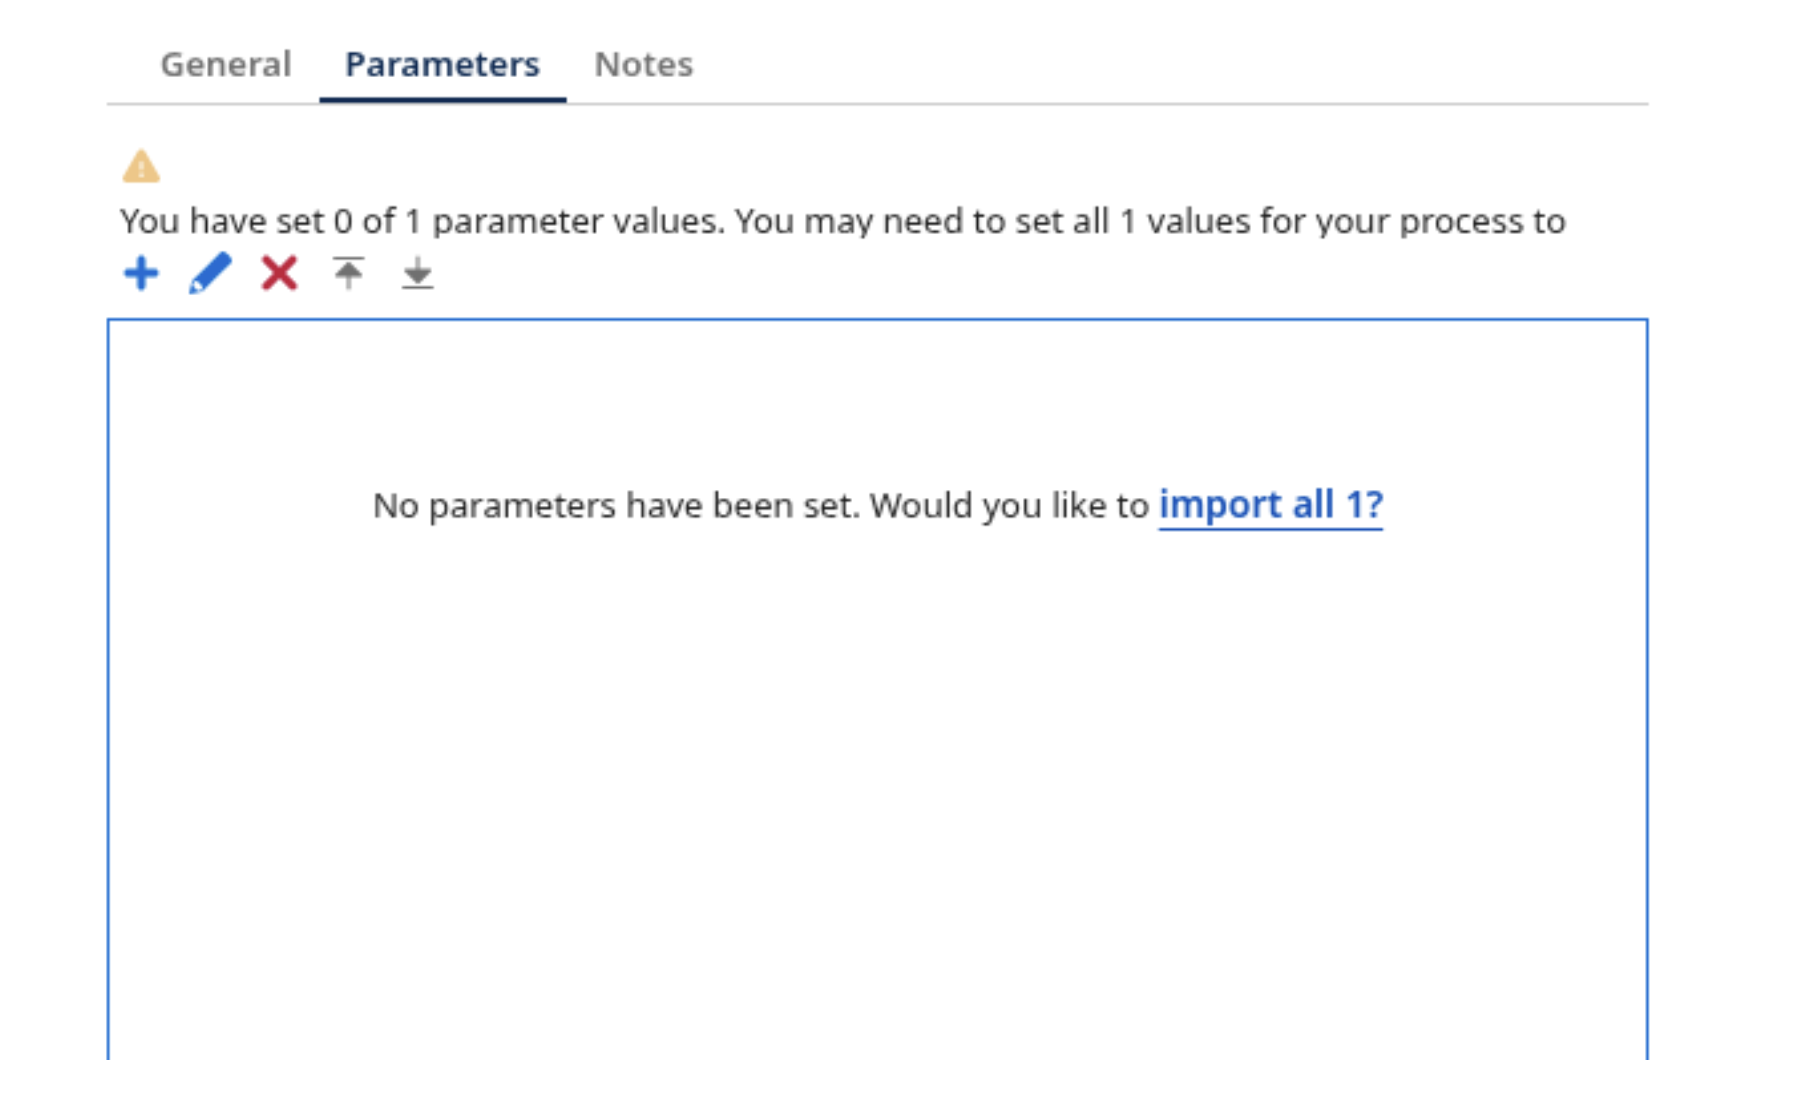
-
Get:
- Select the Parameters field.
-
Select the Get option in the Action drop-down menu.

-
Choose import all, and provide the value.
-
Delete:
- Select the Parameters field.
-
Select Delete in the Action drop-down menu.

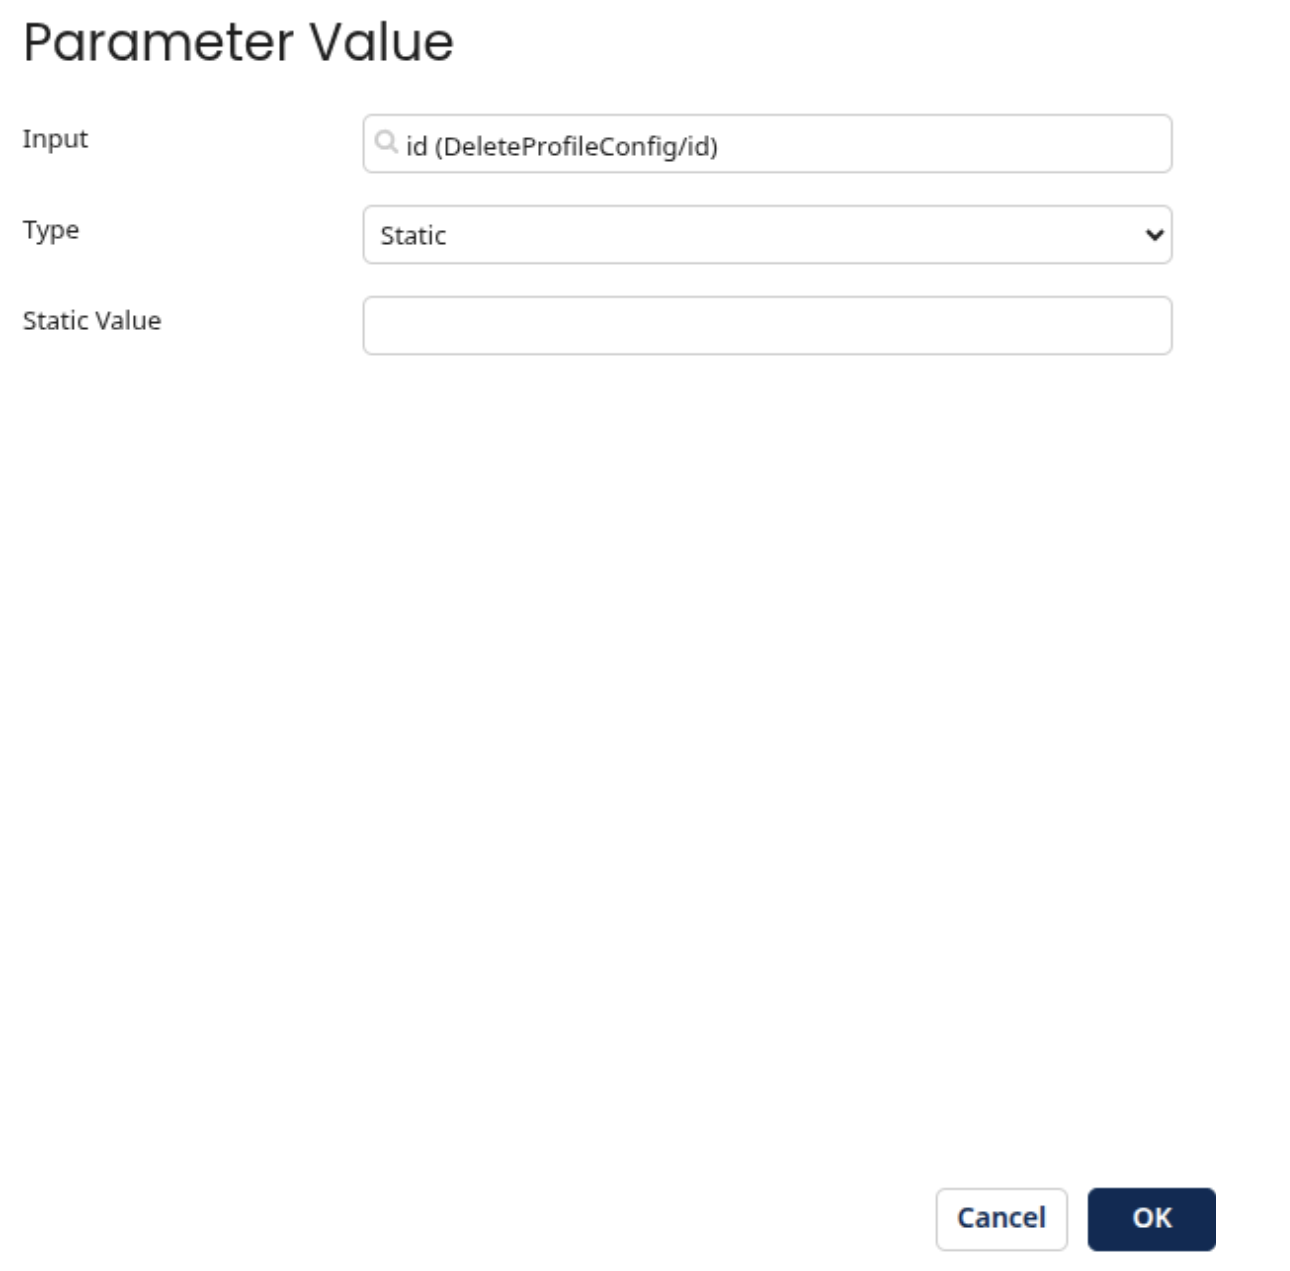
-
Select the + icon.
- Choose the required input. For this example, we chose id.
-
Enter the value in the Static Value field.
-
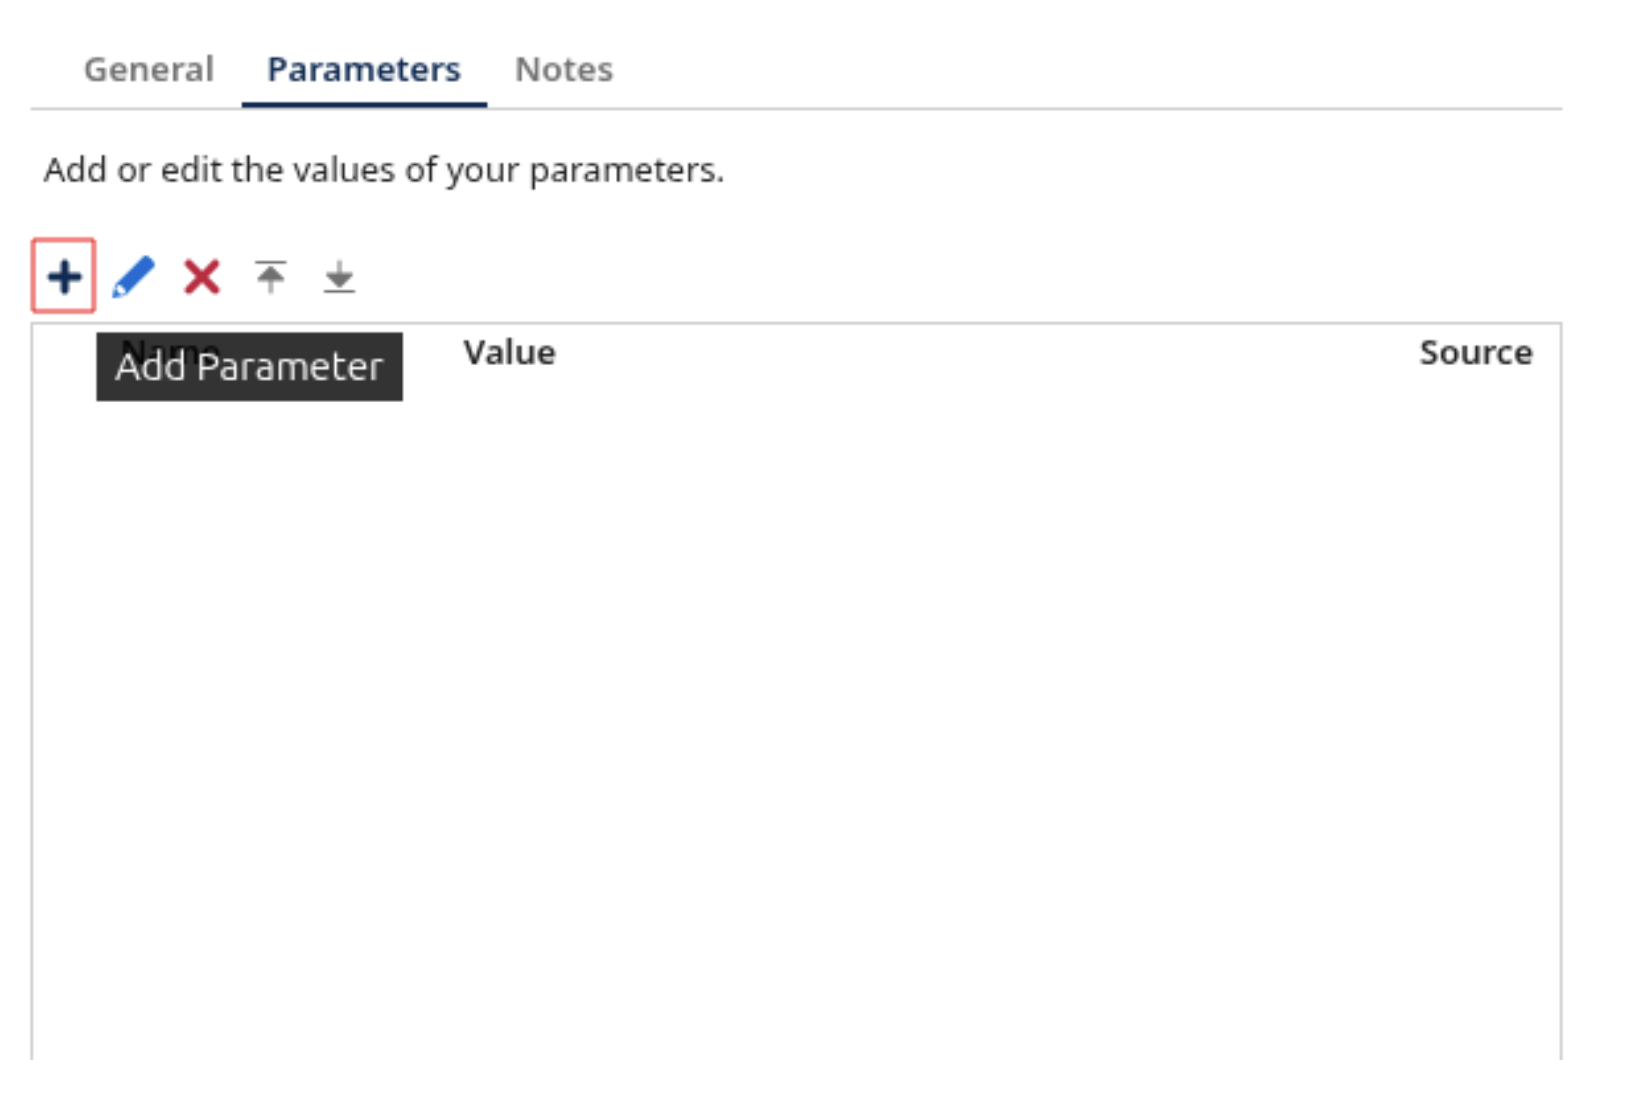
List:
- Select the Parameters field.
- Select List in the Action drop-down menu.
-
Select the + icon in the Operation field.
-
Choose the Object type. For this example, we chose Users.
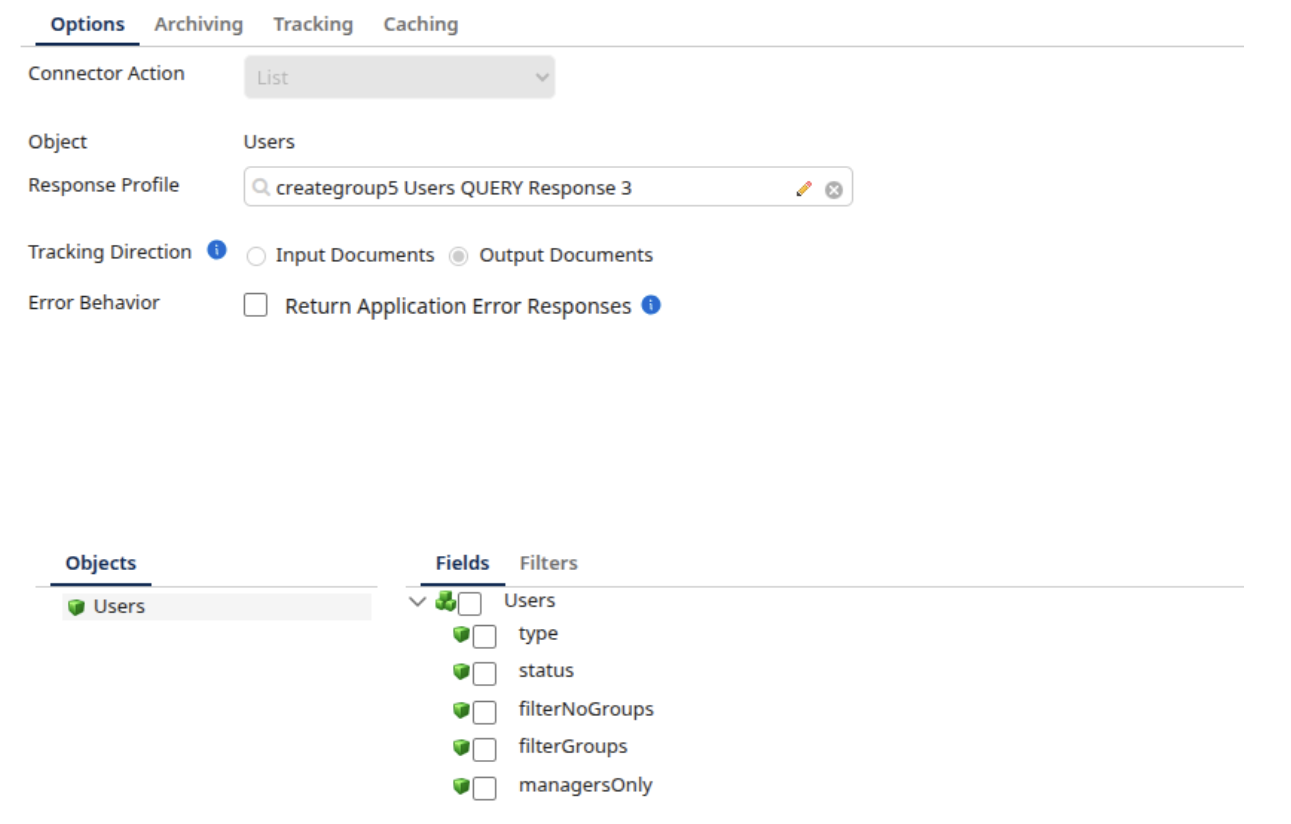
-
Select your desired filters. You can rename the filters’ Expression fields to avoid confusion.
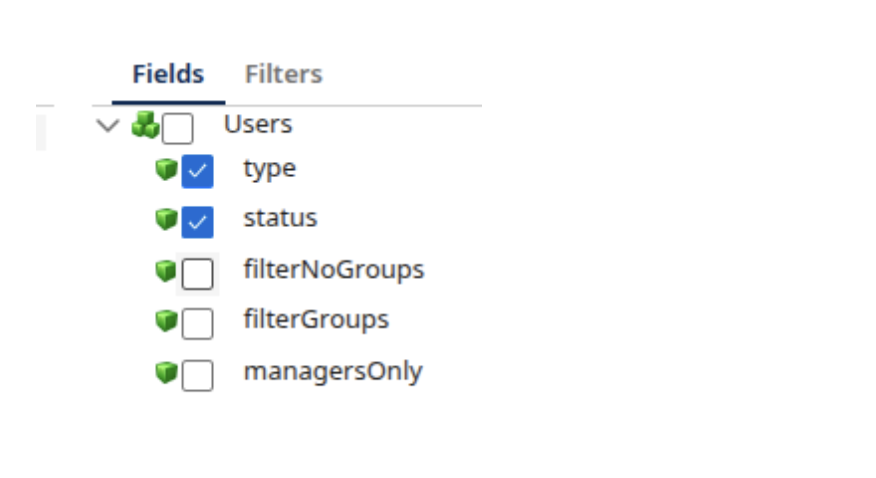

-
Return to the Parameters tab and import your filtered fields.
Error Handling in Boomi
The connector performs a validation check before it makes any calls to the API. This check ensures that mandatory fields are present and valid, saving unnecessary API requests.
As an admin, you can control how the connector behaves when it encounters invalid data or API errors by using the Error Response Enabled setting located on the Connector Step screen used in previous steps.
How Error Response Enabled Works
This setting determines if a data error should stop the process immediately or pass the error information downstream for you to handle.
When Disabled Is Unselected
- Behavior: If mandatory fields are missing or invalid, the process stops immediately at the Connector step.
- Outcome: The process is marked as Failed.
- User Experience: A Boomi UI error message pops up. No API call is made.
- API Errors: If the data passes validation but the API rejects it later, the process also fails and shows the API error in the UI.
When Enabled Is Selected
- Behavior: The connector detects the issue, but the process does not fail.
- Outcome: The connector outputs a custom Error JSON payload.
- User Experience: The process continues to the next step, usually a Stop step or specific error routing path.
- API Errors: If the API rejects the request, the connector returns the specific API error JSON instead of stopping the process.
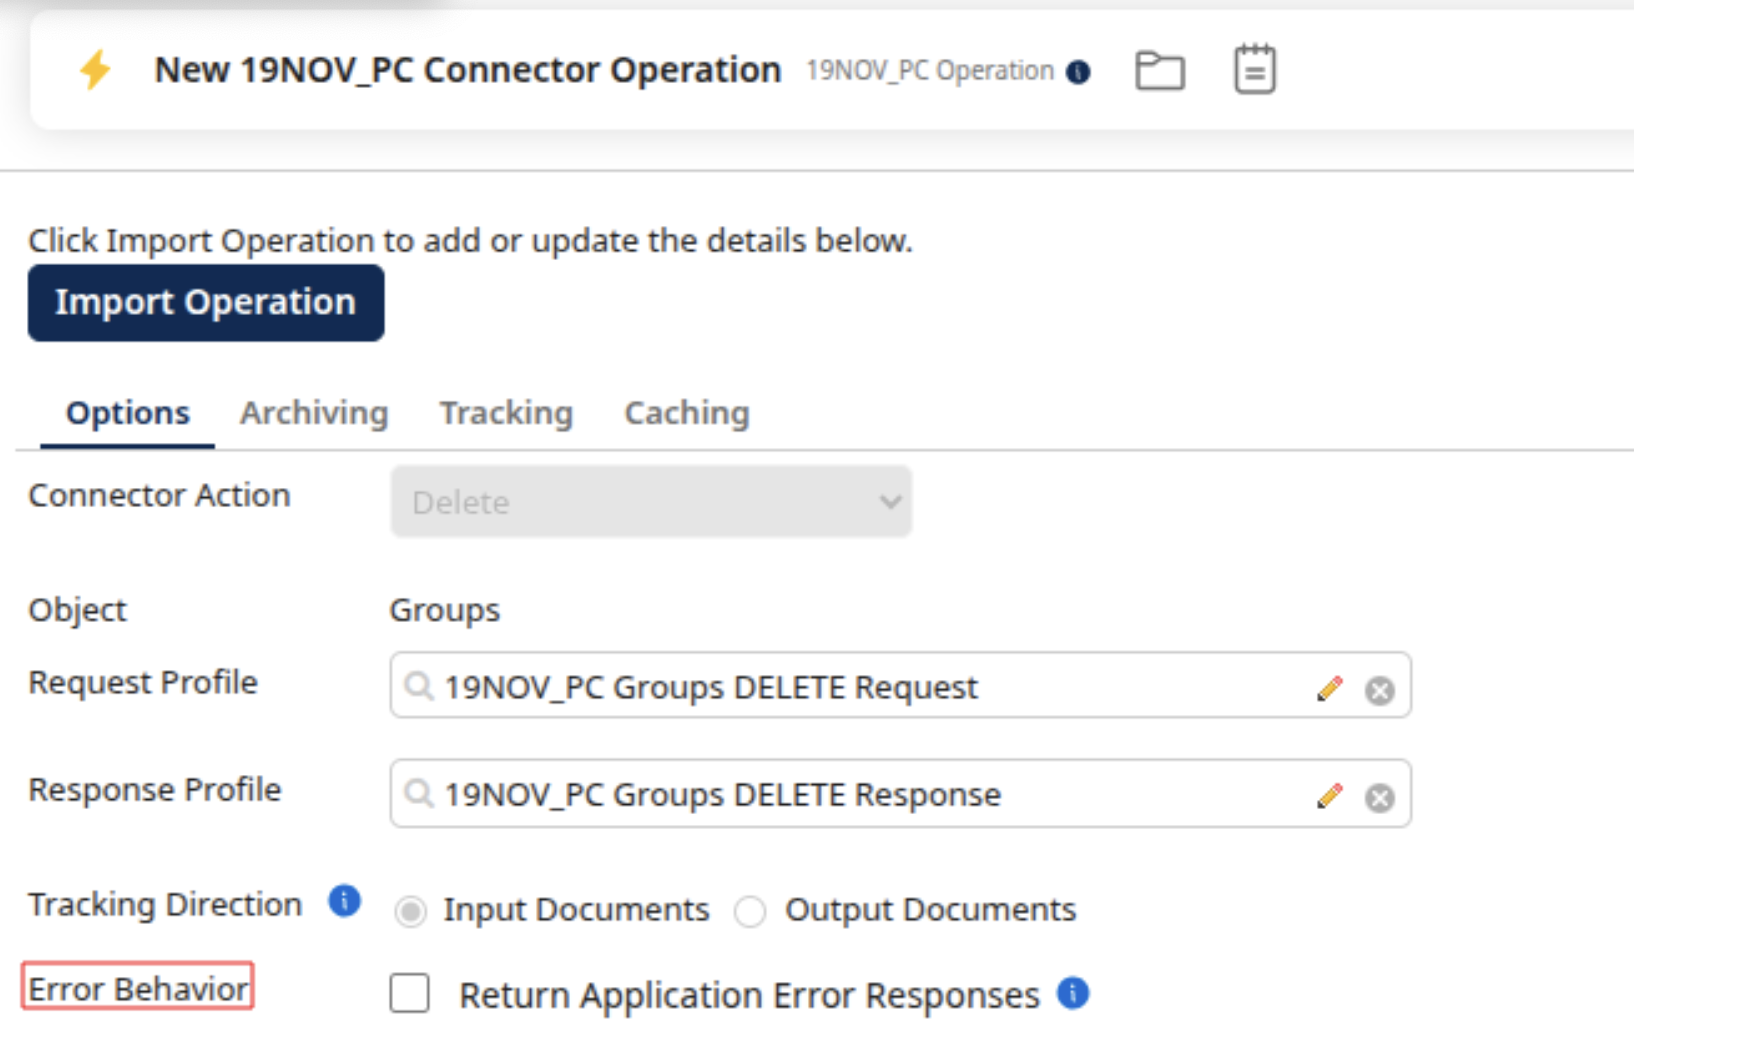
Configuring the Error Response Enabled Setting
To configure the error response enabled setting, follow the steps below:
-
Open your Connector Step in the Boomi process.
- Navigate inside the Operation field.
-
Locate the check box labeled Error Behavior. Unselect the option to block execution and fail on errors. Select the option to return error JSON payloads for custom handling.
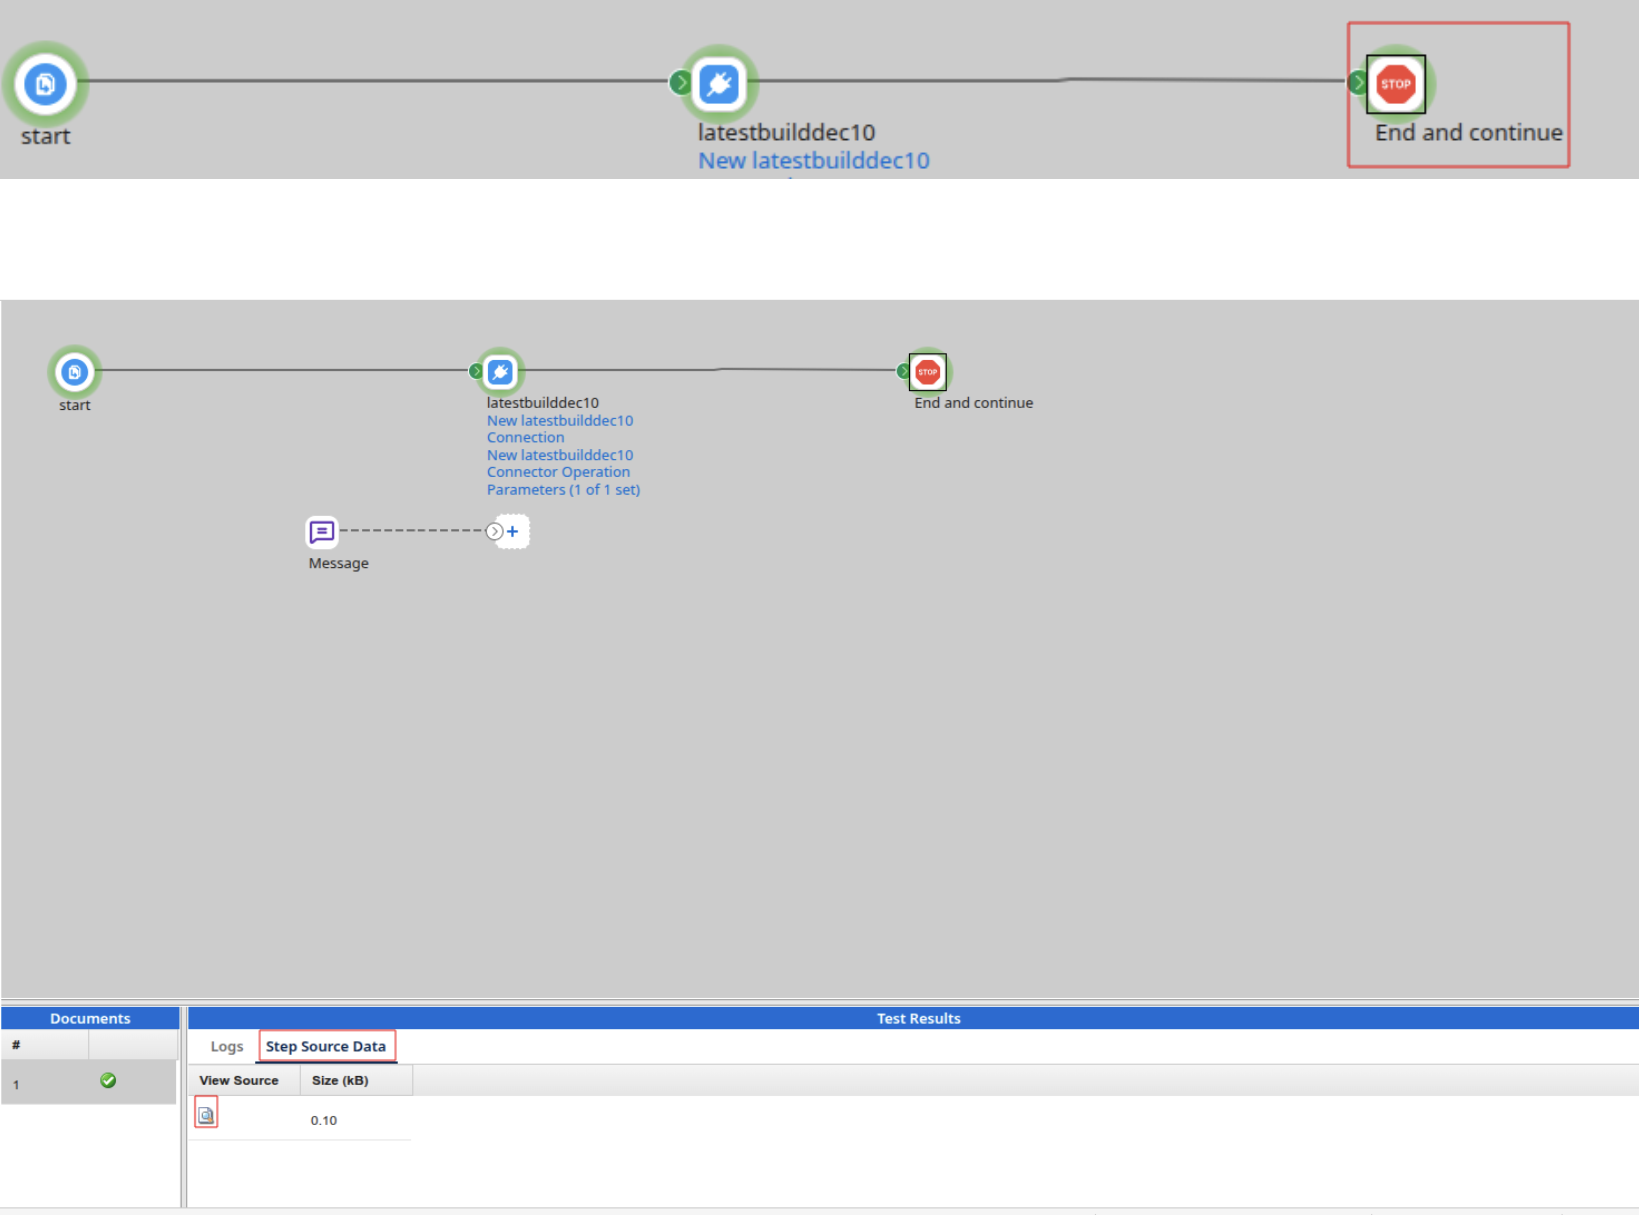
How to View the Error Response
If you have enabled error response, you won't see a red failure notification. Instead, you need to inspect the data returned by the connector in the Stop step.
- Run your process in Test Mode.
- Select the Stop step at the end of your flow.
- In the Test Results panel at the bottom of the screen, select the Step Source Data tab.
-
Select the document icon to view the payload. You will see the JSON response, which contains the specific validation or API error details, here.
If you experience issues integrating Boomi with your KSAT console, please contact Boomi’s technical support Boomi’s technical support (link opens in new window).