Within our reporting feature, you can save reports from managed accounts to be viewed at a later time or send saved reports to other managed accounts. You can also choose to schedule reports to be generated and sent at a set frequency, such as every quarter. See below for more information on how to save and send reports.
Saving Reports
To save a report to be viewed at a later time, see the steps below:
- Log in to your KnowBe4 account.
- Click the Reports tab.
- Select a report that you would like to save and set your desired filters.
- Click View Report to generate the report with your desired filters.
- Click the Save Report button.
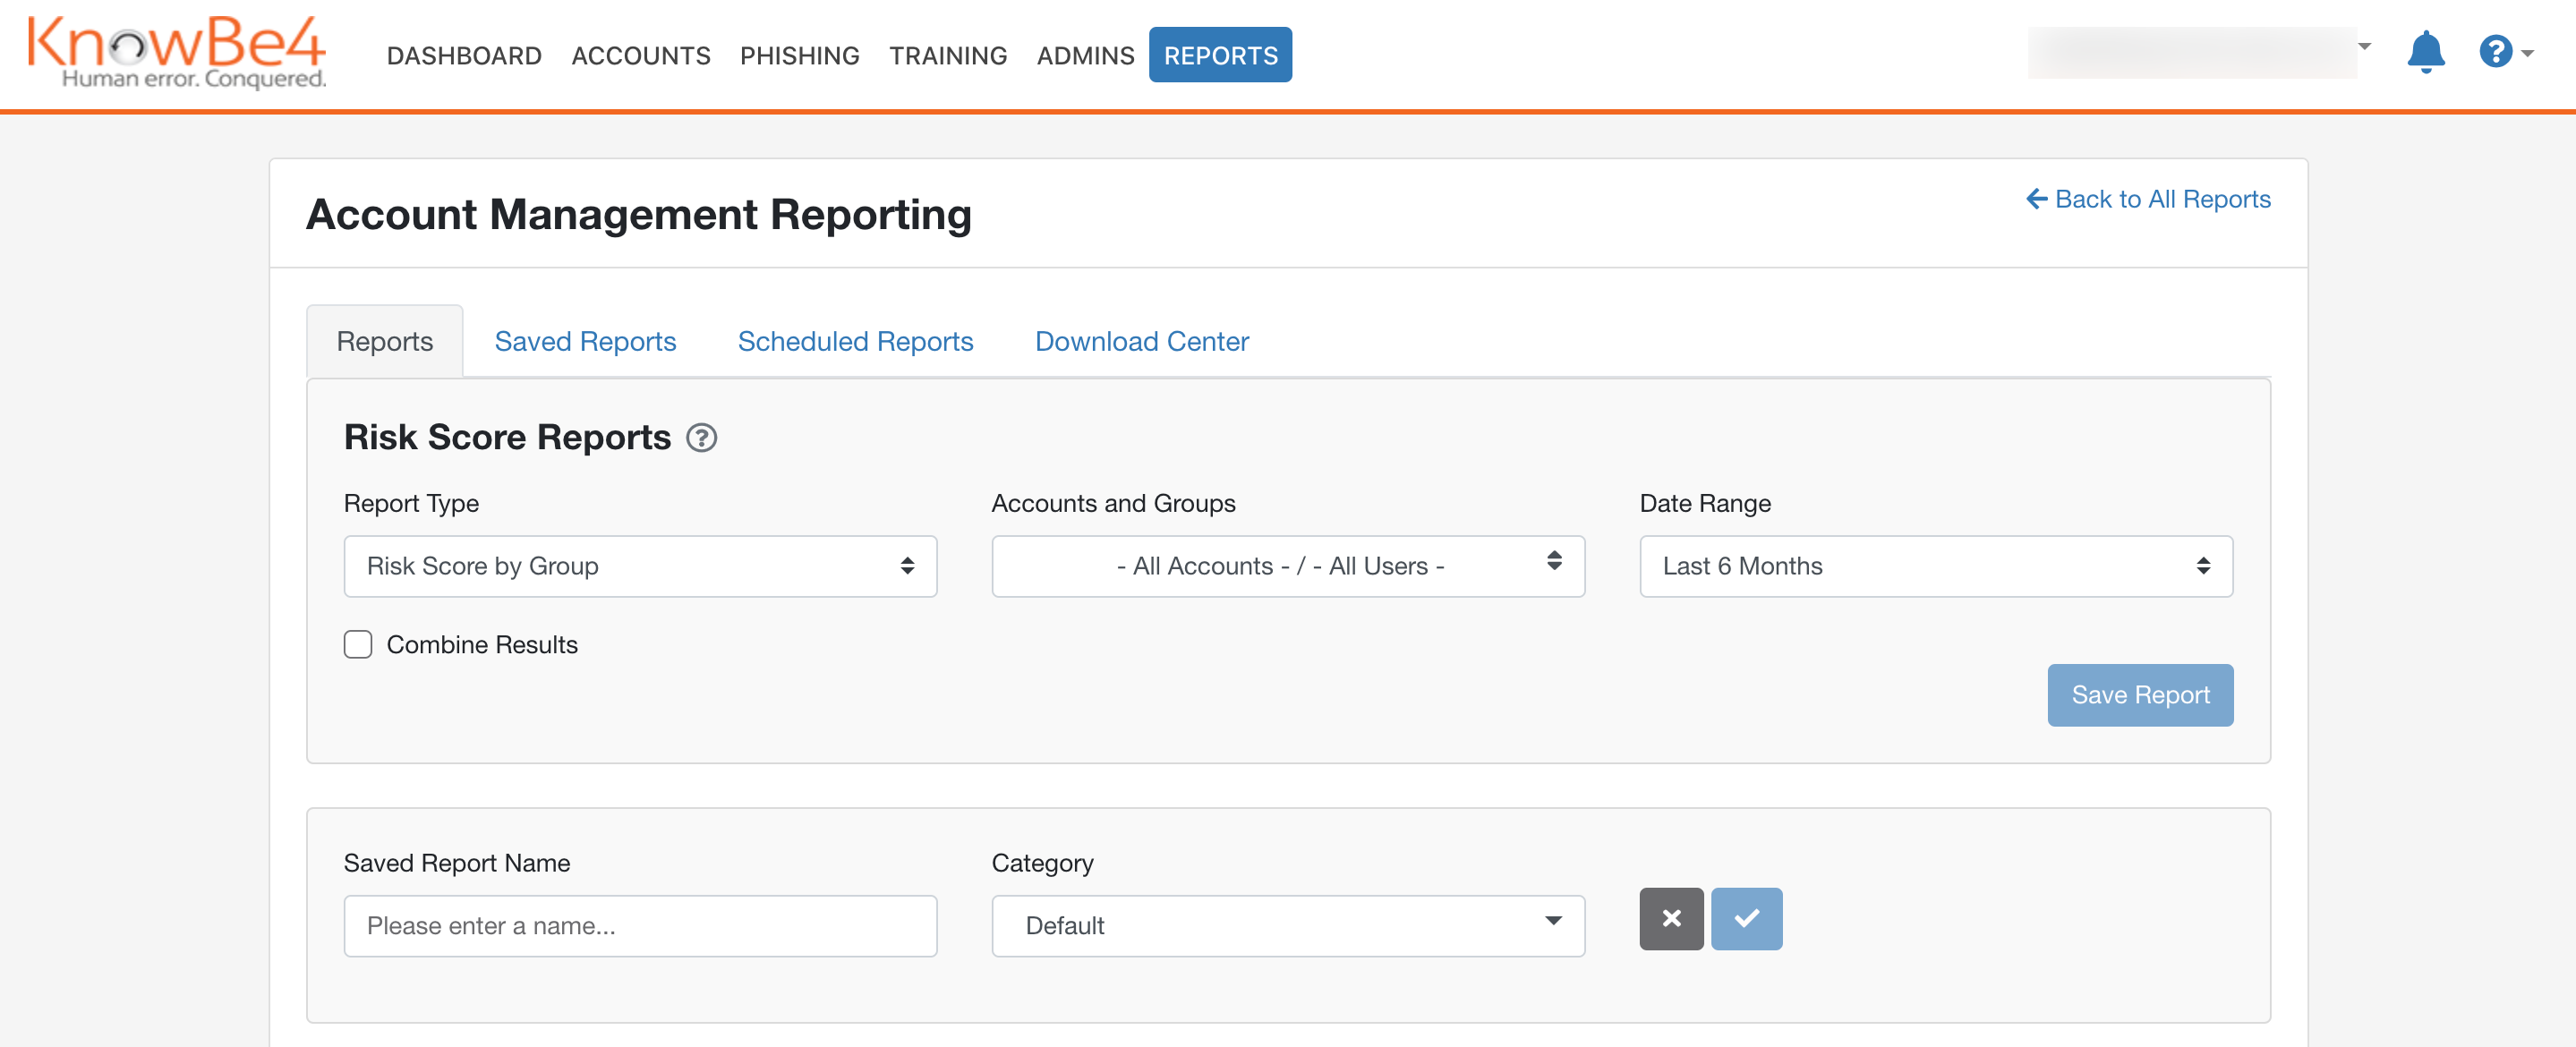
You can now add a name for the report and add the report to a category to keep your reports organized. The Default category is automatically added to all accounts, but you can create your own categories in the Saved Reports tab. Click the checkmark icon to save the report. All saved reports will stay in the Download Center for 90 days.
Viewing Saved Reports
From the Saved Reports tab, you can view all of your saved reports. See the image below for more information on the Saved Reports tab.
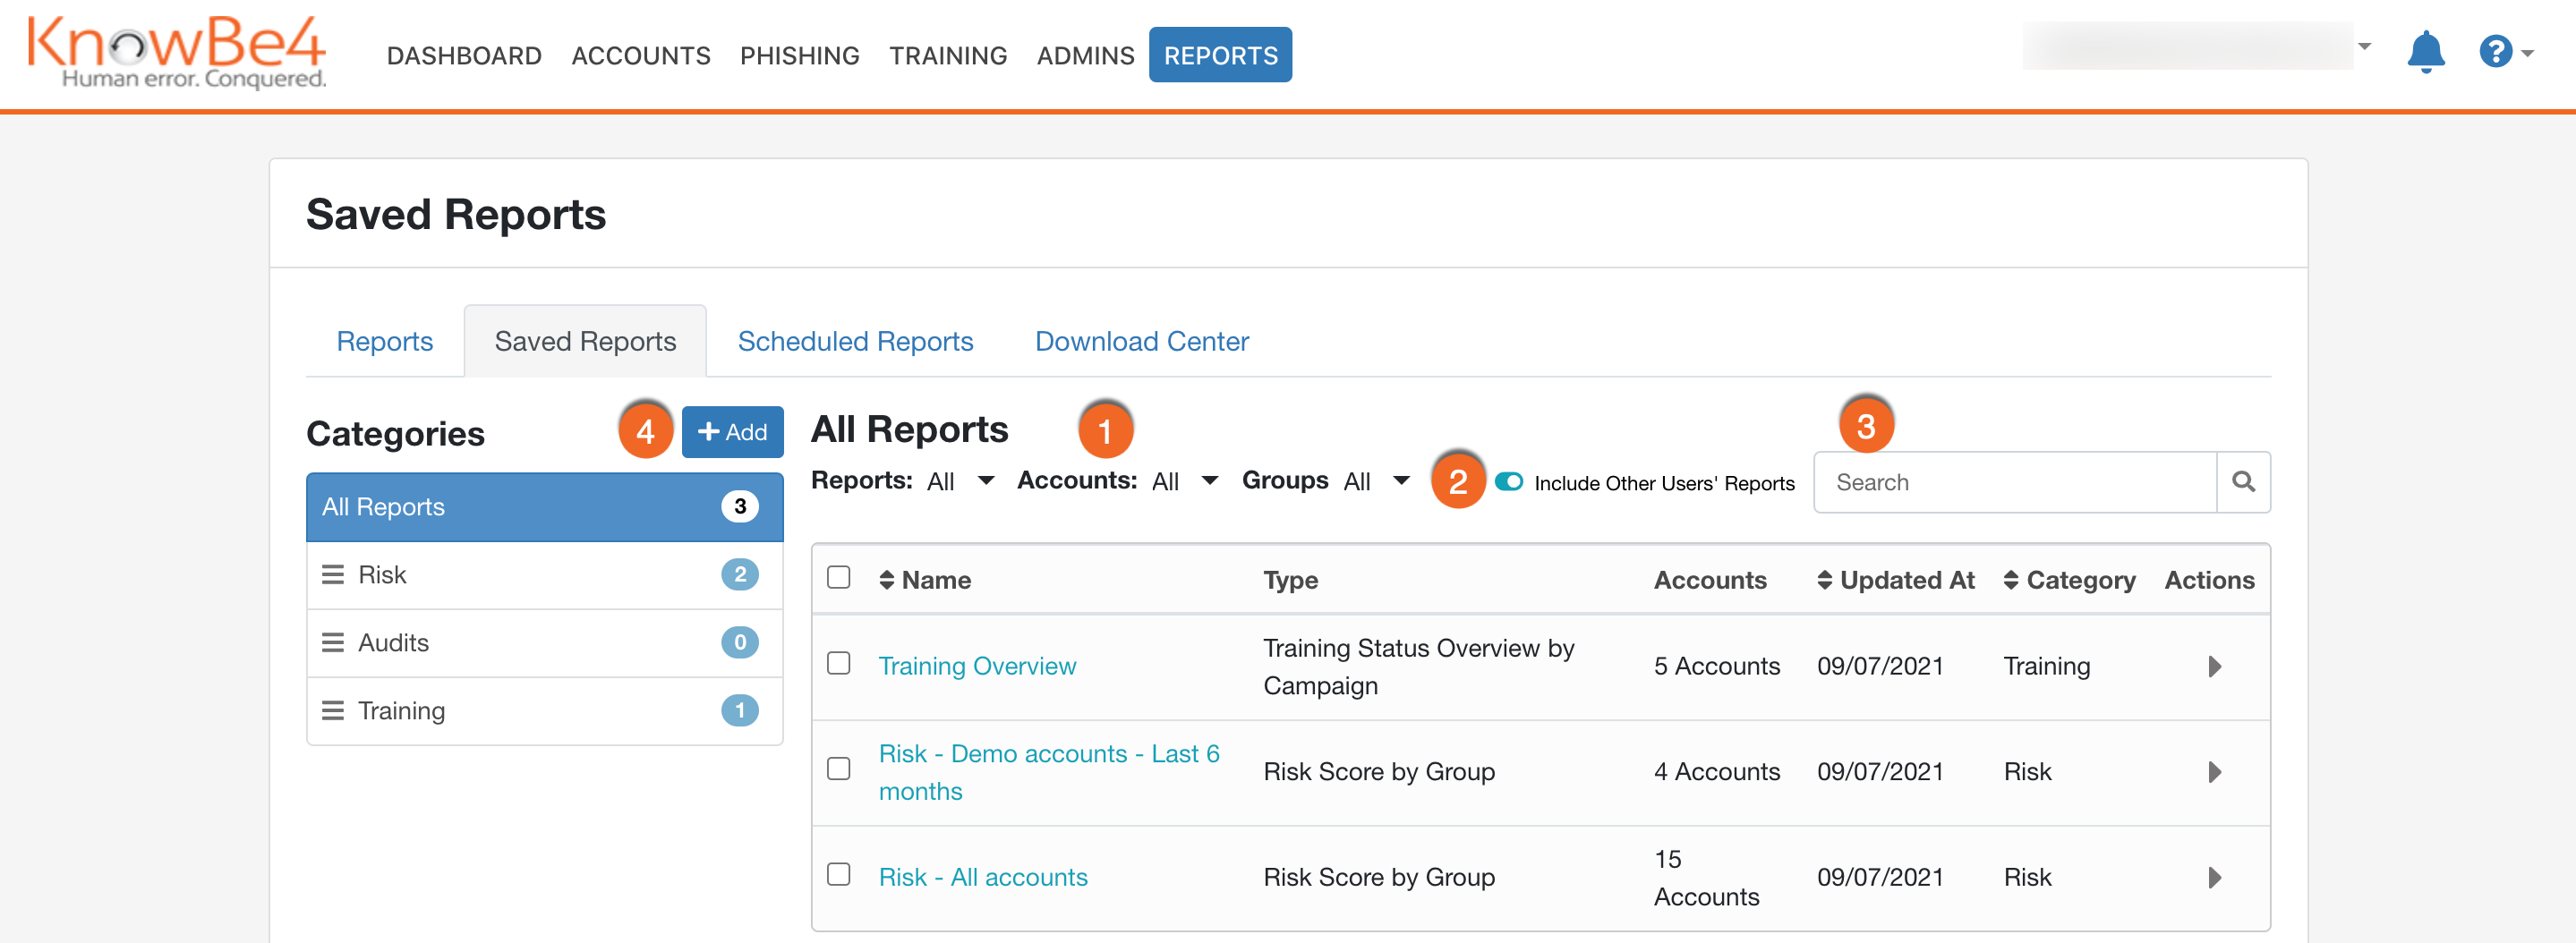
- Filter your saved reports by the type of report, groups included in each report, or accounts included in each report.
- Use the Include Other Users' Reports toggle to see all saved reports for the account instead of just your saved reports.
- Use this field to search for any saved reports by the name of the report or type of report.
- Click + Add next to categories to create a new category. To move reports between categories, click the checkbox next to the report name and select a category for the report from the Move to Category drop-down menu.
For added functionality, click the arrow under Actions.

- Use these buttons to generate a PDF or CSV file in your Download Center.
- Click Send to redirect you to the New Scheduled Report window. See the Sending and Scheduling Reports section for more info.
- Click Clone to duplicate a saved report. Cloning creates a new saved report using the same information as the original saved report which can be modified at any time. You can give the cloned report a new name and category.
Sending and Scheduling Reports
To send reports to other users and generate reports on a schedule, see the steps below:
- Log in to your KnowBe4 account.
- Click the Reports tab.
- Select the Scheduled Reports tab.
- Click Send Report.
You can send any saved reports in the New Scheduled Report window. You can also access this window by clicking the Actions arrow in your Saved Reports tab and selecting Send. See the image below for details on the available fields.

- Name: The name that displays in the Scheduled Reports tab.
- Send to: Choose which Account Management Admins you want this report to be sent to.
- Frequency: Select how often you want a report to be sent to your users. Scheduling reports with a frequency of more than once will automatically generate reports on the specific date and time selected.
- Start Time: The date and time the report will be sent to your users.
- Saved Report: Select which specific report you want to send or schedule.
- Format: Choose the file type of the report that your users will receive.
Once the report has been sent, the recipients can view the report in the Download Center of their KSAT console. Any sent reports will stay in the Download Center for 90 days. You can disable scheduled reports from being sent at any time in the Scheduled Reports subtab.
An email will also be sent to all recipients notifying them about a report being shared along with a link to download the report. See the image below for an example of what the email will look like. They will be prompted to log in to their KSAT account and the report will download immediately on login.

Viewing Scheduled Reports
From the Scheduled Reports subtab, you can view all of your scheduled reports. See the image below for more information on how to navigate the Scheduled Reports tab.
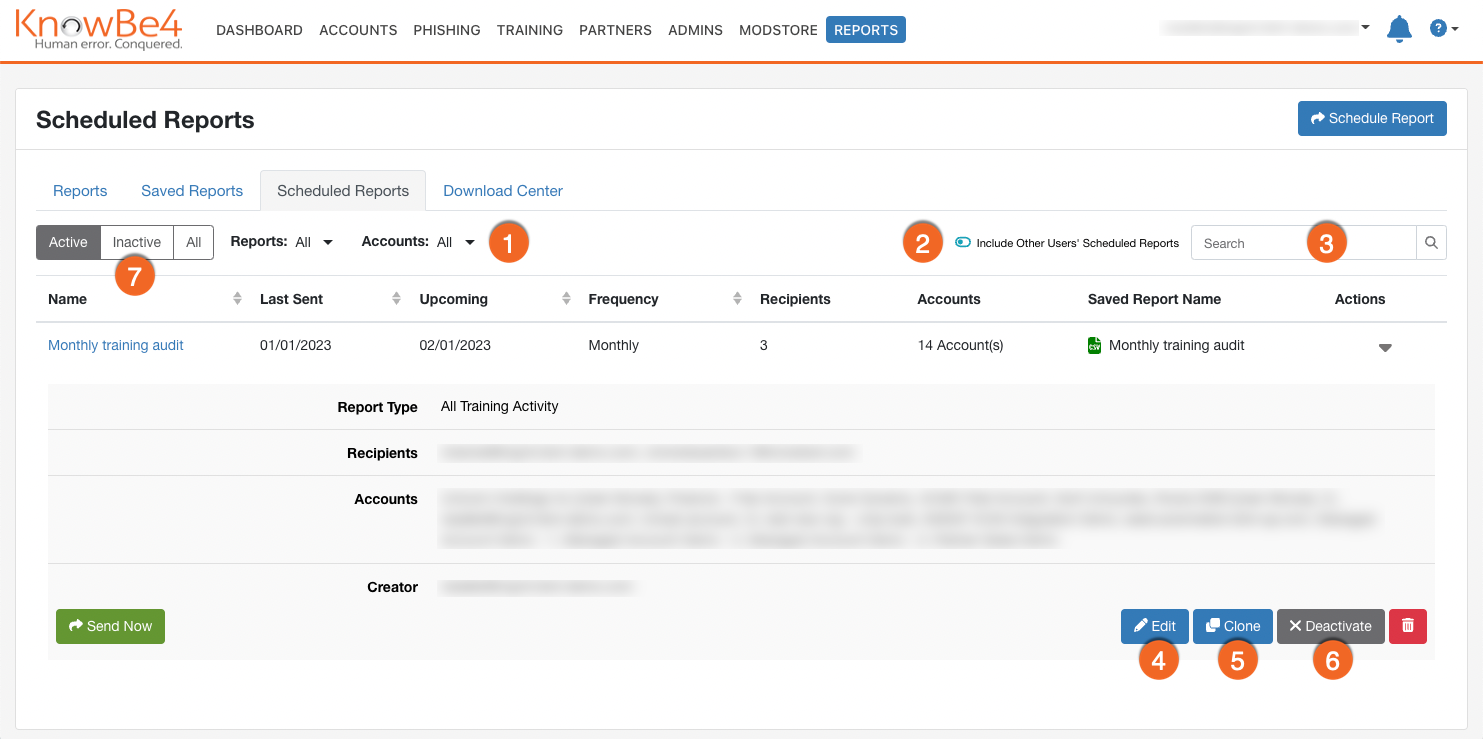
- Filter your scheduled reports by the type of report or the accounts included in each report.
- Use the Include Other Users' Reports toggle to see all scheduled reports for the account instead of just your scheduled reports.
- Use this field to search for any scheduled reports by the name of the scheduled or saved report.
- Click Edit to modify the details of the scheduled report.
- Click Clone to replicate a scheduled report. Cloning will create a new scheduled report using the same information as the original scheduled report which can be modified at any time.
- Click Deactivate to set a report as inactive. The only way to reactivate a scheduled report is to clone it.
- See the Inactive tab for one-time reports that have previously run and deactivated recurring reports. Inactive scheduled reports will be automatically deleted after 90 days.
For further assistance with this feature, please contact our support team and they would be happy to help.