The Government Community Cloud (GCC) High Phish Alert Button (PAB) for Microsoft 365 enables your users to easily report suspicious emails, strengthening your organization's defense against sophisticated phishing attacks. Built for the highly regulated GCC High environment, this PAB operates seamlessly within these security-enhanced infrastructures.
Prerequisites
Before you install the GCC High PAB, your organization will need to have one of the following mail servers:
- Microsoft 365
- Microsoft Outlook 2019 or 2021 for Mac with either Exchange 2019 or Microsoft 365.
If you have a proxy server, you’ll need to connect to all of the following to bypass the proxy server or proxy authentication:
- outlook.office365.us
- outlook.office.us
- us.pab.knowbe4.com, eu.pab.knowbe4.com, or ca.pab.knowbe4.com, depending on your KnowBe4 instance.
You’ll also need to enable and configure the PAB from your KnowBe4 console Account Settings page before following the steps in this article.
Enable Permissions in Your KSAT Console
Before installing the GCC High PAB for Microsoft 365, follow the steps below:
- Log in to your KSAT console.
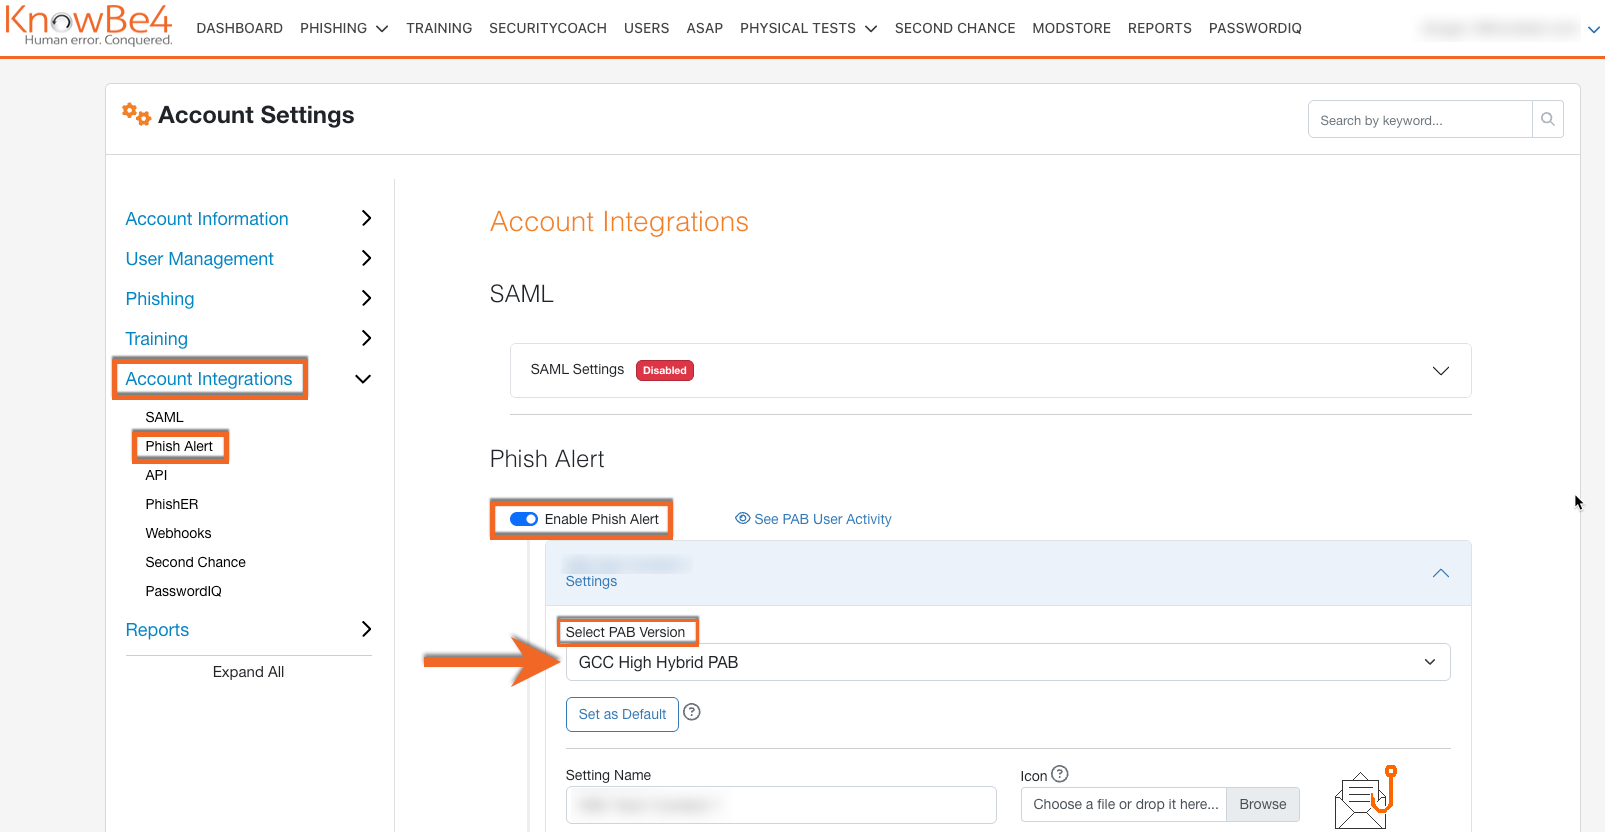
- Click on your email address in the top-right corner of the page, then select Account Settings.
- Navigate to Account Integrations > Phish Alert.
- Select the Enable Phish Alert toggle.
- Select your PAB instance.
- From the Select PAB Version drop-down menu, select GCC High Hybrid PAB
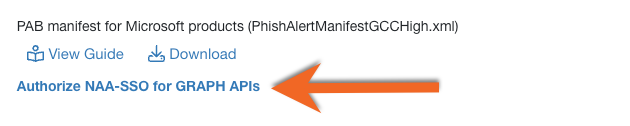
- Scroll down and click Authorize NAA-SSO for GRAPH APIs. You’ll be redirected to the Microsoft 365 login page.
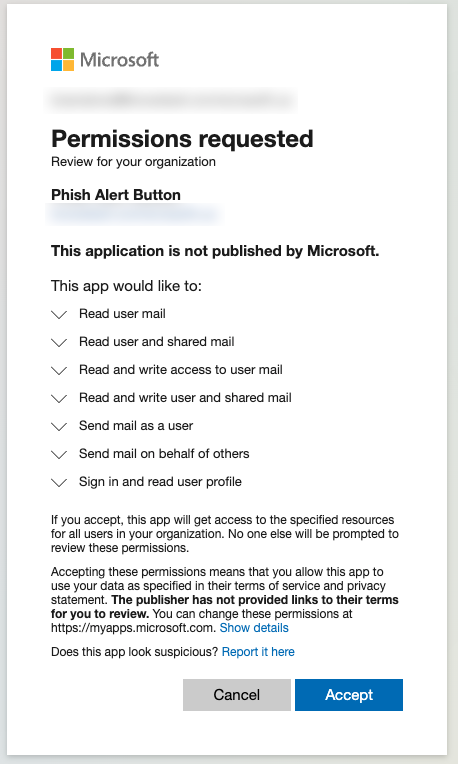
- Log in to your Microsoft 365 account using your admin credentials.
- Once you log in, the Permissions requested pop-up window will display. Read the permissions, then click Accept
- After you accept the permissions, the GRAPH Authorization Successful window will display. Click Back to PAB Configuration to return to the Phish Alert settings.

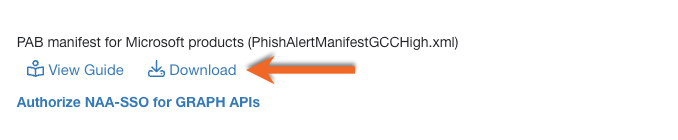
- Click the download icon next to the PAB manifest for Microsoft products option to download the PhishAlertManifestGCCHigh.xml file.
 Note:Each Phish Alert Button (PAB) XML manifest file is unique to the KSAT console based on where it's downloaded. So, if you manage multiple KSAT consoles, you'll need to download and install the correct manifest file for each console separately.
Install the GCC High PAB in Microsoft 365
Follow the steps below to install the GCC High PAB in your Microsoft 365 account.
- In a new browser tab, log in to your Microsoft 365 admin center.
- From the navigation menu on the left side of the page, navigate to Settings > Add-ins.
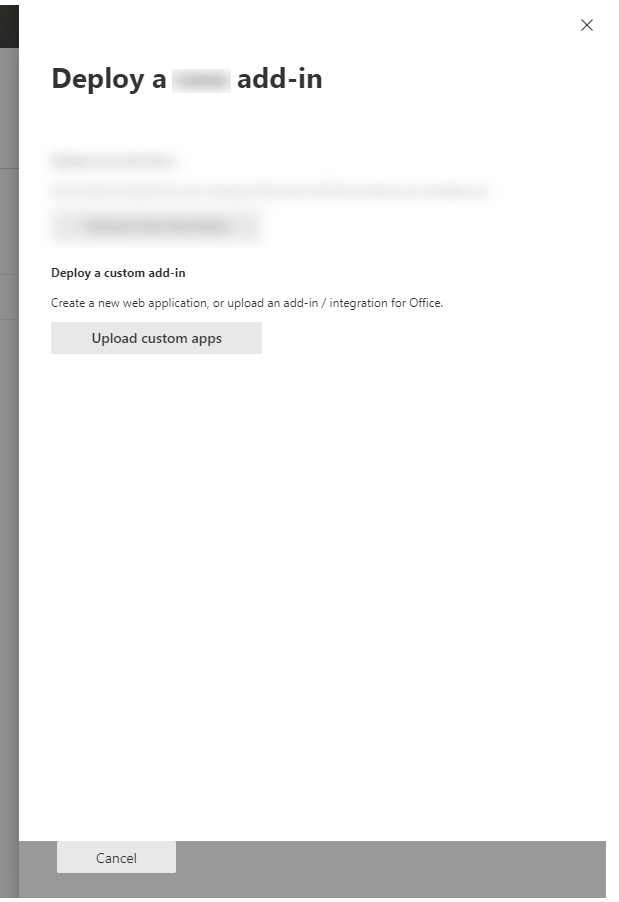
- On the Add-ins page, click Deploy Add-in.
- In the Deploy a new add-in pop-up window, click Next.
- Click Upload custom apps.
- Select I have the manifest file(.xml) on this device. Then, click Choose File and upload the PhishAlertManifestGCCHigh.xml file.
- Click Upload to install the GCC High PAB.
-
From the Configure add-in pop-up window, select which users will have access to the GCC High PAB and which method you want to use to deploy the PAB.
Important:We recommend allowing all users to access the PAB and using the Fixed deployment method.
- Click Next. Additional app permissions will display.
- Once you’ve read the permissions, click Save.

- The Deploy Phish Alert pop-up window will confirm that the add-in has successfully deployed. Then, click Next.

- The Announce add-in pop-up window will open and display a message about Microsoft’s announcement recommendations.
Note:After you install and deploy the PAB, you might receive an email from your mail service provider that contains information you can use to help you announce the PAB add-in to your users. KnowBe4 does not send the email about the PAB's intended usage and benefits.

- Click Close.