The Brandable Content feature allows you to create a branded theme and apply it to active training campaigns with eligible content. Use the Brandable Content tab to set your brand color, upload a company logo, and add an introduction and final page. These optional pages include your company logo, custom text, and an image of your choice. Use this feature to provide a familiar look and feel for your employees. Read the article below or watch this video to learn more.
Finding Brandable Content
Log in to your KnowBe4 console, navigate to the ModStore tab, then select Customization from the side menu. This will open the Customization page.
Click Open themes on the Brandable Content card. This opens the Brandable Content page.
For more information, see the screenshot and details below:
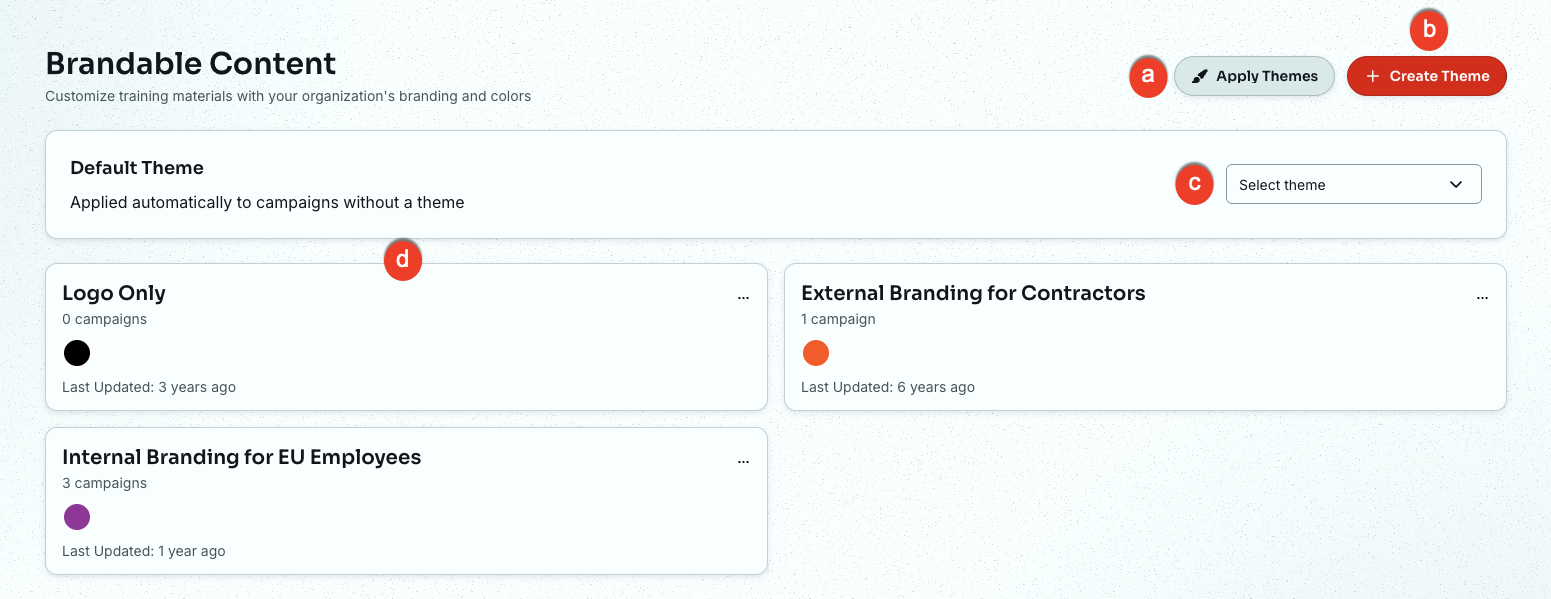
- Apply Themes: Click this button to open the Apply Themes page, where you can apply themes to your campaigns.
- +Create Theme: Click this button to open the Create Theme page, where you can create a theme.
- Select a default theme: Use this drop-down menu to choose a theme that applies to all eligible campaigns.
- Theme card: Click a theme card to view its settings, clone the theme, or delete it.
Creating a Branded Theme
When creating a new branded theme or editing an existing one, you can customize three parts: Theme Settings, Introduction Page, and Final Page.
Theme Settings
When creating a new branded theme, the Theme Settings section is required. You can customize the theme's overall look and feel using the settings listed below. For more information, see the screenshot and details below:
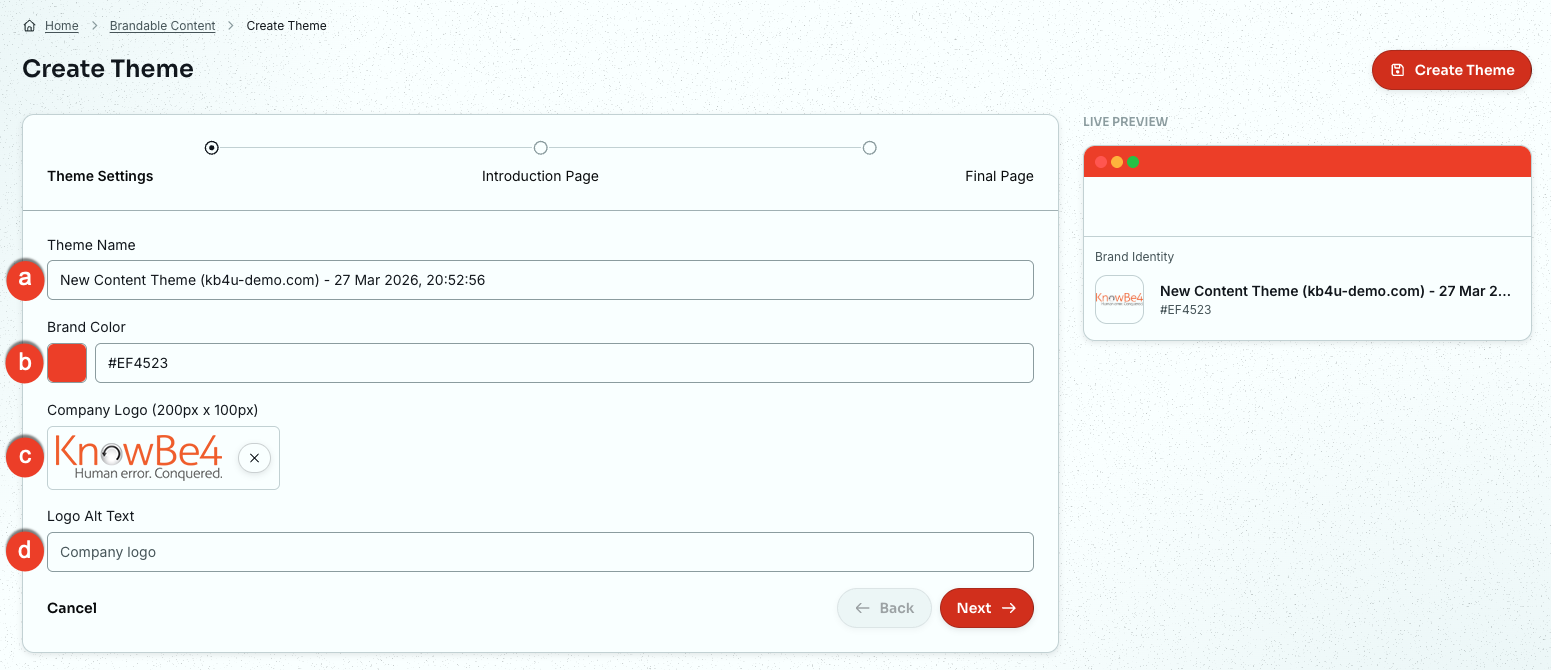
- Theme Name: A theme name is required. This name will help you identify this theme and is displayed in your list of branded themes.
- Brand Color: Elements such as the progress bar, active text, and icons will display in this brand color. Enter the HEX code for your brand or click the square icon to the right of this field to open a color selector.
- Company Logo: Upload a logo to display at the bottom of the content menu and on the optional introduction and final pages. The image must be a PNG that is 200px wide and 100px tall.
- Logo Alt Text: Add text that will explain the image to a screenreader.
For best results, use a logo with a transparent background.
Click the Next button to set up the Introduction Page.
Introduction Page
The Introduction Page is optional and can be customized using the settings listed below.
For more information, see the screenshot and details below:
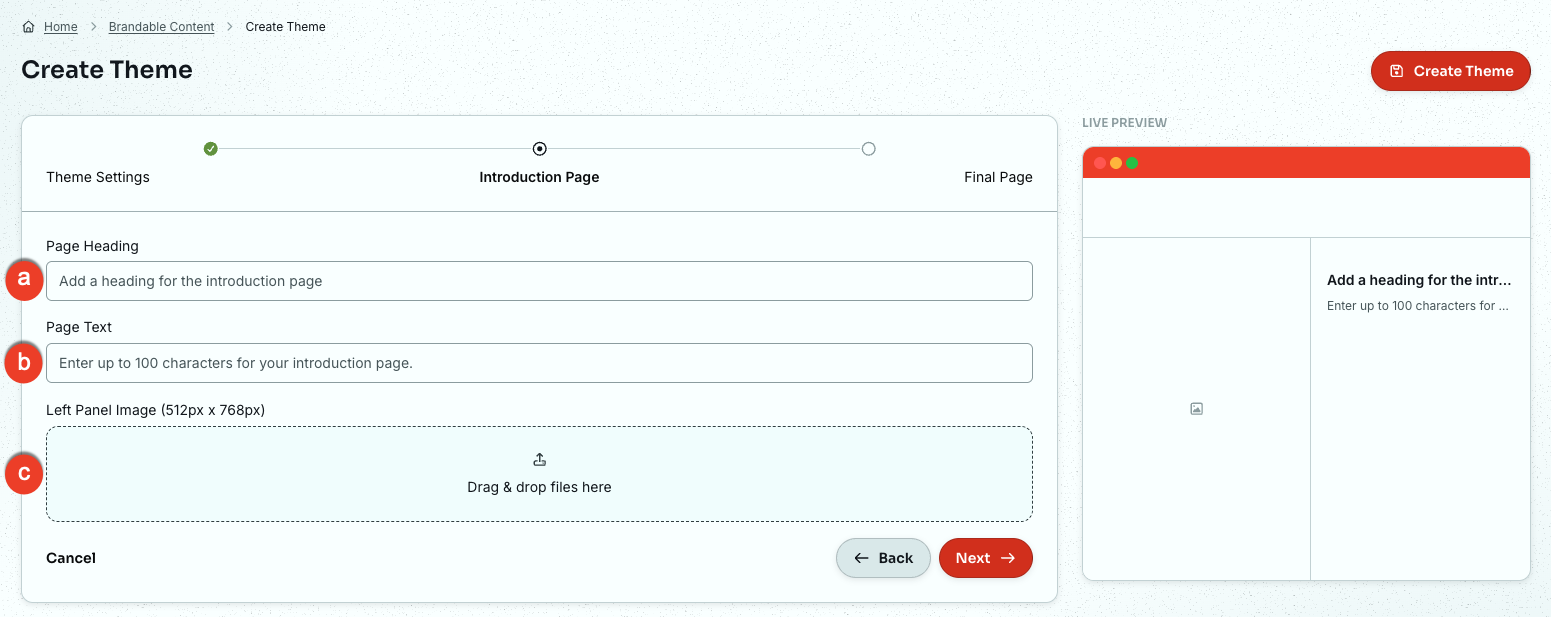
- Page Heading: A heading is required for the introduction page. This field is limited to 100 characters.
- Page Text: Page text is required for the introduction page. This field is limited to 100 characters.
- Panel Image: Upload an image to display on the left side of the introduction page. The image must be a PNG or JPG that is 512px wide and 768px tall.
Click the Next button to set up the Final Page.
Final Page
The Final Page is optional and can be customized using the settings listed below.

- Page Heading: A heading is required for the final page. This field is limited to 100 characters.
- Page Text: Page text is required for the final page. This field is limited to 100 characters.
- Panel Image: Upload an image to display on the left side of the final page. The image must be a PNG or JPG that is 512px wide and 768px tall.
- Phone Number & Email: Provide contact information so that users know who to reach out to with questions.
- Document and Policies: Select an icon from the Type drop-down menu, then enter your URL. We recommend editing the link description to the name of the document or policy because this text is displayed on the final page. You can add up to three links to related documents or policies.
-
Social Media Links: Select an icon from the Platform drop-down menu. Then, enter your URL. Platform options include Facebook, Instagram, X, YouTube, LinkedIn, Snapchat, Pinterest, and Slack.
Note: You can add up to three links to social media pages.
Click the Create Theme button.
Applying a Theme
Once you create a theme, you can apply it to your training campaigns.
- Default Theme: We apply this theme automatically to any campaign that does not have a specific theme.
- Apply Themes: Click this button to choose which theme to use for your current campaigns.
Editing a Theme
You can edit your existing themes at any time to update your organization's branding. When you edit a theme, the changes will apply to all modules that use that specific theme. This feature ensures that your brand remains consistent across your entire training library without requiring you to update each module individually.
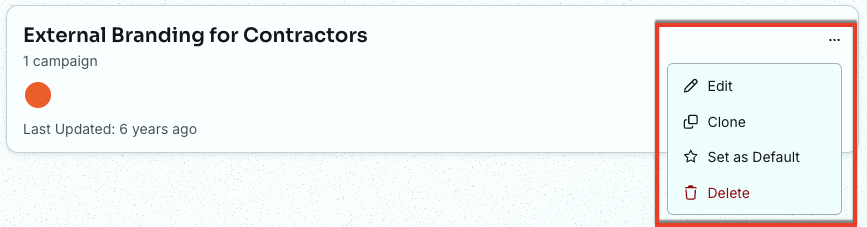
- Edit: Select this option to update the settings for the theme.
- Clone: Select this option to make a duplicate of the theme.
- Set as Default: Select this option to make this the default theme.
- Delete: Select this option to remove the theme.