Within Microsoft's Defender security platform, organizations can run phishing simulations as part of their security awareness training for end users. These simulation emails are generated within the organization’s tenancy and directly injected into users' inboxes, bypassing the Microsoft Exchange transport layer. Consequently, these phishing simulations do not pass through Defend and thus do not display any Defend banners.
To address this, you can manually insert the raw HTML code for a Defend banner into the phishing simulation emails during their creation. The necessary HTML code can be obtained from support. Follow the steps in this guide to integrate the Defend banners into these simulation emails.
Requirements
The following items are required...
- Microsoft 365 E5 or Microsoft Defender for Office 365 Plan 2
- Defend subscription
Integration Steps
Follow the steps below to integrate...
- Log in to Microsoft's Attack Simulator.
-
Navigate to Simulations Launch a simulation. The simulation wizard will open.
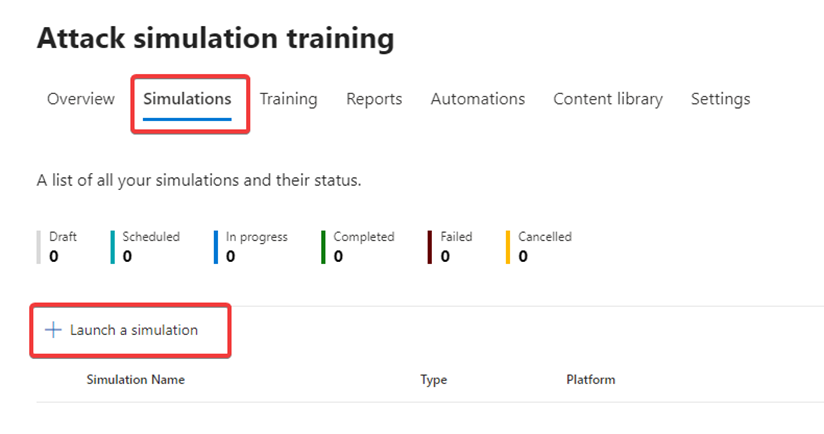
- Select the Technique you require.
- Enter a Simulation Name.
-
Navigate to Tenant payloads Create a payload. The payload wizard will open.
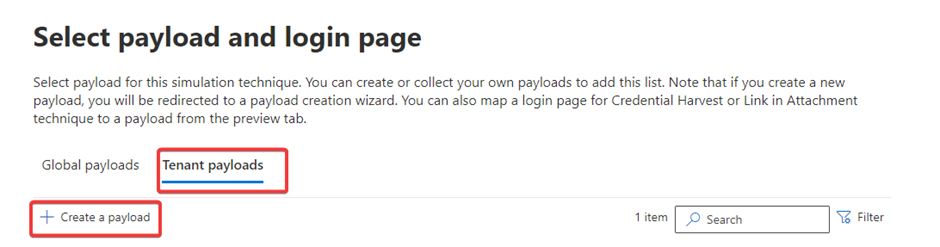
- Leave the Select type and Select technique as the preselected values.
- Enter a Payload name.
- Configure the payload as required.
-
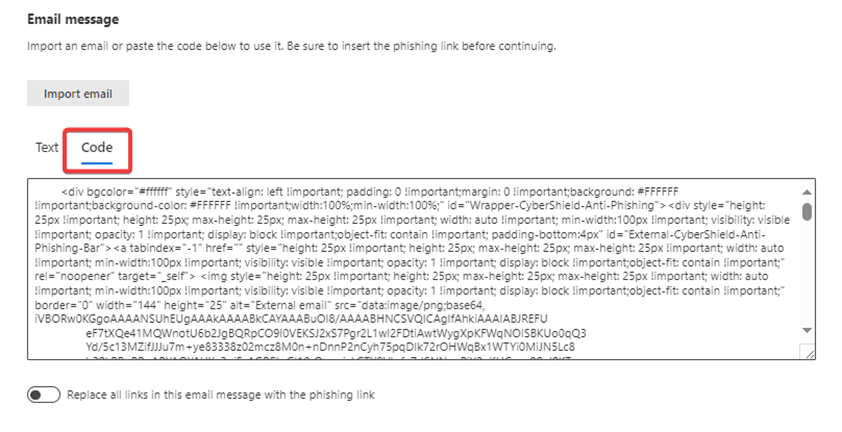
Under Configure Payload Email Message, select Code, and paste in the HTML code.
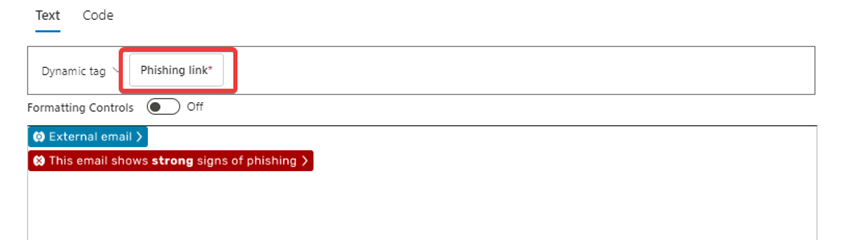
- Navigate back to the Text tab. The banners will be displayed on the page.
-
Add the text and phishing link to the simulation email as required.
- Review the email and send a test as required.
FAQs
- The Defend banners are in emails there to educate users, and by including them in a simulation, the effectiveness of the banners can be tested.
- As the simulation is injected into an inbox and not sent through Microsoft Exchange and Defend, links will not be scanned or rewritten.
- The banners are not clickable, as they are only present as images from the HTML code.