The Actions tab of your PhishER platform contains all of your actions. Each action is a process that PhishER follows to manage messages in your PhishER Inbox. For example, you can create actions to automatically disposition messages and send reports to your users. You can also manage your actions from the Actions List tab.
Creating Actions
To create a new action, follow the steps below:
- Log in to your PhishER platform.
- From the sidebar on the left side of the page, select the Actions tab to open the Actions List page.
-
Click the New Action button in the top-right corner of the page. The Action Details page will open.

-
In the Name and Description fields, enter a meaningful name and description for your action. The name and description can help you or other admins easily recognize the purpose of the action.

- Use the options in the drop-down tabs to set up your action. For more information about these tabs, click the drop-down menus below:
-

- Every Message: Select this option to trigger this action for all messages.
- No Tags: Select this option to trigger this action for all messages without a tag.
-
Specify Tags: Select this option to trigger this action for specific tags. When you select the check box, the Has and Doesn't Have options will display. For either option, you can select All, Any, or Only. Then, add the tags you want to trigger this action. To add a tag, click Add new tag field. Enter the tag you want to use, then press Enter on your keyboard.
 Note:If you select Has, you can select All to trigger this action for messages with all of the listed tags. You can select Any to trigger this action for messages with any of the listed tags. You can select Only to trigger this action for messages with only all of the listed tags and no additional tags. If you select Doesn't Have, you can select the options to trigger this action for messages without all, any, or only the listed tags.
 - Manual Trigger Only: Select this option to only allow this action to be triggered manually. To manually trigger the action, you'll need to select it from the Run drop-down menu on the Inbox page or Message Details page.
-
PhishML Confidence: Select this option to trigger this action for messages that receive PhishML confidence scores in a defined range for a specific category. For the Category option, you can select Threat, Clean, or Spam. For the Threshold option, enter percentages to set a threshold of PhishML confidence values that will trigger your action.
 Important:If PhishML is disabled, this setting will be unavailable and the PhishML Confidence Threshold will be automatically set to zero. If you had set up your action to trigger when the PhishML Confidence Threshold was zero, you will need to select a different option to trigger the action.
 -
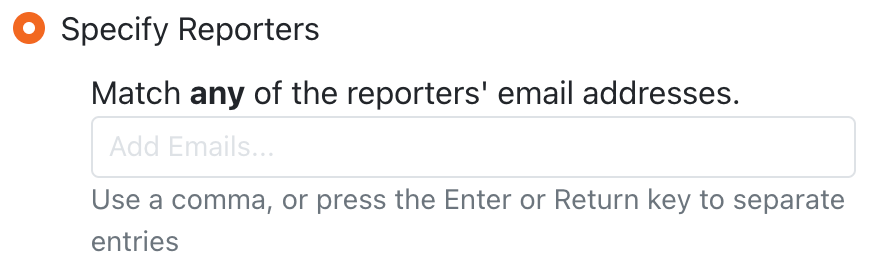
Specify Reporters: Select this option to trigger this action for messages reported by a specific user. Then, add the email addresses of the users you want to trigger this action. To add an entry, click the text field. Enter the email address you want to use, then press the Enter or Return key on your keyboard. You can enter up to 100 email addresses. You can also copy a list of email addresses, separated by commas, and paste the list into the field.
-
 Note:Select the check box next to an option to enable the drop-down menu.
-
Set Status: Select this check box to assign a status to messages. When you select this option, a drop-down menu will display for you to select a status. You can select Received, In Review, or Resolved.

- Set Priority: Select this check box to assign a priority to messages. When you select this option, a drop-down menu will display for you to select a priority. You can select Critical, High, Medium, Low, or Unknown priority.
- Set Category: Select this check box to assign a category to messages. When you select this option, a drop-down menu will display for you to select a category. You can select Clean, Spam, Threat, or Unknown.
-
Add Tags: Select this check box to assign custom tags to messages. To add a tag, click the Add new tag field. Enter the tag you want to use, then press Enter on your keyboard.

-
-

- None: Select this option if you do not want this action to be reported.
- Send to Syslog: Select this option to send a report of this action to a syslog server. If you select this option, a drop-down menu will display for you to select a specific syslog server if you have configured one or more servers. If you have not configured a server, a link to your syslog settings will display instead. See our PhishER Settings and Whitelisting in Syslog articles to learn how to integrate a Syslog server with PhishER.
-
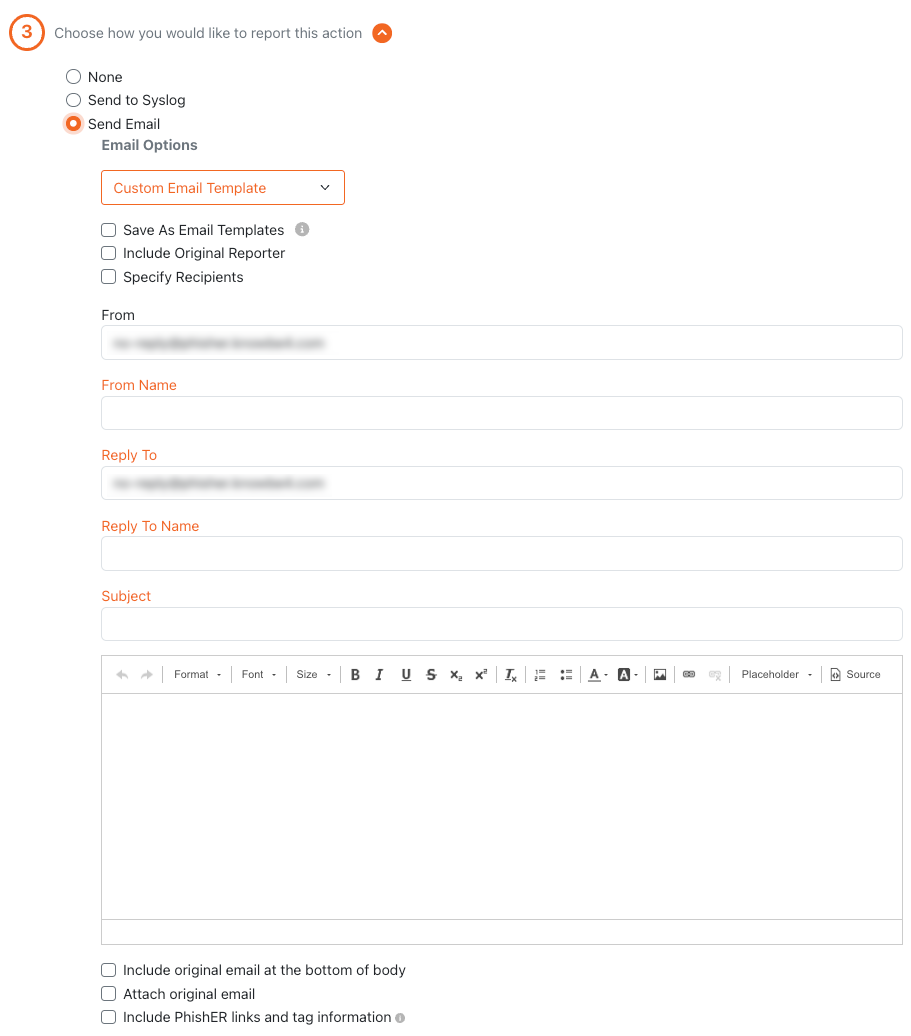
Send Email: Select this option to send a report of this action to a specific email address. If you select this option, you can select an existing custom email template or create a new email template to use for this report.
Note:If you would like to have the fields of your email template populate automatically, you can configure your email server settings accordingly.
The recipient's email address must use a domain from the Allowed Domains that have been added and verified in your KSAT Account Settings.
For more information about using the email template editor, see our How to Create a Custom Email Template in PhishER article.
-
Send to Reporter's KSAT Profile: Select this option to send a report of this action to your KSAT console. If you select this option, you can create a report that will display on the User Timeline.
Note:This option will be disabled until you have entered your KSAT User Event API Key into your PhishER Settings.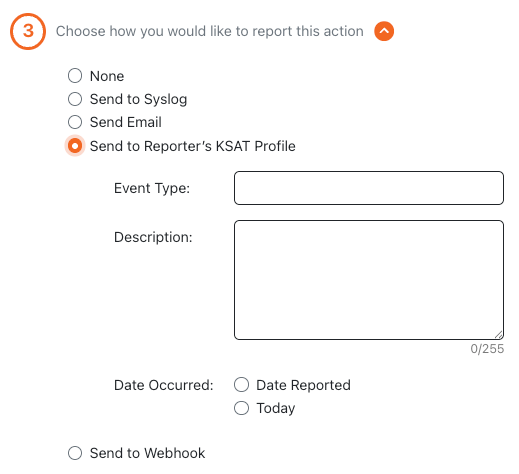

-
Send to Webhook: Select this option to send a report of this action to a webhook. You can use this option to see how the action will appear when it is sent to the selected webhook. When the action is triggered, the webhook will display the message details of each reported message.

-

Select this check box to halt further actions. If this action is triggered, each action ordered below this action will not run. This action will also have a hand icon next to the Trigger Tags column on the Actions List page.
-
 Note:You can add up to ten actions to your QuickActions bar.
- Include this action in the QuickActions bar: Select this check box to display this action in the Quick Actions bar on the Inbox page or Message Details page. QuickActions allow you to trigger actions manually. For example, if you manually disposition a message as Clean, you can create a QuickAction to send an email to the user who reported the original email to let them know that the message is safe.
-
Add keyboard shortcut for this Action: Select this check box to add a keyboard shortcut for this action. This option will allow you to press a key on your keyboard to trigger the action.
Note:Each action must have a unique keyboard shortcut. You cannot use the same shortcut for multiple actions. - Automatically move to Next item in list after Action completes: Select this check box to move to the next message after this action completes.
-

-
Select this check box to permanently delete any new matching messages with the associated tags from your PhishER Inbox when the action is triggered or run.
Note:Any past messages that also have the associated tag will not be found or deleted when this action is triggered or run. If you choose to have this action triggered for all messages, this section will be grayed out.
-
-

- Match Criteria: Select two or more criteria options to find similar messages. You can select Subject, Sender, Recipients, Attachments, or Body.
- Find messages received in the: From the drop-down menu, select a timeframe for PhishER to look for messages received in the Inbox.
- Automatically quarantine all found messages: If you select this check box, the new PhishRIP query will quarantine matching emails when the action is triggered.
- Automatically PhishFlip all found messages: If you select Automatically quarantine all found messages, you can also select this check box to allow PhishFlip to use emails found by the PhishRIP query automatically. When this action is triggered, PhishFlip will use the found messages to create KSAT phishing templates and send a phishing campaign to the users who received the original emails.
- Create a KSAT Phishing Template: Select this check box to make specific KSAT phishing templates for the emails that trigger the action.
-
-
(Optional) If you would like your action to be inactive when it is created, turn off the Active Status toggle in the top-right corner of the Action Details page. By default, your action will be active.
Note:For your action to trigger, it must be active.
- Click the Save Action button at the bottom of the page. Your action will display on the Actions List page.
-
(Optional) If your actions need to be in a different order on the Actions List, drag and drop your new action to a different position. Then, click the Save Action Order button.

Managing Your Actions
All of your actions will be listed on the Actions List page. PhishER runs your actions in order, from top to bottom. You can drag and drop your actions to change their order.
For more information about the Actions List, see the screenshot and list below:

- Name: This column displays the custom name of the action.
- Description: This column displays a custom description of the action.
- Status: This column displays the current state of the action. An action can have a status of Active or Inactive. To change the status of an action, click on the action. Then, toggle the Active Status or Inactive Status toggle in the top-right of the Action Details page.
- Last Updated At: This column displays the date and time when a change was last made to the action.
- Trigger Tags: This column displays the tags that will trigger the action to take place.
- Actions: This column displays the actions available to run on an action entry. You can click the trashcan icon to delete the action.
Using System Actions
Your PhishER platform provides system actions to help you manage messages. To use these actions, you must enable and configure PhishML and the VirusTotal integration for your PhishER platform. By default, these actions are disabled and inactive. After you enable system actions for your account, you can activate the actions immediately. Most of the fields in each action are already configured, but actions that send notifications require you to add information.
For more information about system actions, see the screenshot and list below:

| Action Name | Action Description |
|---|---|
| Clean Email Notification for Admin | If PhishER determines that a message is clean, this action notifies the designated admin to review the email. To use this action, you must enter email addresses in the Send Email option’s From and Reply To fields. |
| Automatic Clean Email Notification for Reporter | If PhishER determines that a message is clean, this action notifies the user who reported the original email automatically. |
| Unmet PML Threshold Notification for Admin | If an email doesn't meet the threshold for PhishML dispositioning, this action notifies the designated admin to review the email. To use this action, you must enter email addresses in the Send Email option’s From and Reply To fields. |
| PhishRIP Query for Subject and Sender from a Threat Email | If PhishER determines that a message is a threat, this action initiates a PhishRIP query based on the subject line and the sender's email address from the original email. |
| Threat Email Notification for Reporter | If PhishER determines that a message is a threat, this action notifies the user who reported the original email. |
| Spam Email Notification for Reporter | If PhishER determines that a message is spam, this action notifies the user who reported the original email. To use this action, you must configure PhishML and VirusTotal. |
| Threat Email Notification for Admin | If PhishER determines that a message is a threat, this action notifies the designated admin to review the email. To use this action, you must enter email addresses in the Send Email option’s From and Reply To fields. |