In your KSAT console, you can create webhooks to send real-time phishing and training data to the other applications you use. Webhooks, limited to Platinum, Diamond, and SAT Advanced customers, create a connection to send data from one application to another application through a payload. You can configure webhooks to perform specific actions when they receive data. For example, you could create a KSAT webhook to send your users’ phishing event data to a data analysis platform such as Splunk so you can monitor that data from Splunk.
Creating Webhooks in Your KSAT Console
To create a webhook, follow the steps below:
- From your KSAT admin account, click your email address at the top-right corner of the page and select Account Settings.
- Navigate to Account Integrations > Webhooks.
-
Click the + Create button.

-
Fill out the fields in the Create Webhook section. For more information, see the screenshot and list below:
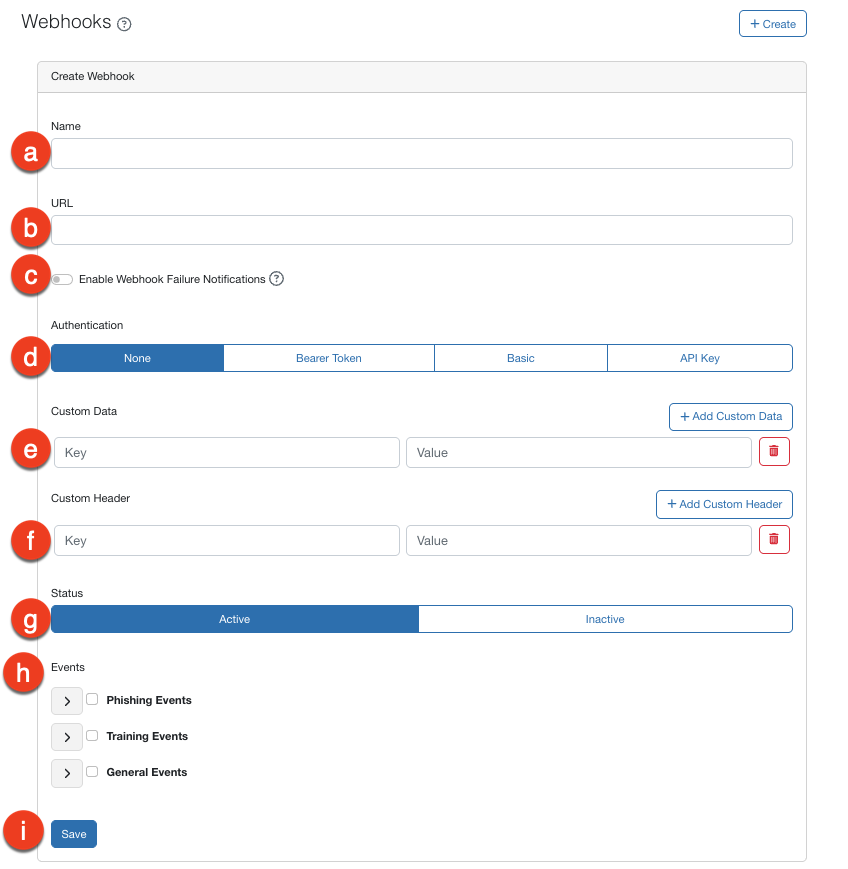
- Name: Enter a name that describes the purpose of your webhook.
- URL: Enter the URL that you would like to send data to. For example, if you are creating a webhook for Slack, you could enter the URL for a specific Slack channel.
- Enable Webhook Failure Notifications: Select this check box to enable webhook failure notifications. Recipients will receive an email notification if the webhook receives 50 percent of the allowed failed responses in an hour. A second notification will be sent if the webhook exceeds the allowed number of failed responses and is deactivated. To learn more about how the allowed number of failed responses, see the Webhook Deactivation Policy section below.
- Authentication: If you would like to use authentication to authorize the webhook, select an authentication method. Once you select an authentication method, additional fields will display for you to enter information about it.
- Custom Data: To add custom data to your webhook’s payload, click the plus sign icon. Then, fill out the Key and Value fields. For example, if your application requires "{ "System" : "KnowBe4" }" in the payload to receive data, you could enter "System" and "KnowBe4".
- Custom Header: If you would like to add a custom header, click the plus sign icon. Then, fill out the Key and Value fields. For example, if your firewall requires the "{ "Header" : "KnowBe4" }” header to allow data to pass through, you could enter "Header" and "KnowBe4".
- Status: Select the status of your webhook. To use the webhook after it is created, select Active.
- Events: Select the events to send to your webhook. To select all Phishing Events, Training Events, or General Events, select the corresponding check boxes. To select specific events, click the drop-down arrow next to an option and then select the check boxes next to the events.
- Save: Click Save to save your webhook.
Webhook Retry Policy
If a webhook request fails, KSAT will retry the failed webhook up to three additional times. These retries will have a 15-minute delay between each request.
Webhook Deactivation Policy
If a webhook connection receives more than 1,000 failed responses in an hour, the webhook will be deactivated. We recommend verifying that the webhook is configured correctly and that the recipient server can receive webhook requests. You can then set the webhook’s status back to Active in your Account Settings.